


A side part changes how layers fall. Hair swept to one side lifts at the root, stacks weight on the heavier side, and lets the shorter pieces frame the face at an angle. The same layered cut can look flat with a center part and full with a side part, which is why stylists often finish a layered cut this way before they change anything else.
This list collects 28 side part layered hair ideas and runs them by length: short pixie and bixie cuts first, then layered bobs, medium lobs and shags, and long layers at the end. Every idea notes the hair type it suits, how the layers are cut, and how much daily styling it asks for. If your main goal is softer pieces around the face, the guide to face-framing layers covers that one detail in depth.
Key Takeaways
- A side part adds root lift and asymmetry to any layered cut, from a pixie to waist length hair.
- Deep side parts create the most volume on the heavy side. Soft side parts, about an inch off center, read calmer and suit office styles.
- Fine hair needs fewer, longer layers with blunt ends. Thick hair needs internal layers that remove weight without thinning the outline.
- Curly and wavy hair should be layered dry or by curl section, so the side part lands where the hair actually falls.
- Short layered cuts need a trim at 4 to 6 weeks. Long layers hold their shape for 8 to 10 weeks.
1. Layered Pixie with a Deep Side Part

The top layers stay long enough to sweep across the forehead while the sides and back are tapered close. The deep part, set above the outer corner of the eye, sends all of that top length in one direction and gives the crown clear lift. It suits oval, heart, and square faces, and it works on straight to wavy hair of fine to medium density.
Daily styling is short work: a pea size amount of matte paste worked through dry hair, then the top pushed across and slightly forward. The trade-off is upkeep. The tapered sides grow out fast, so plan a clean-up every 4 to 5 weeks to keep the shape tight.
Try this: dry the top section in the opposite direction first, then flip it over the part. The roots stand up instead of lying flat against the scalp.
Difficulty: Medium · Cost: $ (salon)
2. Layered Bixie with a Side Part

A bixie sits between a pixie and a bob: cropped at the back, with layered length around the ears and jaw. The side part keeps the longer front pieces sweeping across instead of splitting in the middle. Readers comparing the two families can browse pixie bob haircut ideas for more in-between lengths. This version suits fine to medium hair that needs shape without bulk.
The layers are point cut, so the ends look piecey rather than blunt. Style it with a small round brush at the front and finger drying everywhere else. It grows out into a short bob, which makes it a low risk first short cut.
Try this: tuck the lighter side behind your ear and leave the heavy side loose. The contrast shows the layering best.
Difficulty: Low to Medium · Cost: $ (salon)
3. Polished Layered Bob
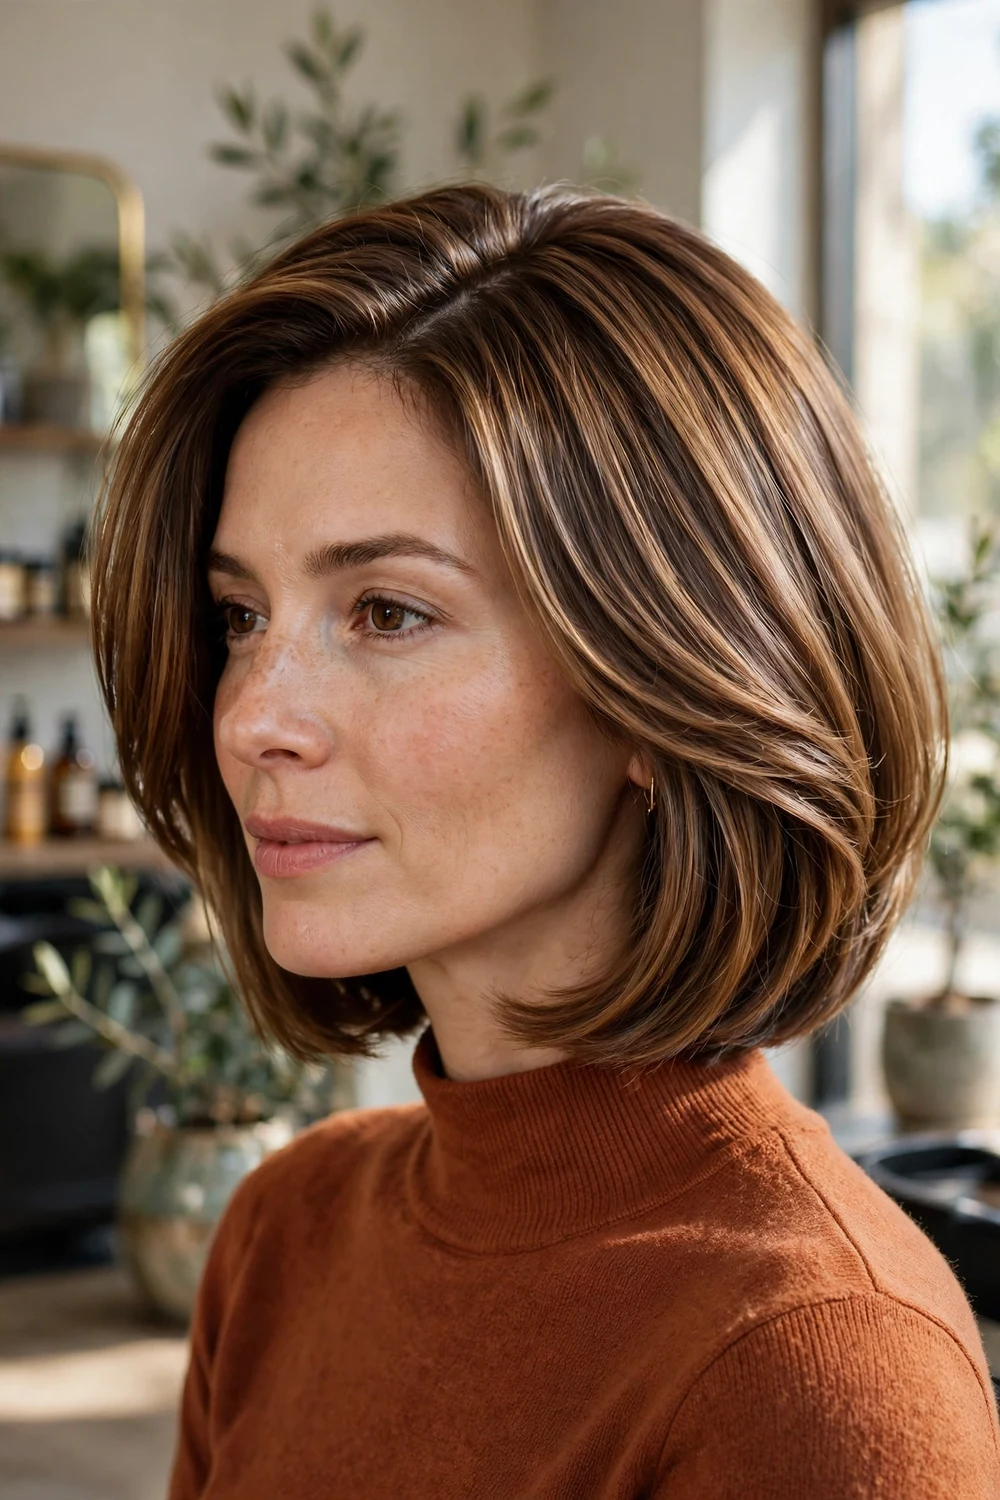
This bob ends at the jaw and hides its layers inside the cut. Internal layering removes the triangle shape that one length bobs get, while the surface stays smooth and swings in one piece. The side part is soft, about an inch off center, and gives the front a gentle sweep.
It suits straight and slightly wavy hair, and it reads well in office settings because the outline stays neat all day. A round brush blowout with the ends curved under takes about ten minutes. Book trims at 6 weeks, since the jaw length line shows growth early.
Try this: ask for the layers kept internal only. Surface layers would break up the smooth finish that defines this cut.
Difficulty: Low to Medium · Cost: $$ (salon)
4. Angled Layered Bob with a Deep Side Part

The back is stacked and shorter, and the front pieces drop past the chin. Light layers through the front stop the long pieces from hanging like curtains. A deep side part adds to the diagonal line, so the whole cut reads as one slant from the nape to the front points.
Straight to wavy hair holds this shape best, since curl springs up and shortens the back more than expected. It flatters round faces, because the long front pieces draw the eye down. Style with a paddle brush, drying the front sections forward and across the part.
Try this: keep the front points at least an inch below the chin. Shorter points can flip out at the jaw instead of falling straight.
Difficulty: Medium · Cost: $$ (salon)
5. Asymmetrical Layered Bob

One side is cut longer than the other, usually by one to two inches, and the side part sits on the shorter side so the long side sweeps across with real weight. Layers are kept light and blended, since heavy layering would blur the uneven outline that makes the cut work.
This bob suits straight and wavy hair and oval or heart faces. The long side softens a strong jaw when it falls just below it. The shape needs a steady trim schedule, around every 5 to 6 weeks, because the two sides grow out of balance at different rates.
Try this: start with a small difference between the sides. You can widen the gap at the next appointment if you want a stronger slant.
Difficulty: Medium · Cost: $$ (salon)
6. Heavily Layered Bob with a Deep Side Part

Layers run through the whole bob here, stacked from the crown down to the ends. The result is movement in every direction and a rounded, full shape. A deep side part throws even more hair to one side, so the heavy side stands tall while the light side sits closer to the head.
This is a strong option for fine to medium hair that falls flat in a one length bob, because the stacking builds body into the cut itself. Thick hair can wear it too, with the ends thinned so the shape stays round instead of wide. Rough dry first, then smooth only the top layer.
Try this: use mousse on damp hair and dry with your head tilted to the light side. The heavy side dries with extra root lift built in.
Difficulty: Medium to High · Cost: $$ (salon)
7. Curly Layered Bob with a Side Part
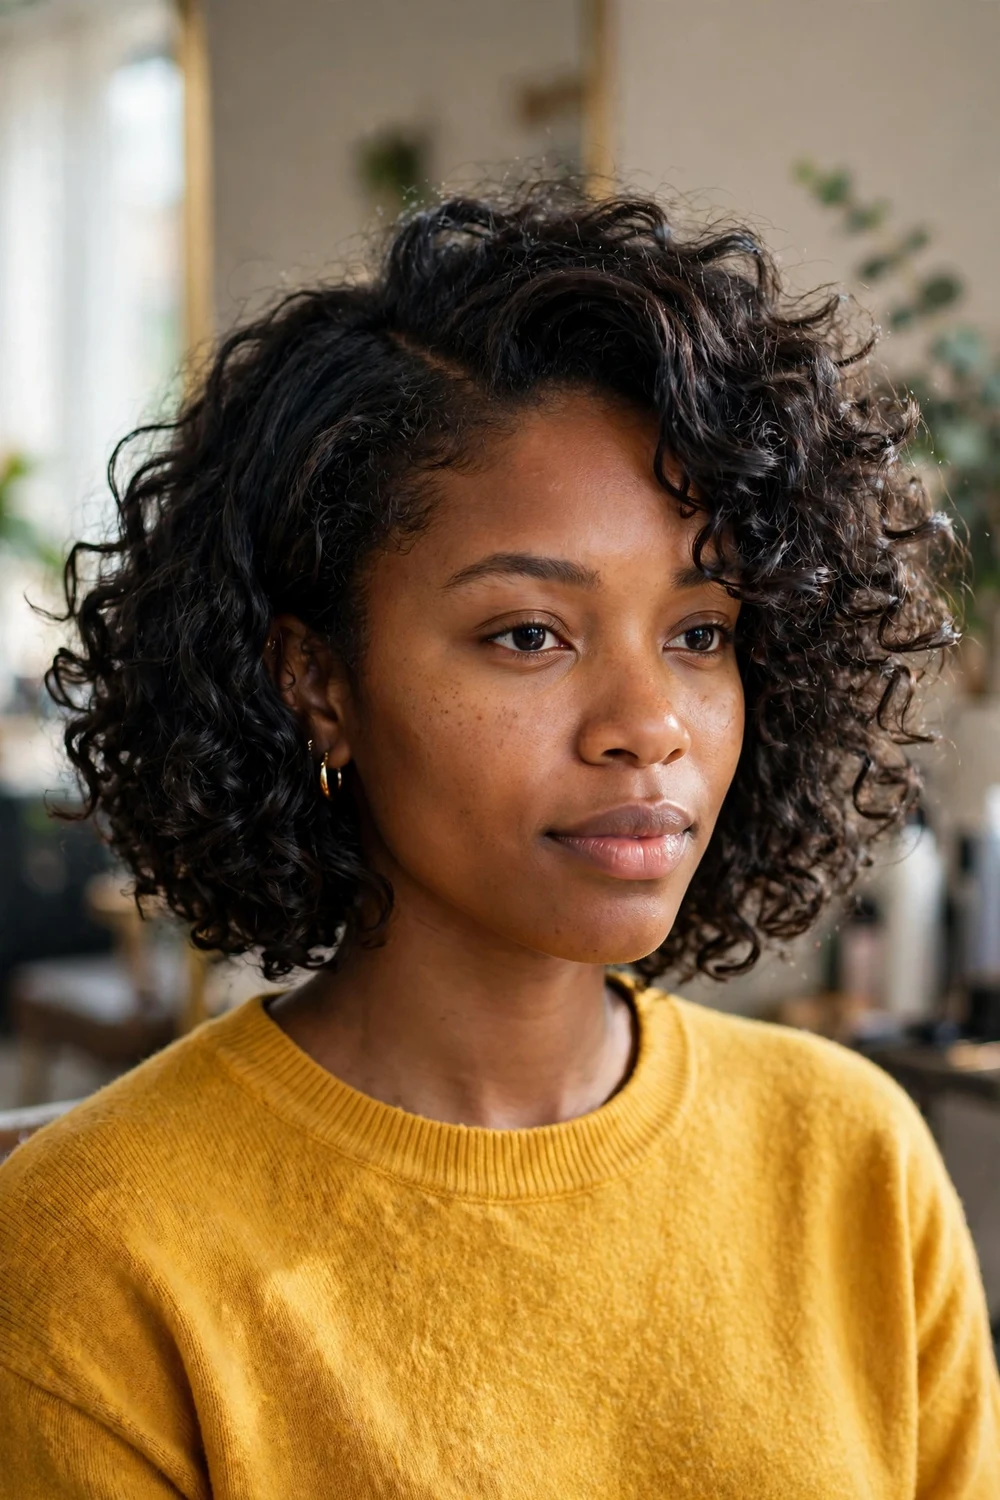
Curls at chin length pile up at the sides without layers. This cut rounds the shape with layers cut curl by curl, so the bob sits as a soft halo instead of a triangle. The side part is deep, which piles more curls on one side and lifts the roots where curly hair usually flattens.
Ask for a dry cut if your stylist offers one. Wet curls stretch, and a wet cut can dry two inches shorter than planned. Style with curl cream on wet hair, then diffuse or air dry without touching the curls until they are fully set.
Try this: clip the roots on the heavy side of the part while the hair dries. The clips hold lift that stays after you take them out.
Difficulty: Medium · Cost: $$ (salon)
8. Wavy Layered Bob
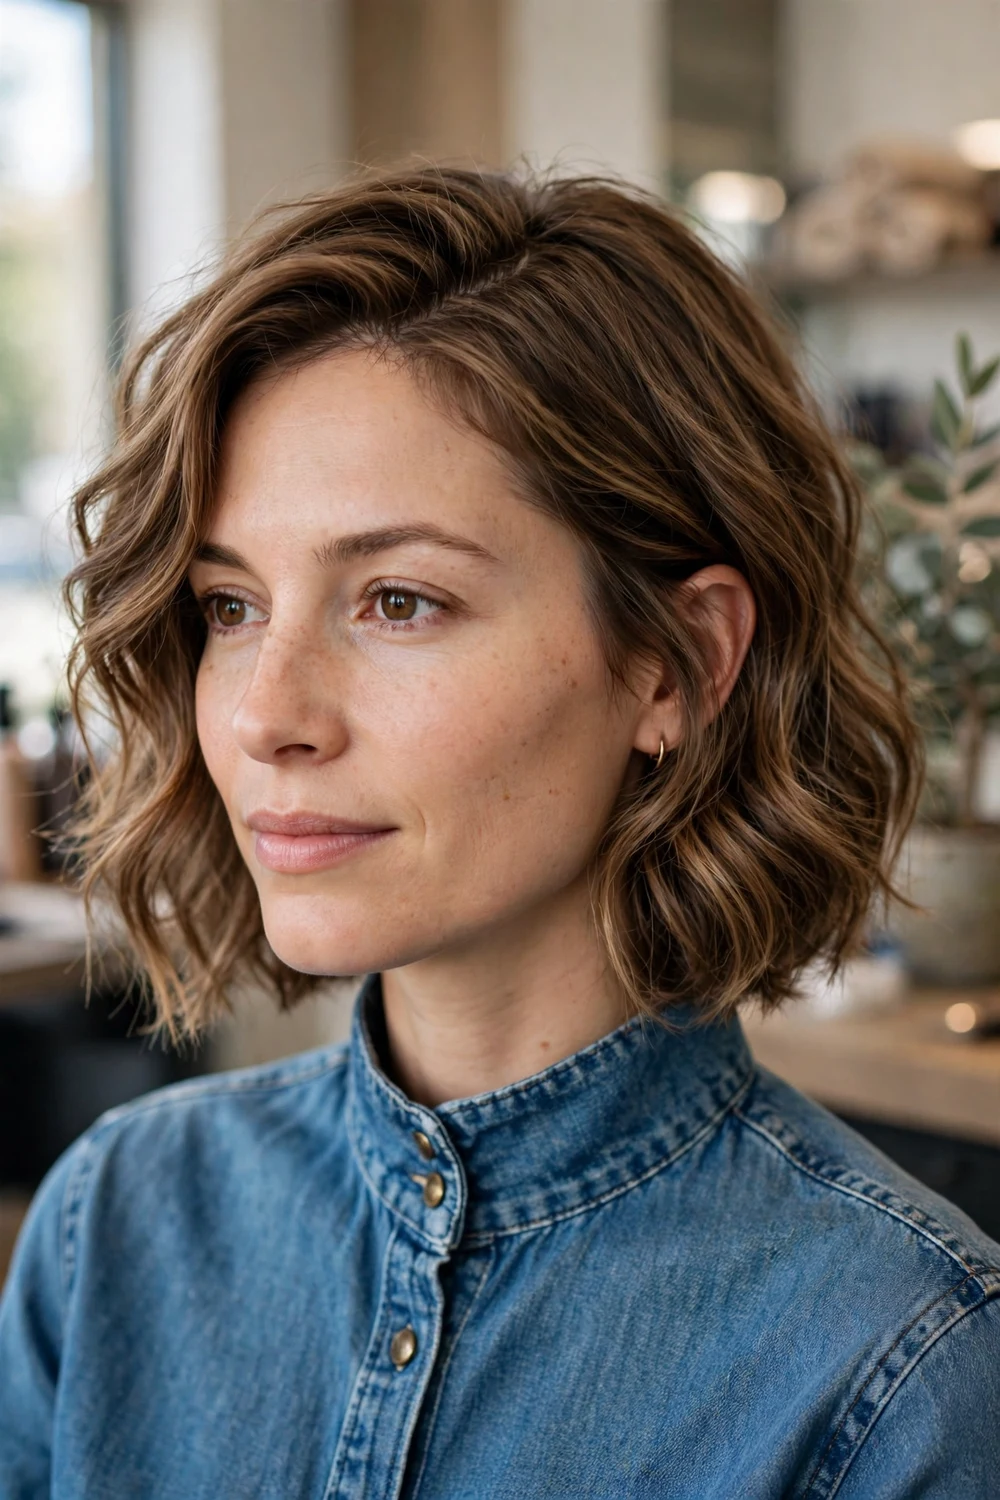
Loose bends plus light layers give this bob a relaxed shape that does not need a precise blowout. The layers start below the cheekbone, so the waves stack and separate instead of merging into one wide mass at the ends. The side part is casual and can sit wherever your hair falls naturally.
It suits natural waves best, and straight hair can copy it with a large barrel iron, leaving the ends out of the clamp for a modern bend. Sea salt spray on damp hair, scrunched and air dried, gets most of the way there on its own.
Try this: alternate the direction of each waved section, one toward the face and the next away. Mixed directions keep the bob from looking like one uniform curl.
Difficulty: Low to Medium · Cost: $$ (salon)
9. Layered Lob with a Side Part

The lob lands between the chin and the collarbone, and the layers are long and blended so you see their movement more than their edges. A side part gives the front a soft sweep and stops the cut from hanging in two equal curtains. This is the version most first time layer wearers choose, and it suits almost every hair type.
Because the layers are long, the cut grows out gently and can stretch to 8 weeks between trims. It also ties back cleanly, which shorter layered cuts cannot do. Wear it smooth for work or add a bend through the mid lengths for evenings.
Try this: ask for the shortest layer at chin level. That starting point frames the face without taking fullness off the ends.
Difficulty: Low to Medium · Cost: $$ (salon)
10. Textured Lob with a Deep Side Part

Point cut ends and hidden internal layers give this lob a piecey, undone edge. The deep side part throws volume to one side on purpose, so the silhouette looks fuller at the crown and lighter at the ends. It works on medium and thick hair, and on straight hair that holds a bend.
Styling is mostly texture spray and a flat iron bend through a few sections, with the ends left straight. The internal layers remove bulk, so the lob sits close at the sides instead of puffing out at shoulder level.
Try this: flip your part to the opposite side on day two. The roots lift again and the cut looks freshly styled in seconds.
Difficulty: Low · Cost: $$ (salon)
11. Shoulder-Length Layers with a Deep Side Part

Shoulder length is where layered hair gains real swing. The layers here are cut through the last few inches, so the ends flick and move while the top stays smooth. A deep side part combs the front across the forehead, which adds height over one brow and softens the whole outline.
Straight to wavy hair of medium density wears this cut with the least effort. It flatters oval, round, and square faces because the swept front adds a diagonal line. A round brush blowout holds for two days if you sleep with the hair in a loose high ponytail.
Try this: bevel the ends at the salon, cut at a slight angle, so they tuck in at the shoulder instead of kicking out all day.
Difficulty: Low to Medium · Cost: $$ (salon)
12. Feathered Layers with a Side Part

Feathered layers are slide cut or razor cut so the ends taper thin and flick away from the face. Brushed back from a side part, the flicks sit at the temples and cheekbones and give fine to medium hair a wide, airy frame. The length usually rests at the shoulders.
This cut depends on the blowout more than most. Dry each side back with a small round brush and roll the face pieces outward at the cheek. The tapered ends are delicate, so trims at 6 to 8 weeks stop them from looking wispy.
Try this: finish with a light flexible hairspray only. Heavy spray weighs feathered ends down and the flick disappears.
Difficulty: Medium · Cost: $$ (salon)
13. Layered Shag with a Side Part

A shag stacks short, choppy layers at the crown over longer, thinned lengths. Worn with a side part instead of a center part, the crown layers flop to one side and the shape reads softer and less round. Razored ends keep the bottom light so the top volume stays the focus.
The cut suits wavy hair and straight hair with texture spray. Fine hair versions exist too, and the roundup of shag haircuts for fine hair shows how the layers shrink for thinner density. Work texturizing paste through dry ends and leave the roots alone.
Try this: ask for the crown layers cut shorter than you think you need. Shag crown layers grow flat within weeks at longer lengths.
Difficulty: Low to Medium · Cost: $$ (salon)
14. Curly Layered Shag with a Side Part
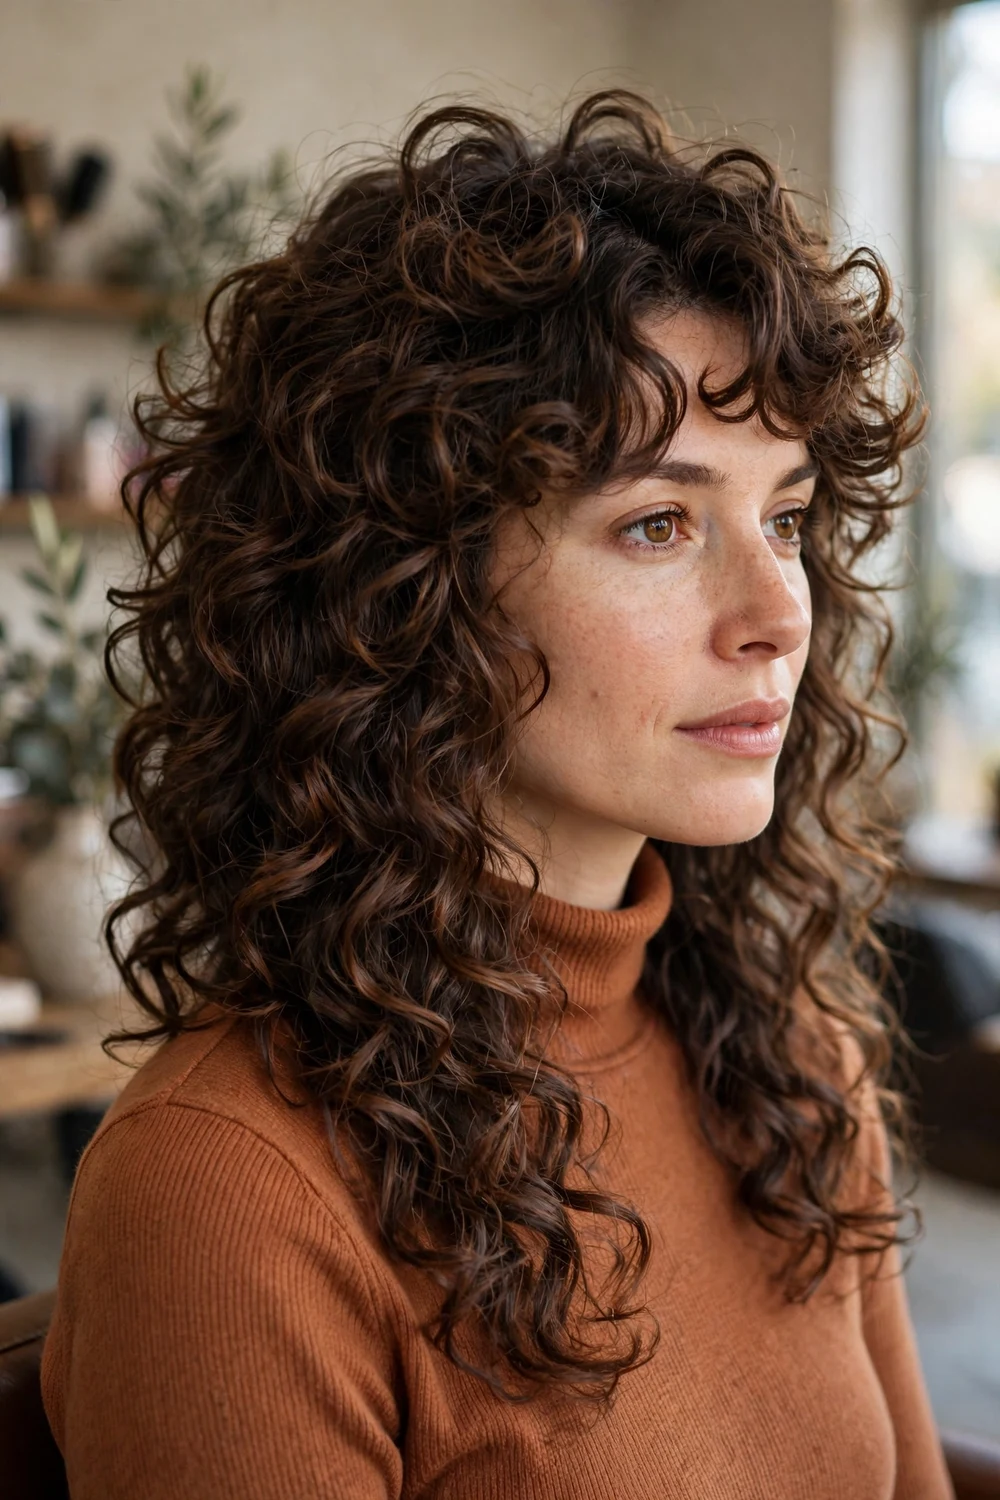
The curly shag piles short layers over the crown and around the face, with longer curls reaching the shoulders. A side part pushes extra curl toward the front, so the face gets a full frame on one side. The shape moves far more than a one length curly lob of the same length.
It is cut for curl types from loose waves to tight curls, shaped dry so each layer lands where the curl actually sits. Rake gel through wet curls in sections, clip the crown roots for lift, and scrunch out the cast with a drop of oil once dry.
Try this: refresh day two curls with a water and conditioner mist at the crown only. The front and top are what people see first.
Difficulty: Medium · Cost: $$ (salon)
15. Butterfly Layers with a Side Part
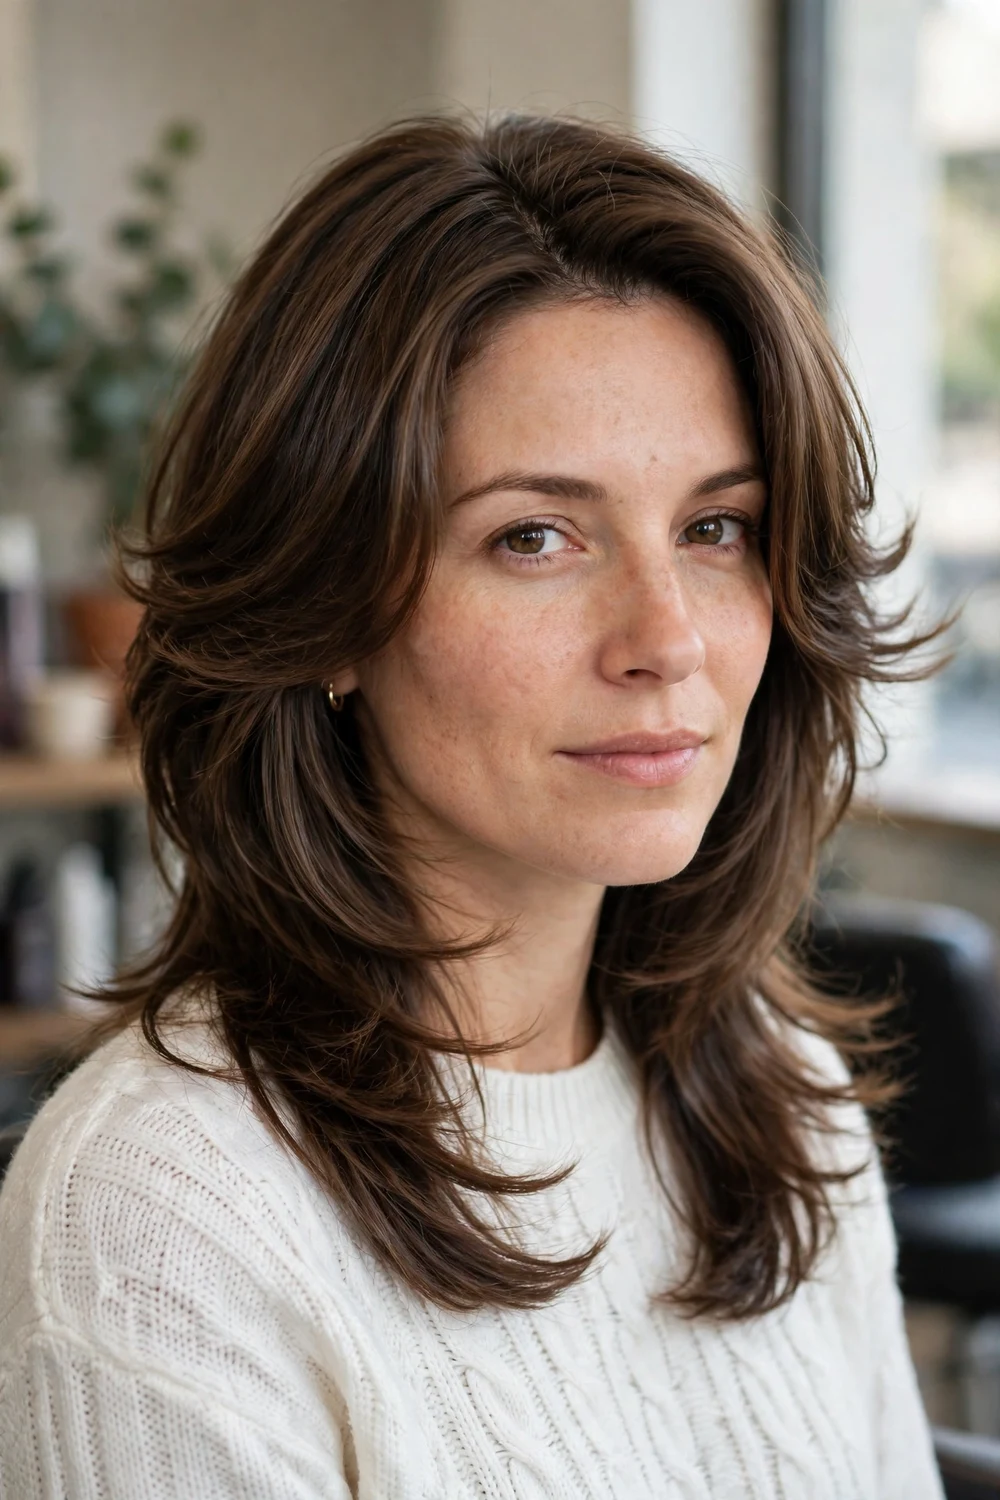
The butterfly cut pairs short, rounded layers at the front and crown with length kept below the shoulders. On a side part, the front wings sweep back from one point instead of splitting into two even curtains, and the asymmetry makes the wing shape easier to see. It suits medium to thick straight or wavy hair.
The blowout does the heavy lifting: roll each front layer back with a large round brush and clip the pieces until they cool. Crown layers need a trim at about 8 weeks or they lose their lift and start to lie flat over the longer hair.
Try this: set the front pieces in two large rollers while you do your makeup. Ten minutes of cooling gives the wing shape hold for the day.
Difficulty: Medium to High · Cost: $$$ (salon)
16. 90s Rachel Layers with a Side Part
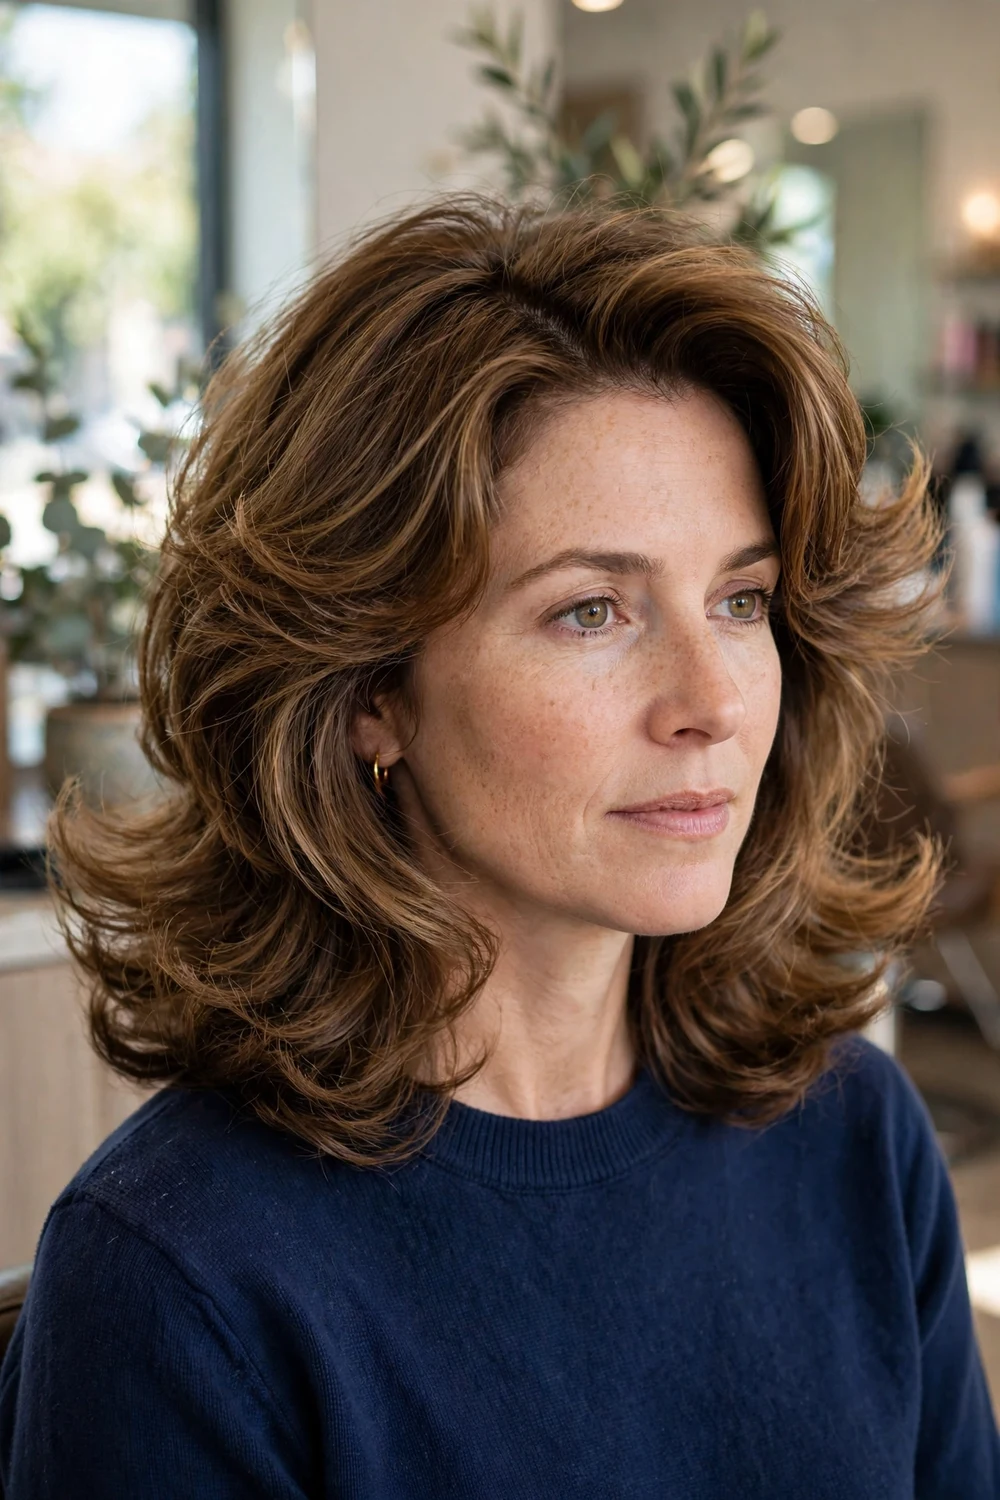
This updated Rachel cut uses rounded, bouncy layers at shoulder length, with face pieces that flip outward at the chin. Worn on a side part, the flip sits heavier on one side and the whole shape looks like a blowout that grew out of the cut itself. Medium to thick straight hair holds it best.
Style it the 90s way: blow dry the layers with a round brush, turning the ends out, then set the crown in one large roller while the hair cools. The face pieces lose their flip first as the cut grows, so trims land at 6 to 8 weeks.
Try this: keep the layers rounded rather than choppy at the salon. Rounded layering is what gives this cut its smooth, bouncy outline.
Difficulty: Medium to High · Cost: $$ (salon)
17. Wolf Cut Layers with a Side Part

A wolf cut mixes a shaggy, layered top with shorter sides and a longer wispy back. Parted to one side, the choppy crown flops over and the shape gains a clear heavy side. Dense wavy hair wears it well, and heavy straight hair works if the stylist adds enough texture through the top.
Scrunch sea salt spray into damp hair and air dry or diffuse. The cut is meant to look undone, so precision styling works against it. Shorter versions fill the roundup of wolf cuts if you want the same shape with less length.
Try this: piece out the crown layers with a small amount of dry texture paste. The top should separate into chunks, while the back stays wispy.
Difficulty: Low to Medium · Cost: $$ (salon)
18. Hush Cut Layers with a Side Part
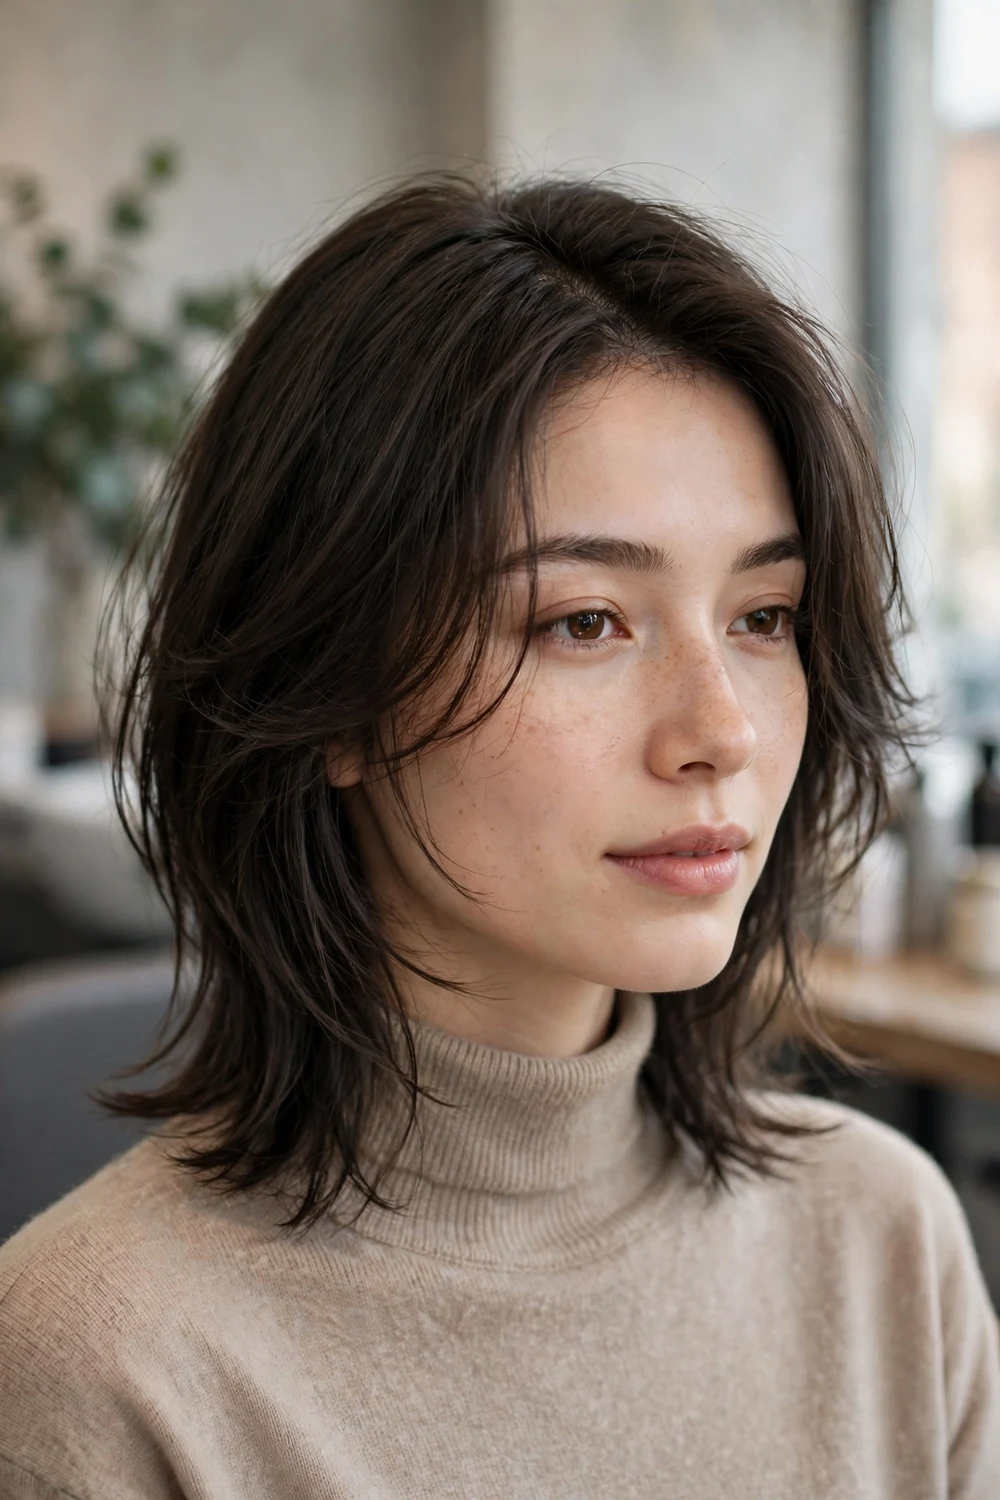
The hush cut comes from Korean salons: feathery layers thinned through the lengths, plus wispy pieces at cheek level, resting around the shoulders. On a side part the wispy pieces fall light and uneven across the face, which softens round and oval faces.
It was designed for thick, straight, heavy hair that needs lightness without short layers. Blow dry with a round brush, bending the ends outward, and curl the face pieces away from the cheeks. The thinned lengths get heavy again by 6 to 8 weeks, which is your trim cue.
Try this: finish with a drop of light hair oil on the ends only. Hush cut layers are thinned, and oil keeps them smooth without weighing the top down.
Difficulty: Low to Medium · Cost: $$ (salon)
19. Layers with Side-Swept Bangs

Here the shortest layer doubles as a bang. A long fringe is cut from the side part and sweeps across the forehead, then blends into the face-framing layers with no hard line between them. The layers below the chin carry the same soft, blended cutting, so the whole head reads as one sweep.
This is the forgiving way to wear bangs. The fringe is long enough to pin back or tuck, and it grows into the layers without an awkward stage. It suits round and heart faces, since the diagonal fringe adds length across the forehead.
Try this: blow dry the fringe across your forehead in the direction it will lie, then sweep it over. Drying it straight down first makes it sit flat and split.
Difficulty: Low to Medium · Cost: $ (salon)
20. Fine Hair Layers with a Deep Side Part
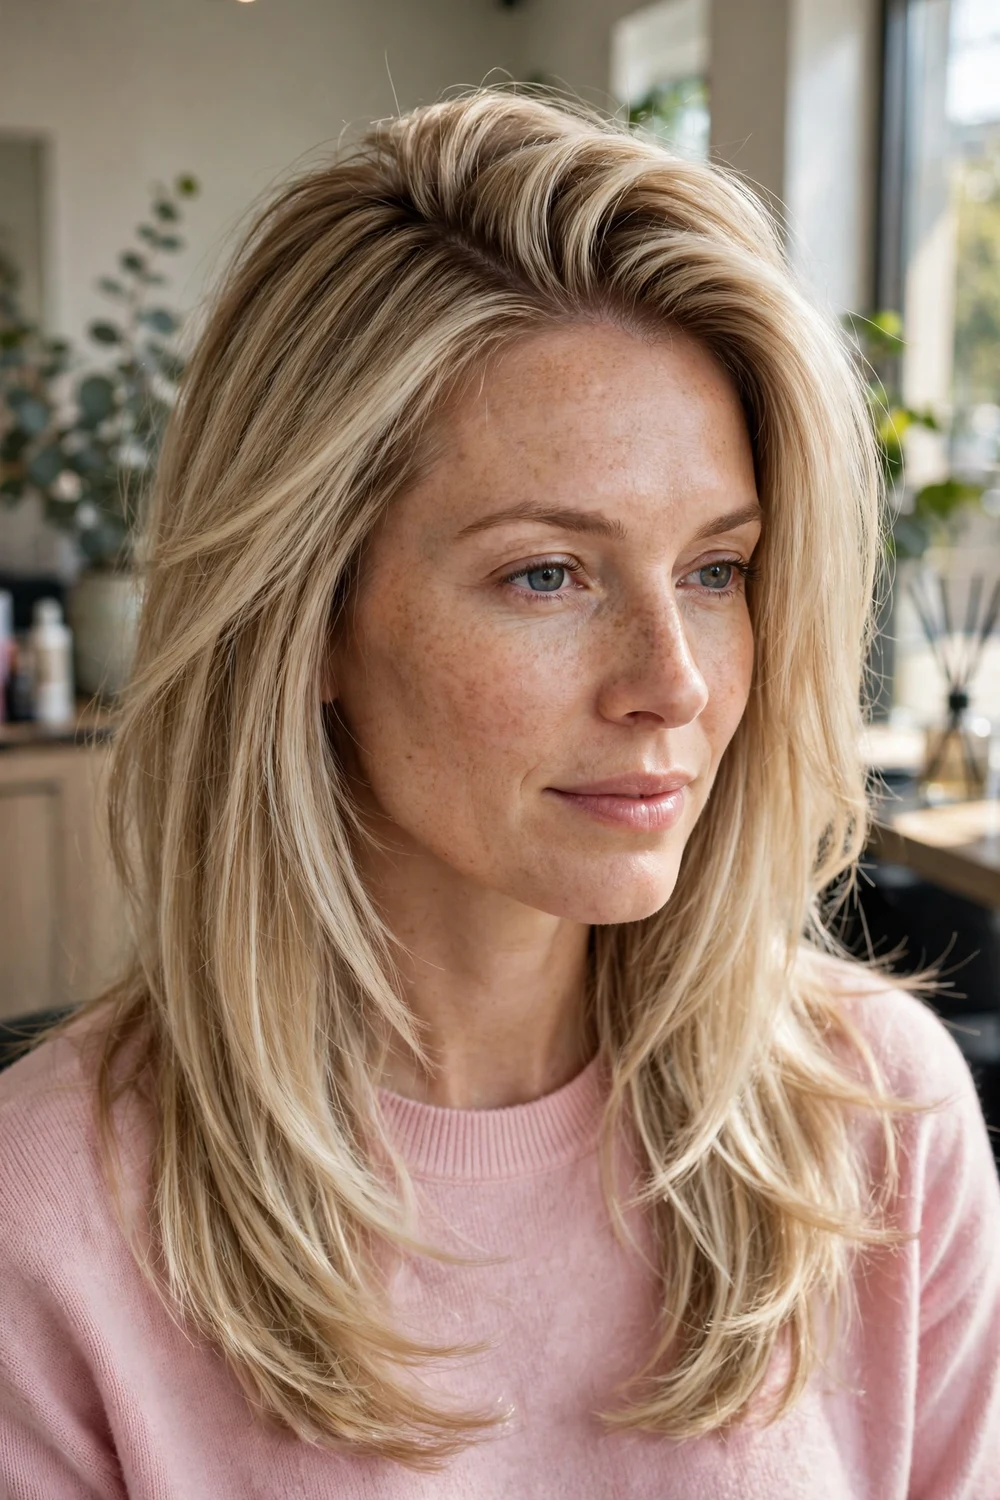
Fine hair loses fullness when layers are cut short and numerous, so this version keeps the layers long, few, and blunt at the ends. The deep side part does the volume work instead: hair trained to fall one way lifts at the root when it is flipped to the opposite side, and the crown looks fuller with no product at all.
Ask for point cutting kept to a minimum, since thinned ends read as stringy on fine hair within weeks. Volumizing mousse on damp roots and a blow dry with the head tilted sideways is the whole routine. Trims at 8 weeks keep the blunt ends thick.
Try this: set your part on the opposite side of your natural growth direction. Hair that has to fight its own fall pattern stands up at the root.
Difficulty: Low · Cost: $ (salon)
21. Long Cascading Layers with a Side Part

Layers start around the chin and cascade down in smooth, sweeping sections, while the longest pieces keep their full length past the collarbone. The side part at the crown gives the cascade direction and lift, and the face layers pull away from the face instead of closing it in.
This is the long cut for anyone who wants movement without giving up length. It suits straight and wavy hair, and thick hair gains the most because the layers release weight all the way down. Regular trims at 8 to 10 weeks keep the cascade steps clean.
Try this: add volume at the roots on the heavy side of the part only. Lifting both sides equally makes long layers look wide instead of tall.
Difficulty: Low to Medium · Cost: $$ (salon)
22. Face-Framing Long Layers with a Side Part
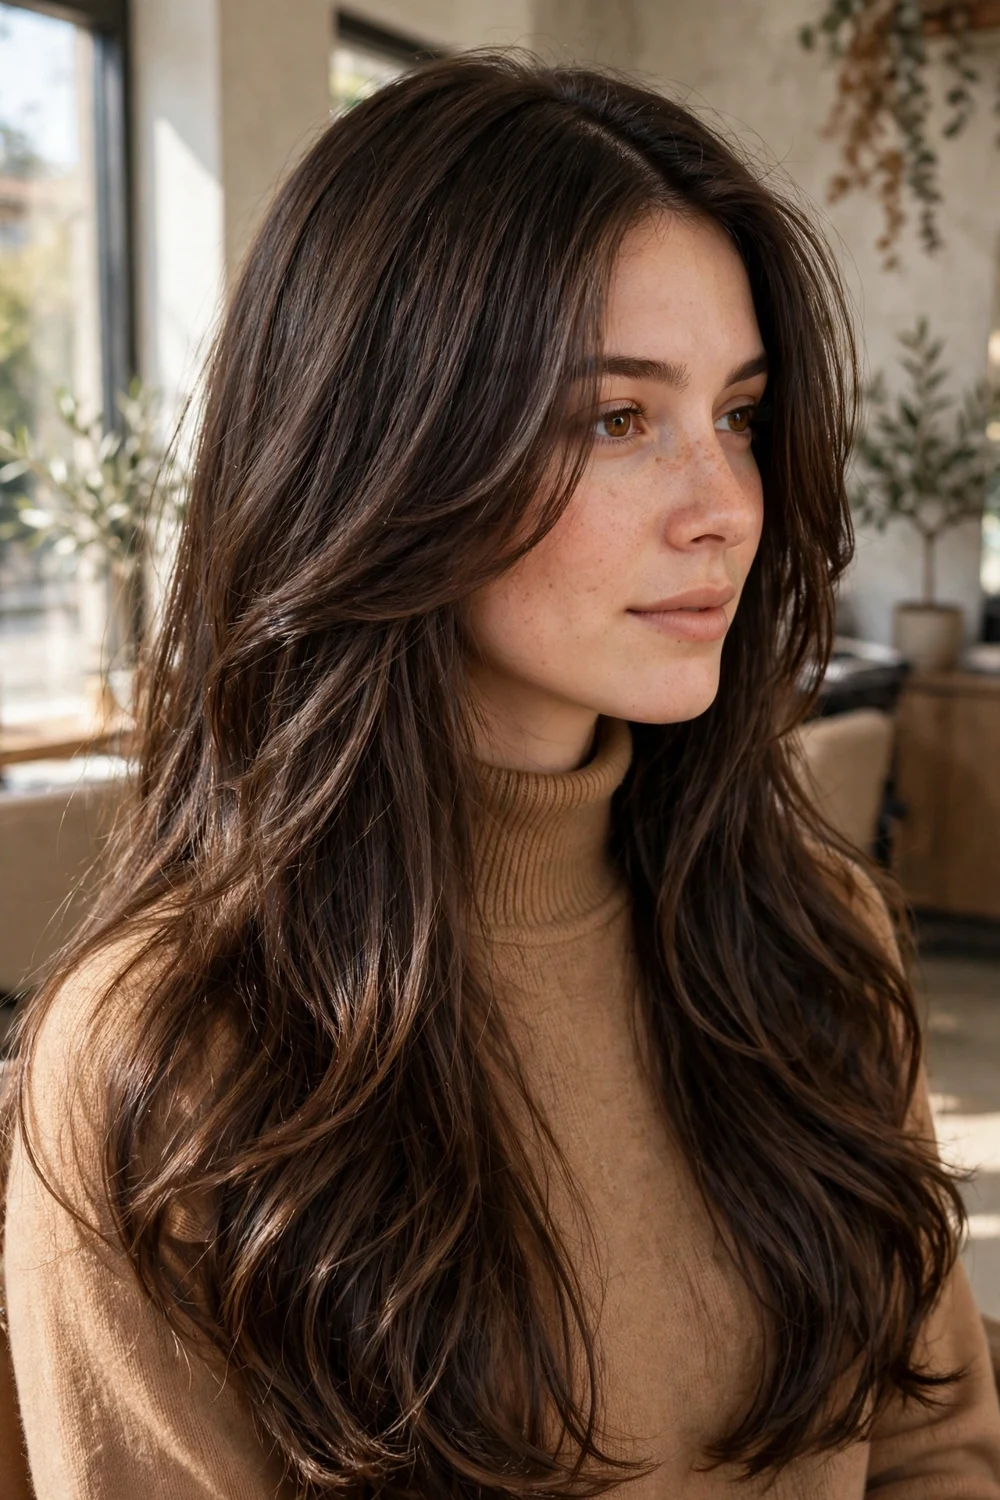
Only the front is layered here. Short pieces start at the cheekbone and step down to the collarbone, while the back and underneath keep their length and weight. The side part angles those front pieces across the face, so you get the framing effect without thinning the ponytail.
This suits anyone who likes their long hair thick at the ends but finds a one length front heavy or plain. It also suits growing out shorter layers: the front gets shaped now while the back catches up. Curl the front pieces away from the face with a large iron to open the frame.
Try this: ask for the first layer at cheekbone level rather than chin level. Cheekbone starts frame the eyes and cheekbones, not just the jaw.
Difficulty: Low · Cost: $ (salon)
23. Long Layers with Curtain Bangs and a Side Part

Curtain bangs are usually worn split in the middle, but they work swept over too. Cut the bangs to cheekbone length, part the hair to one side, and the near bang merges with the layers while the far bang drapes across the forehead as a soft fringe. The long layers below the chin carry the same blown out curve.
It suits round and oval faces and thick or medium hair that can hold the sweep. More styling photos sit in the collection of long hairstyles with curtain bangs. A round brush is the daily tool here, since curtain bangs lose their curve overnight.
Try this: dry the bangs forward and down first, then sweep them to your part side while they are still warm. The roots set flat and the ends keep their curve.
Difficulty: Medium · Cost: $$ (salon)
24. Layered Beach Waves with a Side Part
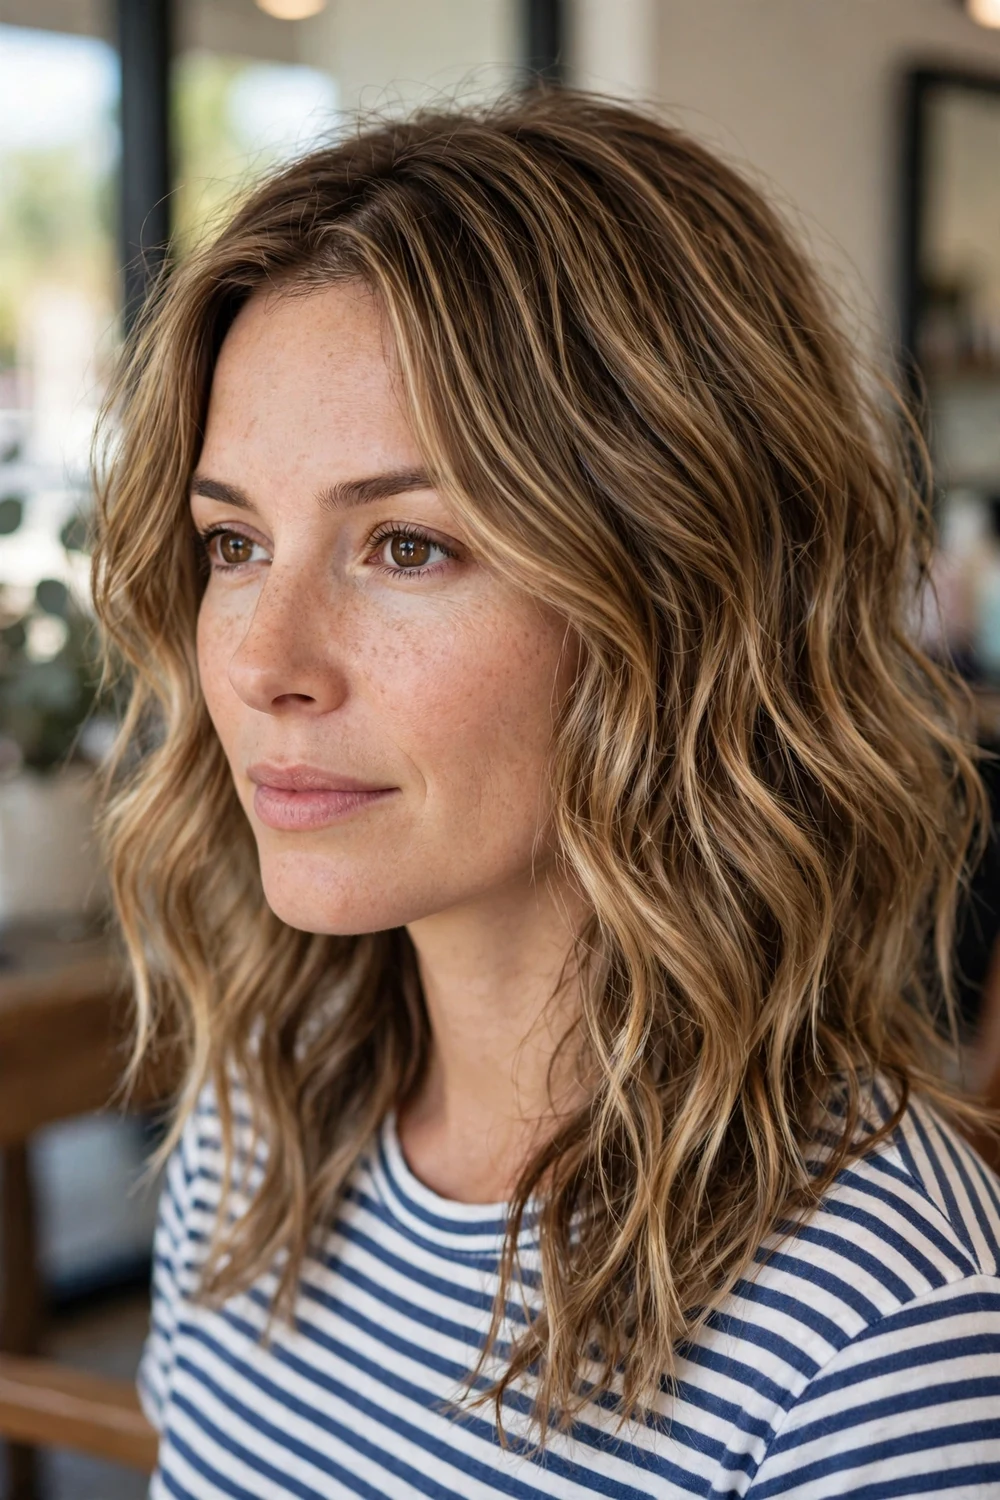
Layers set into loose, uneven waves are the relaxed end of this list. The layering is what keeps beach waves from going shapeless: the shorter pieces stack at the cheek and shoulder, and the side part gives the top a clear direction while the lengths stay loose.
Fine to thick wavy hair can wear it, and straight hair can copy it with a flat iron wave through the mid lengths. Salt spray scrunched into damp hair builds most of the texture without heat. On day two, mist the lengths with water and scrunch again rather than rewetting the whole head.
Try this: leave the last inch of every section out when you wave the hair. Straight ends mixed into waves are what make the finish look natural.
Difficulty: Low · Cost: $ (salon)
25. Layered Curls with a Deep Side Part

Long curls without layers hang in one heavy curtain. Layering by curl section shapes the mass into a rounded outline, and a deep side part piles the volume to one side for a clear, dramatic silhouette. The shortest layers sit at the crown, where they lift the roots that long curl weight usually pulls flat.
Moisture is the upkeep that matters here. Layered curls expose more ends, so a weekly deep conditioning session and curl cream on wash day keep the shape defined. Diffuse on low heat or air dry, and refresh with a water mist instead of daily washing.
Try this: part the hair while it is wet and clip the heavy side at the root as it dries. Setting the part during drying stops curls from re-splitting to the middle.
Difficulty: Medium · Cost: $$ (salon)
26. Long Layers for Thick Hair with a Side Part

Thick long hair needs layers for a practical reason: weight removal. Internal layers and slide cutting through the mid lengths take out bulk, so the hair lies closer to the head and dries faster, while the surface and the ends keep their full look. The side part then has something to work with, since the top can actually lift.
Tell your stylist where your hair feels heaviest, usually behind the ears and at the nape, so the weight comes out there first. The ends should stay blunt and full. Thinned ends on thick hair frizz and split faster than the rest of the head.
Try this: book the layer work as its own appointment rather than adding it to a color visit. A proper weight removal cut on thick hair takes time and should not be rushed.
Difficulty: Low to Medium · Cost: $$$ (salon)
27. Sleek Straight Layers with a Side Part
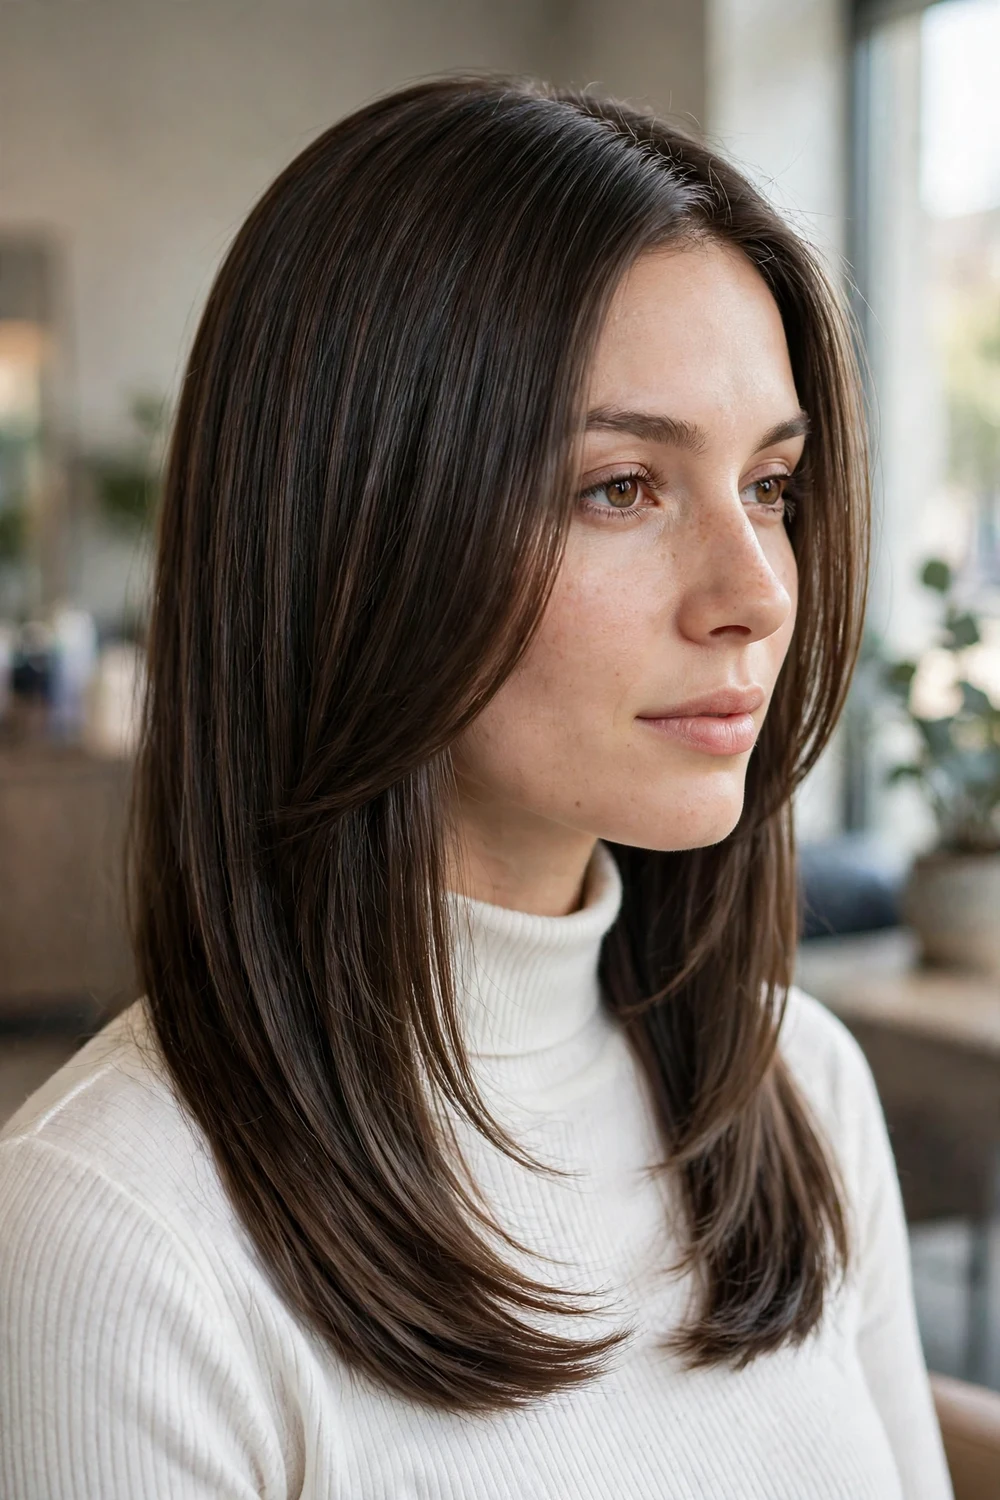
Straight hair shows every layer, so this cut keeps them long, blended, and smooth, with a soft side part that frames the face in clean lines. There is no texture work at the ends. The interest comes from the diagonal fall of the part and the way each layer slides over the next when the head moves.
It suits naturally straight hair and hair that flat irons smooth without a fight. The side part also fixes the common flatness of straight hair worn in the middle, because the heavy side gains root height. A light smoothing serum through the ends keeps the layers lying in sheets.
Try this: dry the hair across the part with a paddle brush before any flat iron work. Roots dried in the right direction need far less heat later.
Difficulty: Low to Medium · Cost: $ (salon)
28. Air-Dry Layers with a Soft Side Part
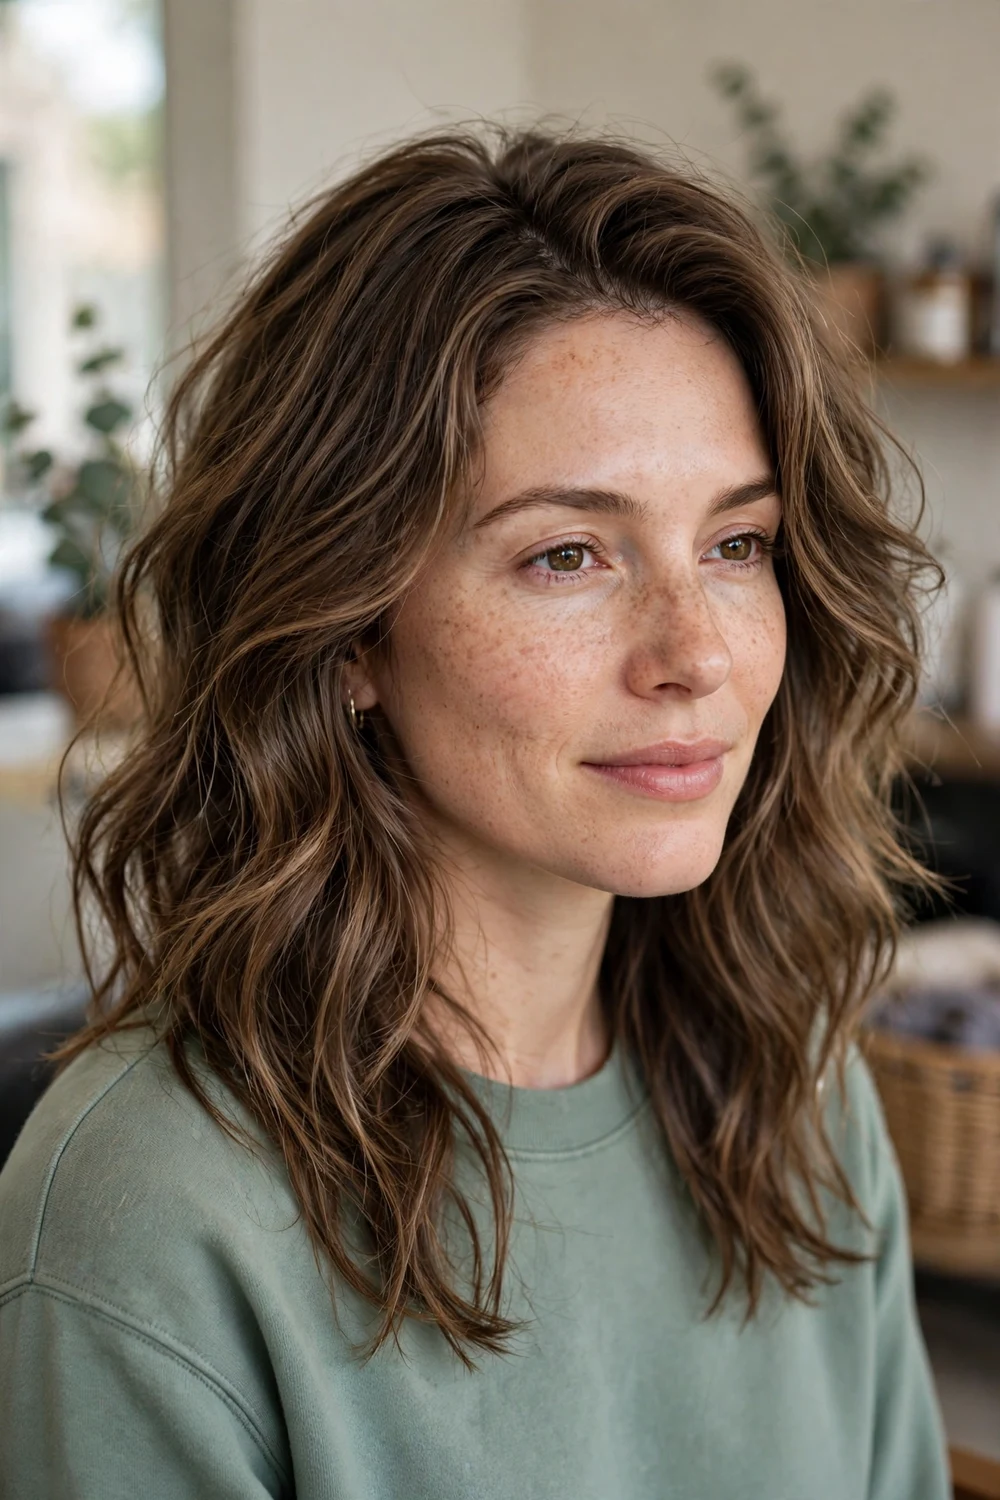
Some layered cuts only look right after a blowout. This one is cut for the opposite routine: layers placed where your natural wave or straight fall already bends, a soft part about an inch off center, and ends left slightly blunt so they dry with weight. The goal is hair that settles into shape while it dries.
Bring your hair to the appointment air dried and unstyled, and say so when you book. A stylist cutting for air drying needs to see your real texture and your natural part before choosing layer lengths. A leave-in conditioner and a wide tooth comb are the full product list.
Try this: comb the part in while the hair is soaking wet, then do not touch it until it is dry. Touching air drying hair is the main cause of frizz and a lost part.
Difficulty: Low · Cost: $ (salon)
| Cut group | Best hair types | Daily styling | Trim interval |
|---|---|---|---|
| Short layers (pixie, bixie) | Fine to medium, straight to wavy | Paste and finger styling, about 5 minutes | 4 to 5 weeks |
| Layered bobs | Straight, wavy, and curly at chin to jaw length | Round brush blowout or air dry for wavy versions | 5 to 6 weeks |
| Medium layers (lob, shag, feathered, hush) | Most types; internal layers suit thick hair, light layers suit fine hair | Texture spray, bend with an iron, or a brushed blowout | 6 to 8 weeks |
| Long layers | Straight, wavy, curly, and thick hair past the collarbone | Root lift at the part; lengths can air dry | 8 to 10 weeks |
Frequently Asked Questions
What is side part layered hair?
Side part layered hair is a layered haircut worn with the part placed to one side of the head instead of the center. The layers are cut or styled to fall from that side point, so the heavy side sweeps across the forehead and the light side sits closer. It works at every length, from a pixie with a long layered top to long hair with layers starting at the chin.
Does a side part make fine hair look thicker?
Yes, in most cases. Hair that is flipped against its natural fall direction lifts at the root, and a deep side part stacks more hair on one side, so the crown and the heavy side both look fuller. Fine hair gets the best result from long, blunt ended layers rather than short thinned layers, and from setting the part while the hair is damp so the roots dry in the lifted position.
How often does a layered cut with a side part need a trim?
Short layered cuts such as pixies and bobs need a trim every 4 to 6 weeks, because a small amount of growth changes the outline. Medium layered cuts hold for 6 to 8 weeks, and long layers can go 8 to 10 weeks before the layer steps start to blur. Bangs and side swept fringes usually need a quick tidy between full appointments.
Can I wear a side part with curly hair?
Yes. Curly hair often gains volume from a side part, because the curls pile to one side instead of splitting evenly. Ask for layers cut dry or curl by curl, set the part while the hair is wet, and clip the roots on the heavy side while it dries. A deep side part gives the strongest lift; a soft side part gives a rounder, more even shape.
How do I keep a deep side part in place all day?
Set the part on damp hair with a fine tooth comb, then dry the roots in the direction the hair will lie, aiming the airflow across the part. A small amount of root lift mousse before drying helps more than hairspray after. If your hair keeps falling back to the middle, wear the part on the opposite side for a week; trained roots hold a new part better after a few days.
Final Thoughts
Side part layered hair is a small change with a clear payoff: the same layers gain lift, direction, and a face frame the moment the part moves off center. Pick the cut by length first, then by how much styling you will honestly do each morning. Short layers reward a five minute paste routine, medium layers forgive an air dry, and long layers ask only for root lift at the part. Bring two or three photos of your chosen idea to the appointment, name your part side, and the cut is easy to repeat at every trim after that.

