

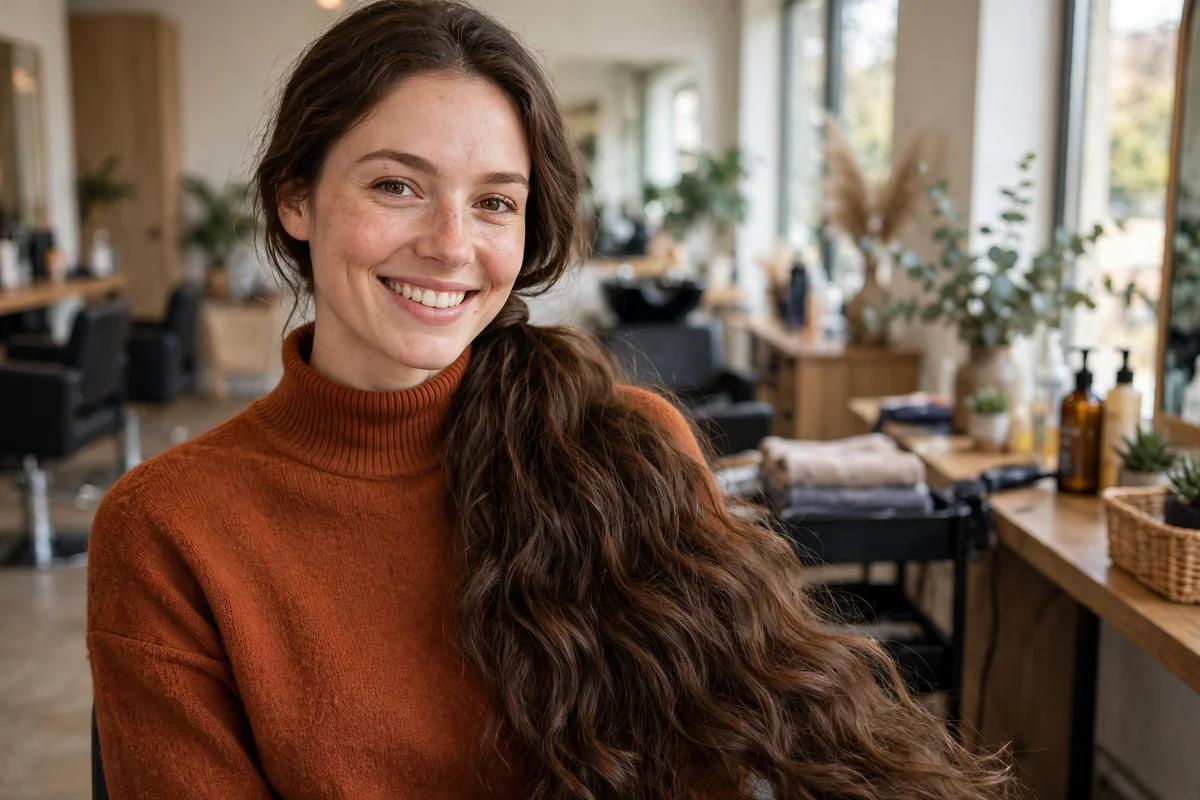
Long hair gives you a lot to work with, and it also takes the most time to wash, dry, and untangle. On busy mornings, the goal is usually simple: get the hair off your face, keep it neat until evening, and use only the tools already in your drawer. Every style on this list was chosen for that goal. Each one takes ten minutes or less, needs a brush, elastics, pins, or a clip, and works with the length you already have.
The list below has 26 simple hairstyles for long hair and runs from the fastest fixes to the slightly more involved braids: one minute clip and headband styles first, then ponytails and buns, then half up styles, then braids and twists, and finally the loose, worn down options. Every idea notes the time it takes, the difficulty, and the cost band, where cost covers only basic supplies such as elastics, pins, or a clip. If you want waves without any morning effort at all, the overnight braid idea on this list and the wider heatless styling approach both set the style while you sleep.
Quick Takeaways
- Every style here takes ten minutes or less and needs only a brush, elastics, bobby pins, or a claw clip.
- Ponytails, buns, and claw clip styles are the fastest options, at one to five minutes each.
- Braids and twists take five to ten minutes and hold the longest, which suits active and outdoor days.
- Half up styles keep hair off your face while still showing your length.
- Cost bands cover basic supplies only. Most styles cost $ because they use elastics or pins you already own.
How to Make a Simple Style Last All Day
Start with dry, brushed hair for ponytails, buns, and braids. Damp hair slips out of elastics and loosens as it dries, so the style you tied in the morning rarely looks the same by noon. The one exception is the overnight braid and the deep side part, which both set better on slightly damp hair. Use soft, fabric covered elastics for daily styles, because plain rubber bands catch and snap long ends when you remove them.
Place bobby pins with the wavy side facing down against your head. The ridges grip the hair underneath, and the pin holds with less tension. For heavy, long hair, cross two pins in an X shape at each hold point rather than adding more pins in a row. Finish by leaving the style alone. Repeated touching, retying, and smoothing breaks down the hold faster than movement does.
1. One-Minute Claw Clip Twist for Long Hair
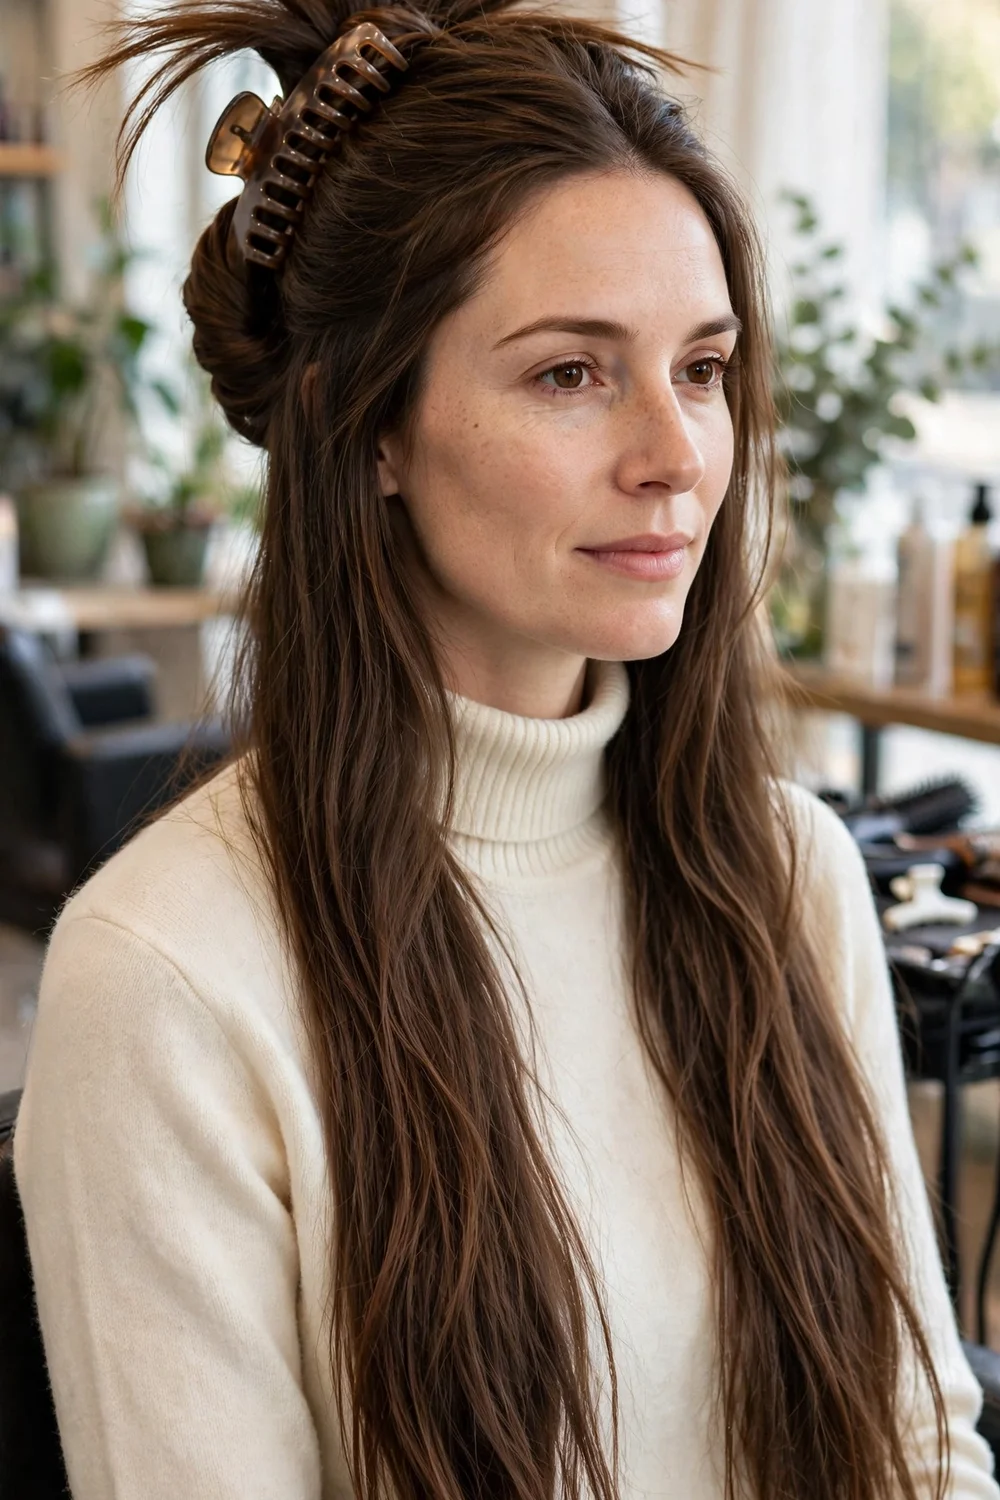
Gather all of your hair at the back as if you are making a low ponytail, then twist the length upward against your head. Fold the twist once so the ends point down or fan just above the clip, then open a large claw clip over the twist and close it. Long hair needs a large or extra large clip, because a small clip will slip within the hour.
Work on dry, brushed hair and leave two thin strands free at the front if you want a softer frame. The twist holds best on straight, wavy, and lightly textured hair. On very thick hair, twist in two sections and clip them side by side.
Try this: Use a clip with long teeth and test the hold with a head shake before you leave. If it slides, gather the hair higher and twist one extra turn.
Difficulty: Easy | Cost: $ | Time: 1 minute
2. Five-Minute Low Ponytail with Wrapped Base

Brush your hair back, part it in the center or on the side, and gather it low at the nape. Secure it with a soft elastic, then take a thin strand from under the ponytail, wrap it around the elastic two or three times, and pin the end underneath. The wrap hides the elastic and gives a clean finish with no extra tools.
A small amount of serum smoothed over the top controls flyaways without making the roots look oily. This style suits work, school, and dinners, and it keeps long lengths contained in wind and heat. It works on straight and blow dried hair, and on wavy hair if you brush the top smooth first.
Try this: Wrap the strand while the elastic is still slightly loose, then tighten the ponytail. The wrap stays flat and does not unravel during the day.
Difficulty: Easy | Cost: $ | Time: 3 minutes
3. Quick High Ponytail with Hidden Elastic

Flip your head forward, brush all of your hair toward the crown, and gather it high. Secure it with a strong elastic, then wrap a small section from the underside around the base and pin it in place. Tilting your head back slightly as you tie helps the ponytail sit higher and look fuller at the top.
Keep the sides smooth with a brush as you gather, and leave the length loose so it moves. This is a good choice for hot days, workouts, and days when loose hair feels in the way. Readers who like ponytail variations can also browse the trendy ponytail hairstyles for long hair collection for more height and braid options.
Try this: Use two elastics stacked together for very long or thick hair. The second elastic stops the ponytail sagging by midday.
Difficulty: Easy | Cost: $ | Time: 3 minutes
4. Two-Minute Messy Top Bun for Long Hair
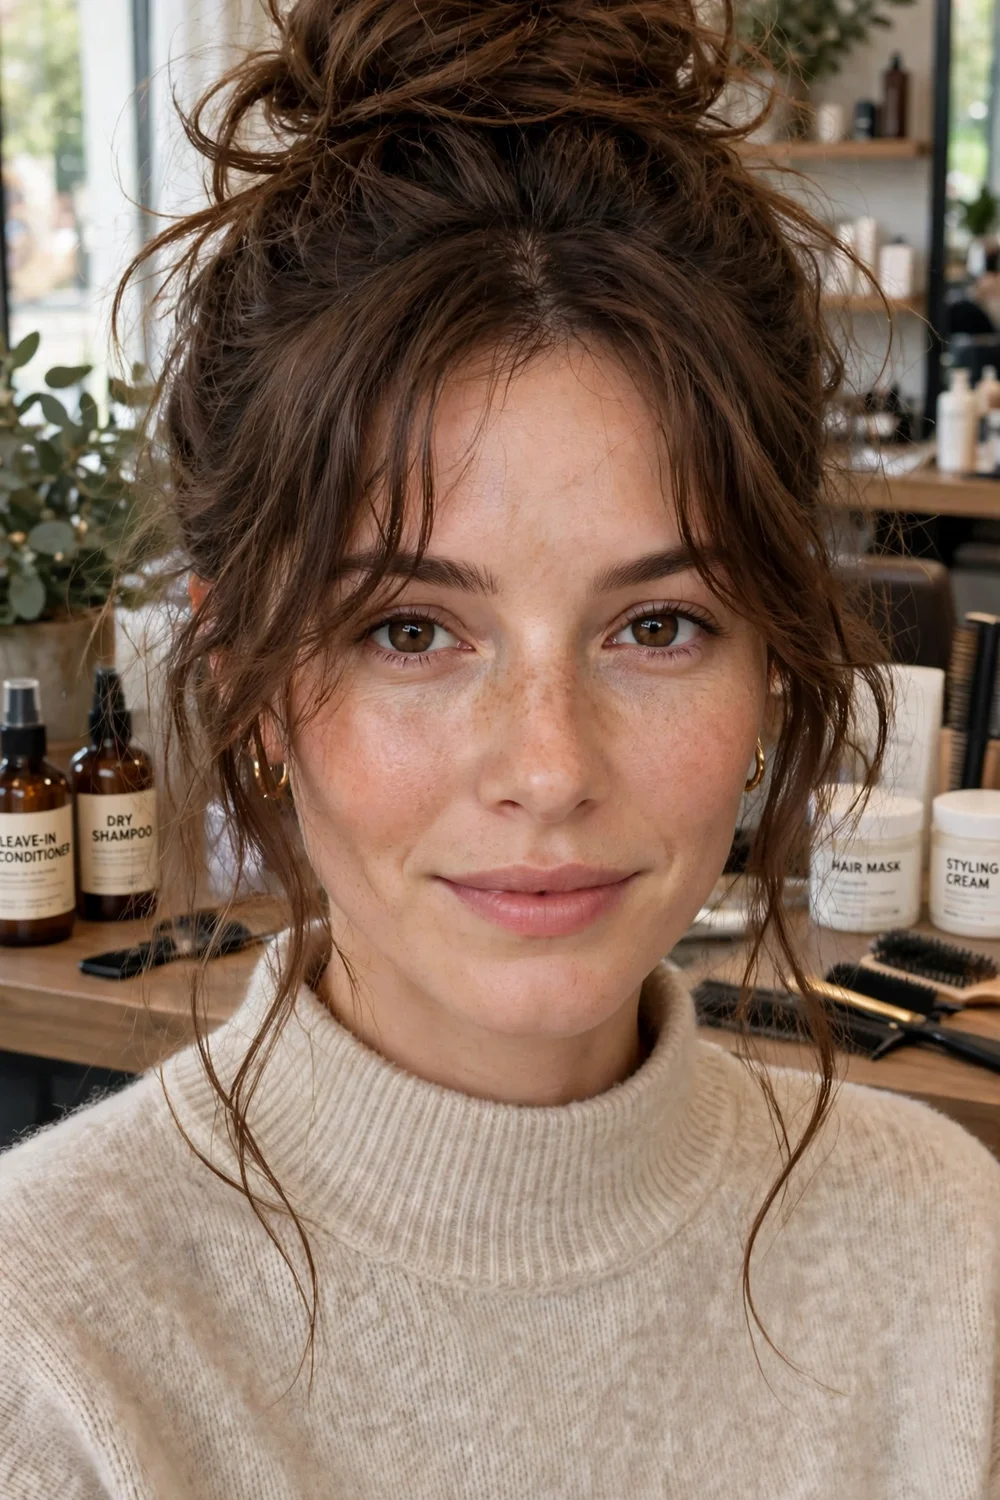
Gather your hair into a high ponytail, twist the length loosely, and wrap it around the base into a bun. Secure it with the same elastic or a second one, then gently pull small sections of the bun outward to add size. Pull out two thin strands beside your face and loosen the hair above your ears.
This bun is meant to look loose, so skip the brush at the final step and use your fingers instead. It suits home days, errands, and second day hair, because natural texture helps the bun grip. Fine hair holds better if you start from a ponytail rather than twisting loose hair on its own.
Try this: If the bun feels heavy, split the length in two, twist each half in opposite directions, and wrap them one after the other. The weight spreads and the bun stays up longer.
Difficulty: Easy | Cost: $ | Time: 2 minutes
5. Five-Minute Sleek Low Bun at the Nape
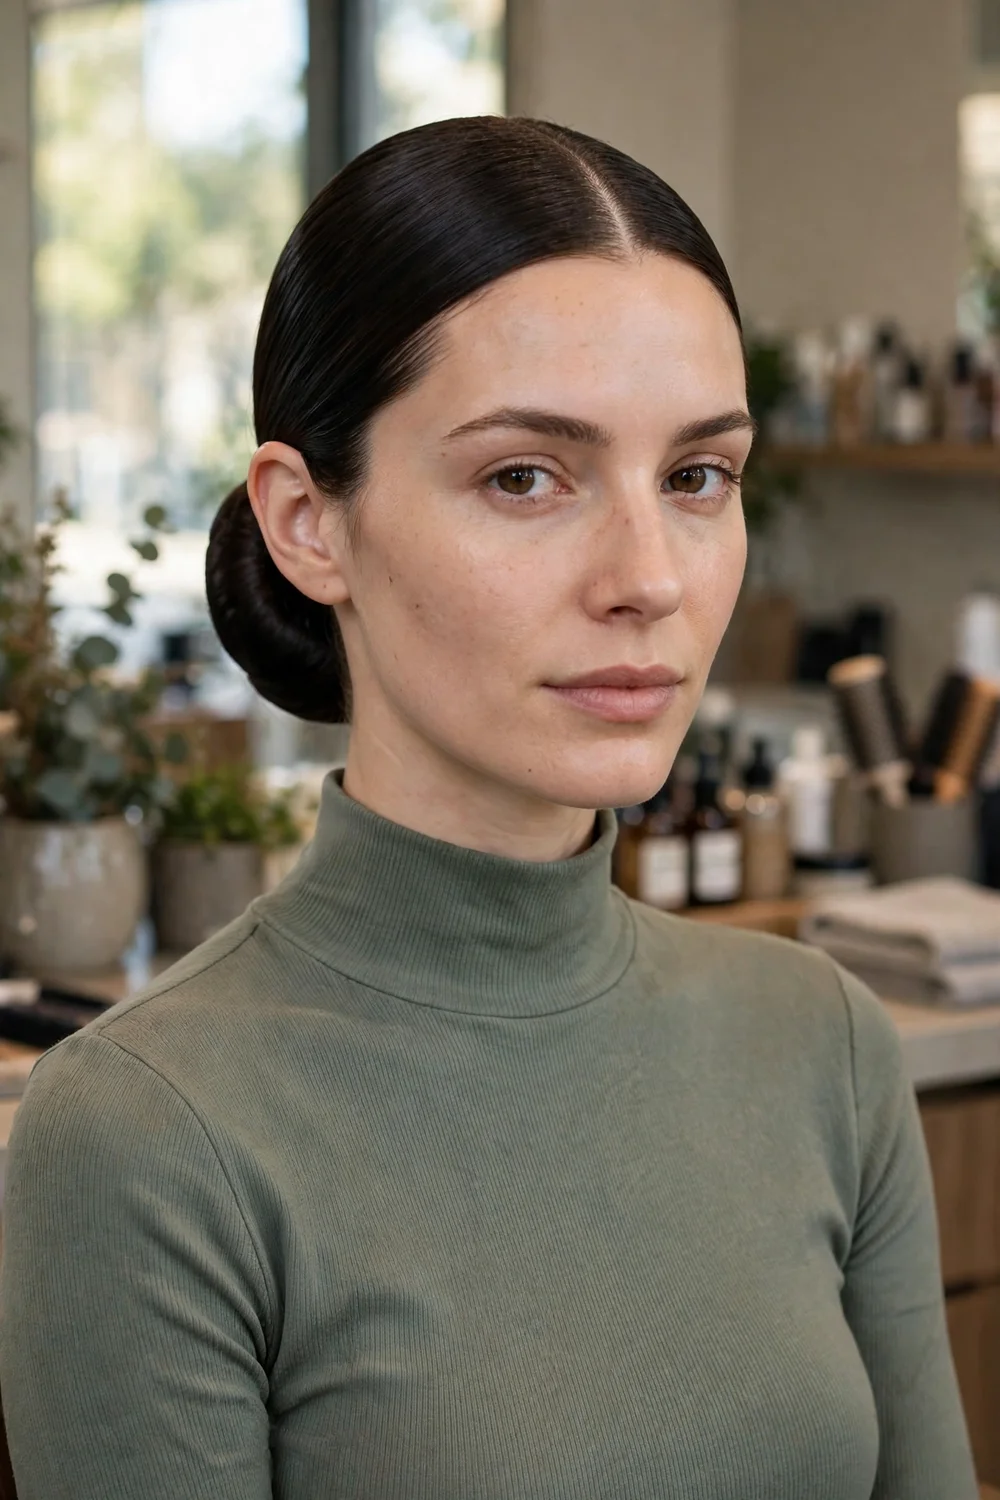
Part your hair in the center, brush it back smooth, and gather it into a low ponytail at the nape. Twist the ponytail, wrap it into a flat bun, and pin the ends under with bobby pins crossed in an X shape. Smooth a pea sized amount of gel or serum over the top and sides to hold flyaways down.
The flat shape sits well against a chair back, a car headrest, and high collars. It suits office days and formal events where a loose style would feel out of place. Straight and relaxed hair reaches the smoothest finish, while wavy hair needs a firm brush through before you gather it.
Try this: Pin the bun at four points, top, bottom, and both sides. Four pinned points keep a long, heavy bun from tipping to one side.
Difficulty: Easy | Cost: $ | Time: 5 minutes
6. Two-Minute Half-Up Claw Clip Style
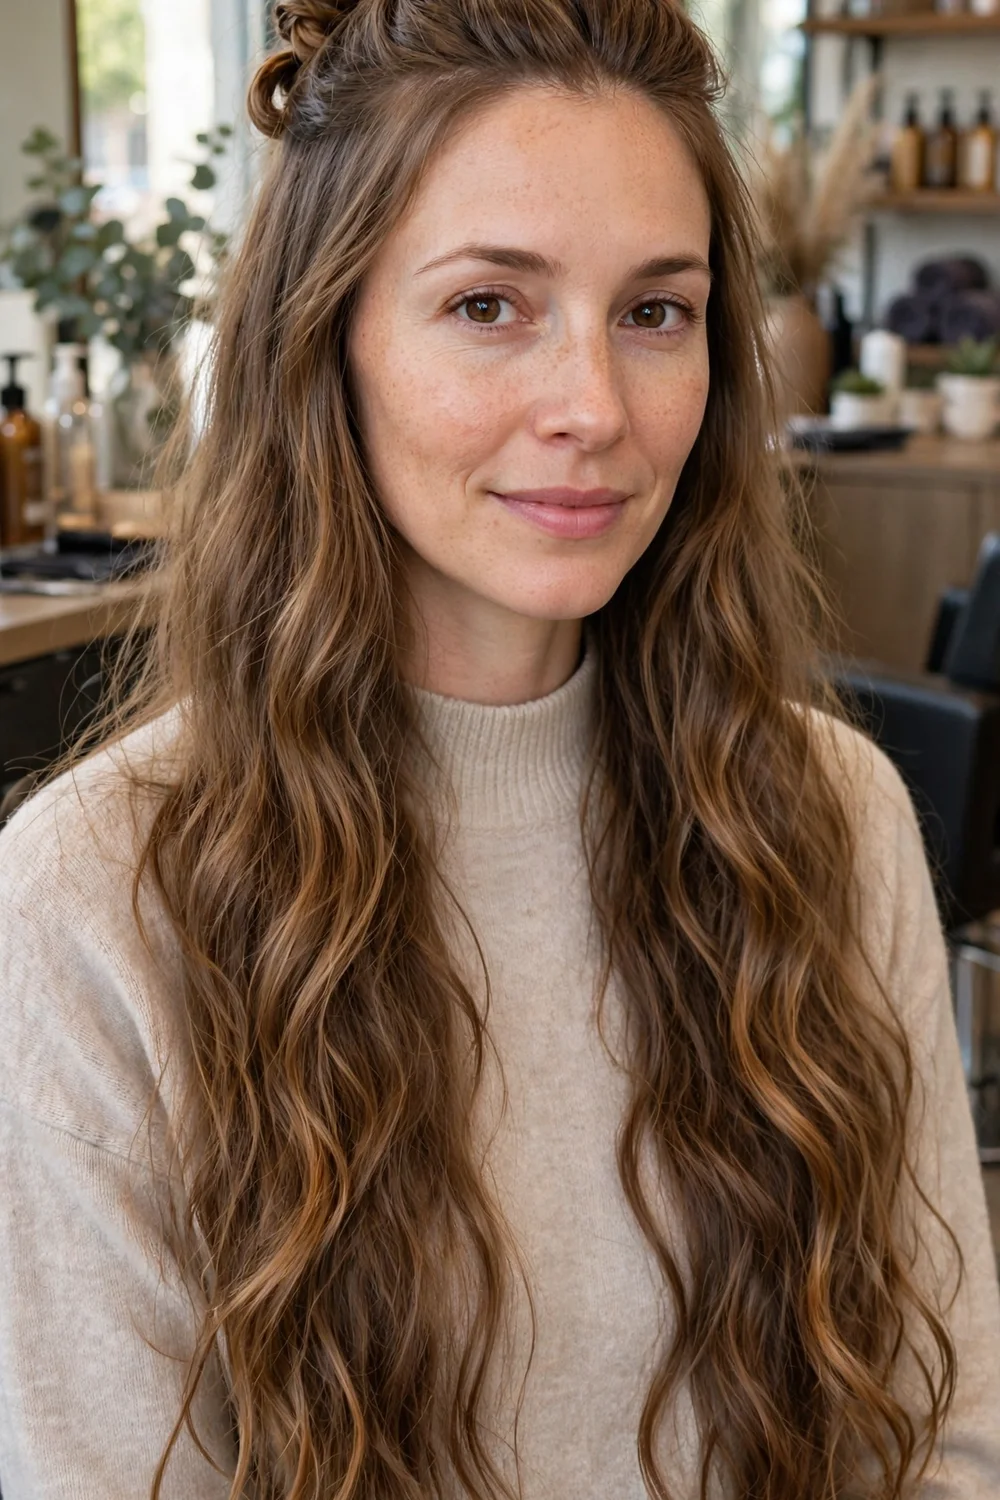
Take the top section of your hair from temple to temple, twist it once at the back, and hold it with a small or medium claw clip. Leave the rest of your length loose over your shoulders and back. The clip lifts hair off your face while the length still shows, which is why this style works on days when you want both.
You can place the clip high for more lift at the crown or lower for a softer look. The style suits straight, wavy, and curly hair, and it takes under two minutes once you know where your section sits. For a framed finish on longer layers, compare it with the long hairstyles with curtain bangs ideas, where the front pieces do similar face framing work.
Try this: Twist the section before you clip it. A single twist stops the clip sliding down smooth hair.
Difficulty: Easy | Cost: $ | Time: 2 minutes
7. Quick Twisted Half-Up with Two Pins
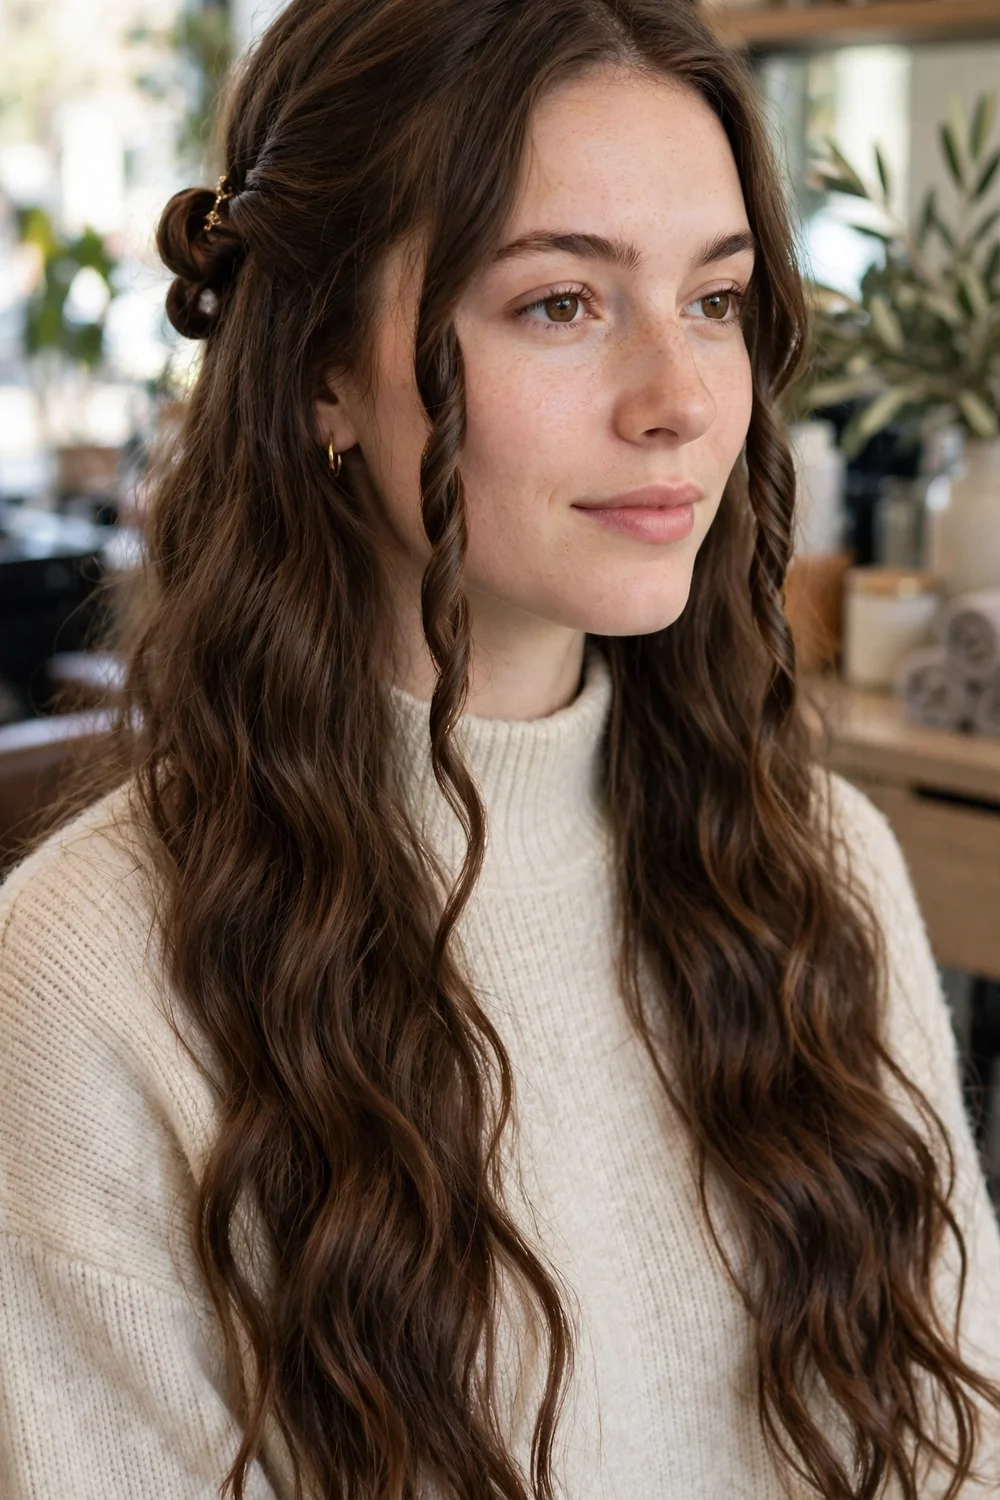
Take a small section above each ear, twist each one away from your face, and bring both twists to the back of your head. Cross them over each other and pin them flat with two bobby pins, wavy side down for grip. Leave the rest of your hair loose, and let the twists sit over the loose hair rather than under it.
This style adds detail at the back without any braiding skill. It suits wavy hair especially well, because the twists blend into the natural texture. On straight hair, twist tighter sections so the shape stays visible through the day.
Try this: Pin the second twist over the first and push the pins in opposite directions. Opposing pins lock the twists together so they do not separate.
Difficulty: Easy | Cost: $ | Time: 3 minutes
8. Five-Minute Classic Three-Strand Back Braid
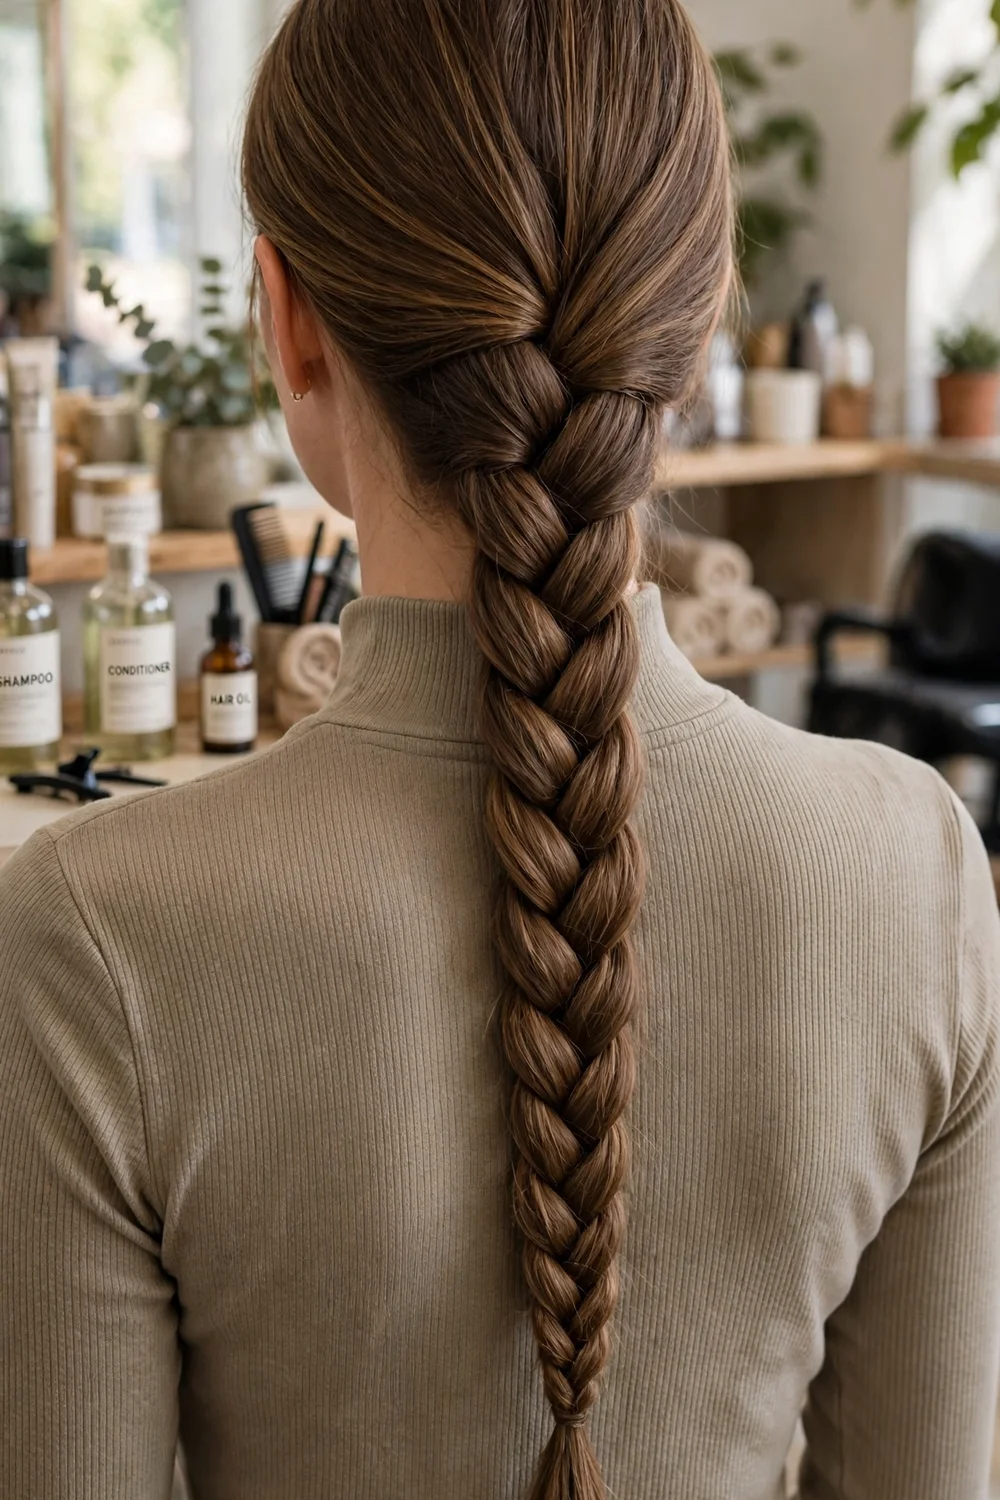
Brush your hair straight back, divide it into three equal sections at the nape, and cross the right section over the middle, then the left section over the new middle. Repeat that pattern down the full length, keeping the tension even, and secure the end with a small elastic. The braid keeps long hair contained and reduces tangles on busy or windy days.
You can wear the braid snug for a neat finish or gently pull the outer edges after braiding to make it look fuller. A braid worn during the day also protects ends from rubbing on bags and seat belts. At night, the same braid limits knots, and the heatless hairstyles for long hair guide shows how that overnight braid turns into morning waves.
Try this: Start the braid with brushed, dry hair. Damp hair stretches as it dries and the braid loosens and sags.
Difficulty: Easy | Cost: $ | Time: 5 minutes
9. Loose Side Braid Over One Shoulder
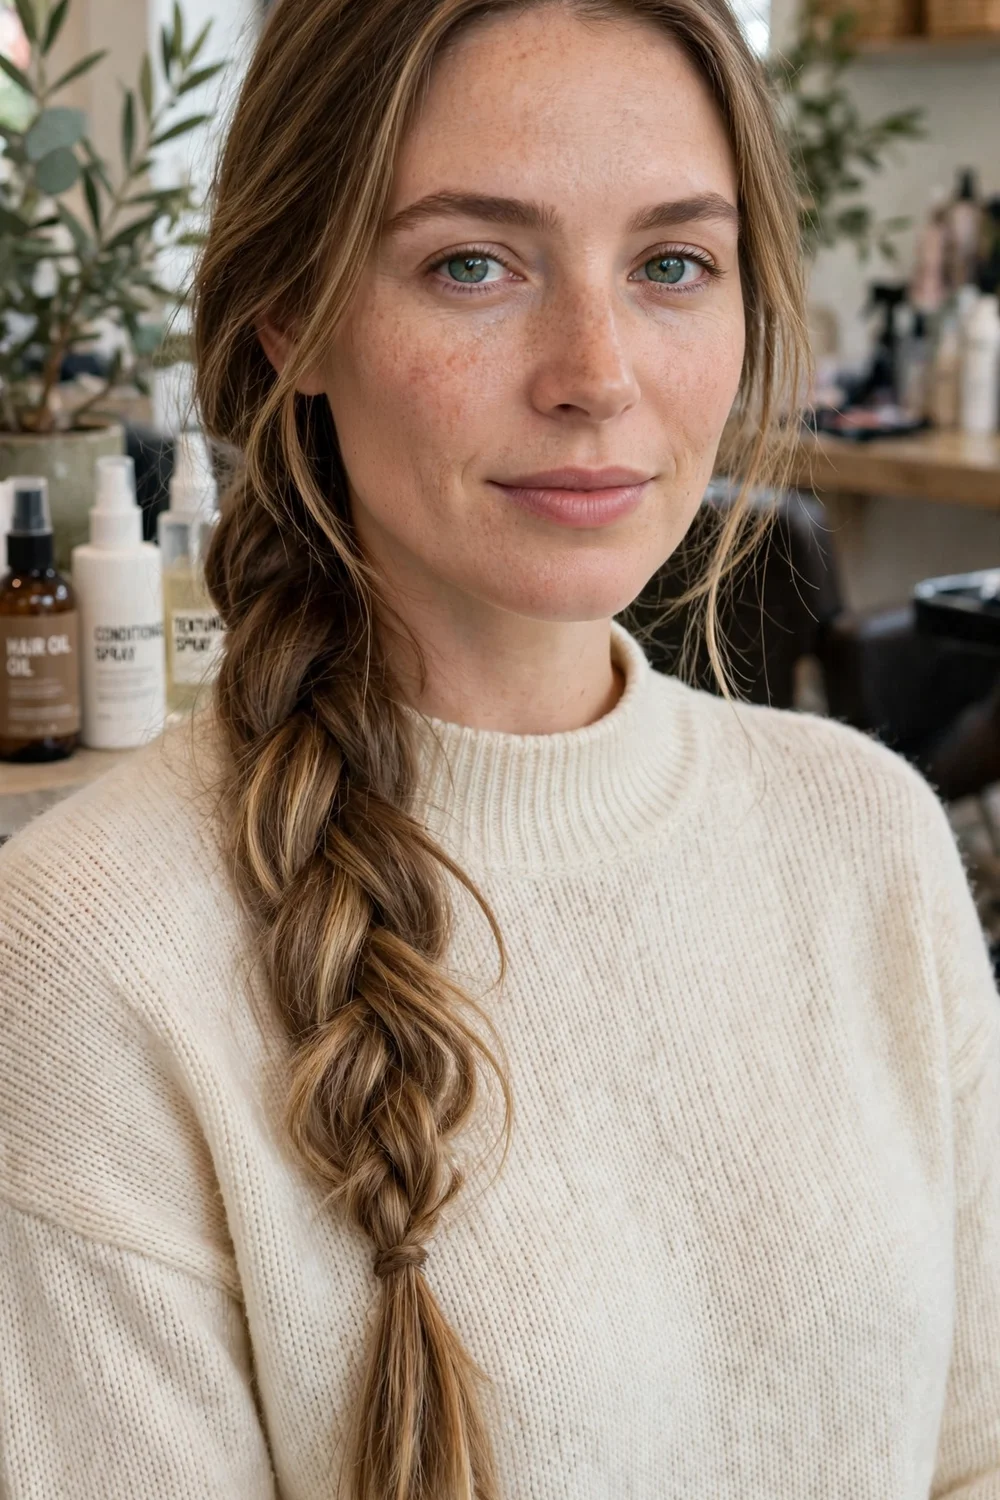
Bring all of your hair over one shoulder, divide it into three sections, and braid loosely down the length. Secure the end with a small elastic, then use your fingertips to pull each loop of the braid a little wider, starting from the top and working down. Leave a soft strand free beside your face on the opposite side.
The side position keeps the braid visible in photos and off your back in warm weather. It suits wavy and thick hair well, because the texture fills the loosened loops. On fine hair, braid a little tighter first, then loosen only the top half so the end does not slip out.
Try this: Braid over the shoulder you use less for a bag strap. A strap worn over a fresh braid flattens one side within minutes.
Difficulty: Easy | Cost: $ | Time: 4 minutes
10. Simple Fishtail Braid with Loosened Edges
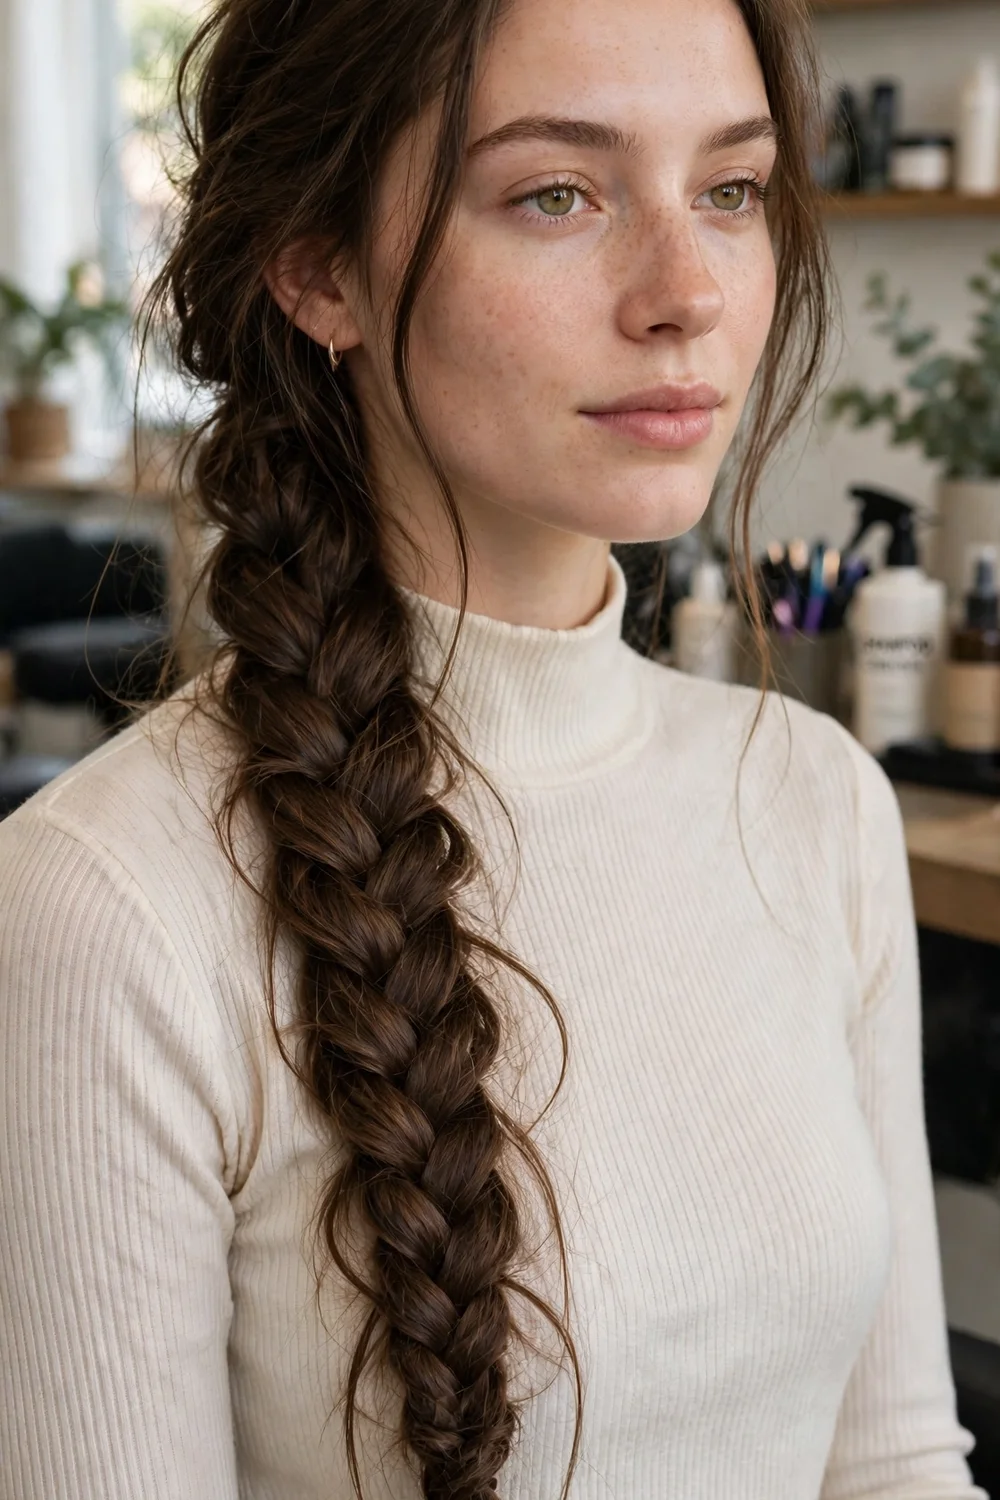
Divide your hair into two large sections. Take a thin strand from the outside of the right section and cross it over to join the left section, then take a thin strand from the outside of the left section and cross it to the right. Repeat, keeping the strands thin and even, until you reach the ends, then secure with an elastic and gently widen the braid with your fingers.
The fishtail pattern looks detailed, but the movement is only two steps repeated. Long hair shows the pattern clearly because there is enough length for many crossings. Give yourself the full eight minutes the first few times, and work in front of a mirror until the hand pattern feels automatic.
Try this: Keep each crossed strand about the width of your fingertip. Even strand width is what makes the finished braid look neat.
Difficulty: Medium | Cost: $ | Time: 8 minutes
11. Five-Minute Bubble Ponytail with Small Elastics

Make a high or low ponytail and smooth the base. Place a second small elastic about two inches down the ponytail, then gently pull that section outward on all sides to form a rounded bubble. Repeat down the length, spacing the elastics evenly, until you reach the last few inches of hair.
Clear or hair colored elastics let the bubbles carry the look, while colored elastics add contrast. The style holds long hair in sections, so it tangles less than a loose ponytail during active days. It suits straight and wavy hair, and thick hair makes larger, rounder bubbles.
Try this: Pull each bubble gently from the sides only. Pulling from the top and bottom shortens the section and makes the bubbles uneven.
Difficulty: Easy | Cost: $ | Time: 5 minutes
12. Knotted Low Ponytail in Two Sections

Divide your hair into two equal sections at the nape. Cross the sections over each other and loop one through to tie a simple knot, then pull it snug. Tie a second knot below the first if your length allows, gather both ends together, and secure them with an elastic below the knots.
The knots replace braiding and still add clear detail at the back. This style works best on long, fairly even length hair with some slip, because very layered hair can poke out of the knots. Smooth a little serum over the sections before you start so the knots slide into place without catching.
Try this: Wet your hands slightly if the sections stick together. A small amount of moisture helps the knot tighten cleanly.
Difficulty: Easy | Cost: $ | Time: 4 minutes
13. Rope Twist Ponytail Without Braiding

Gather your hair into a ponytail at your preferred height and divide the ponytail into two equal sections. Twist each section in the same direction, then wrap the two sections around each other in the opposite direction and secure the end with an elastic. Twisting one way and wrapping the other is what locks the rope so it does not unwind.
This gives a braided look with no three strand pattern to learn. It keeps long hair secure for work, workouts, and travel, and it comes out with soft waves when you undo it. It suits medium to thick hair best, because fine hair can look thin in a tight rope.
Try this: Twist each section firmly before you wrap. Loose first twists make a loose rope that unravels from the bottom up.
Difficulty: Easy | Cost: $ | Time: 5 minutes
14. Braided Ponytail for All-Day Hold

Make a firm ponytail at the crown or mid head, then divide the ponytail into three sections and braid it down to the ends. Secure the end with a small elastic. Because the hair is anchored at the base first, this braid swings less and holds longer than a braid started from loose hair.
This is a practical pick for sports, outdoor work, and long shifts, where loose ends would catch or tangle. The braid also keeps long hair off the neck without a bun. If you wear it often, alternate the ponytail height between days to change where the elastic sits.
Try this: Add a second elastic over the first at the base on very active days. Doubling the base stops the ponytail tilting as the braid moves.
Difficulty: Easy | Cost: $ | Time: 6 minutes
15. Pull-Through Faux Braid Ponytail
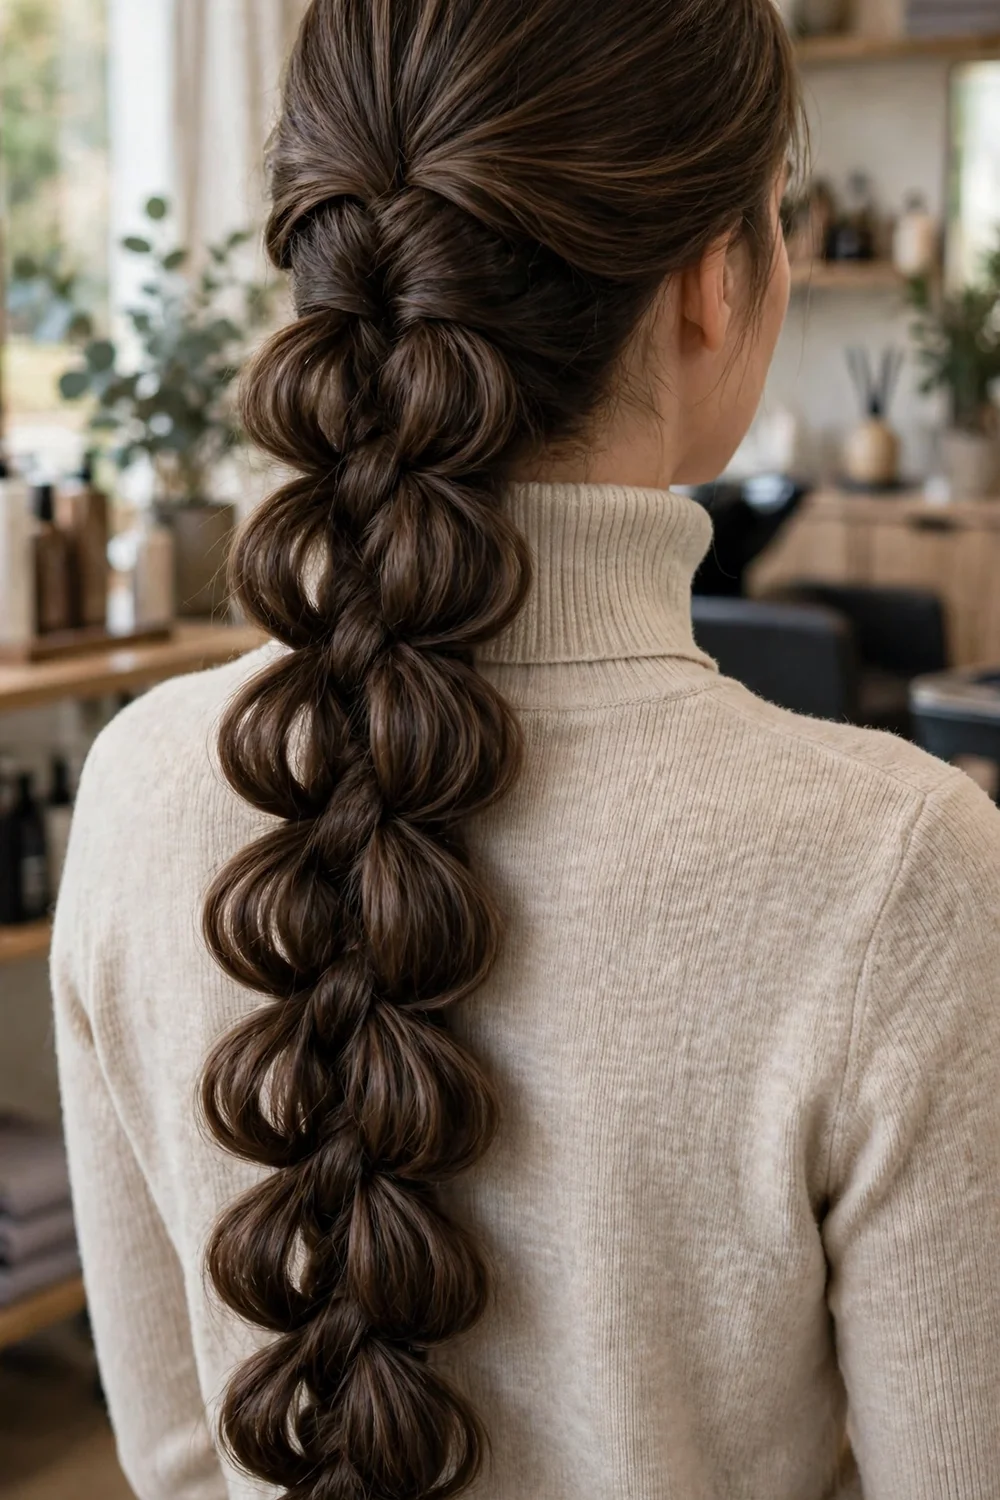
Make a ponytail, then place a second elastic a few inches down. Split the hair just above that elastic into two, loop the tail up and through the split, and pull it snug to form the first link. Move down, add another elastic, and repeat the split and loop pattern to the ends.
The result reads as a thick braid, yet each step is only a loop, which suits anyone who finds fishtail or Dutch patterns hard to keep even. Long hair is needed for several links, and thick hair makes the fullest version. Work with small, clear elastics so the links, rather than the ties, get the attention.
Try this: Pull each link wider with your fingers right after you form it. Widening as you go keeps all of the links a similar size.
Difficulty: Easy | Cost: $ | Time: 7 minutes
16. Double Dutch Braids for Busy Days
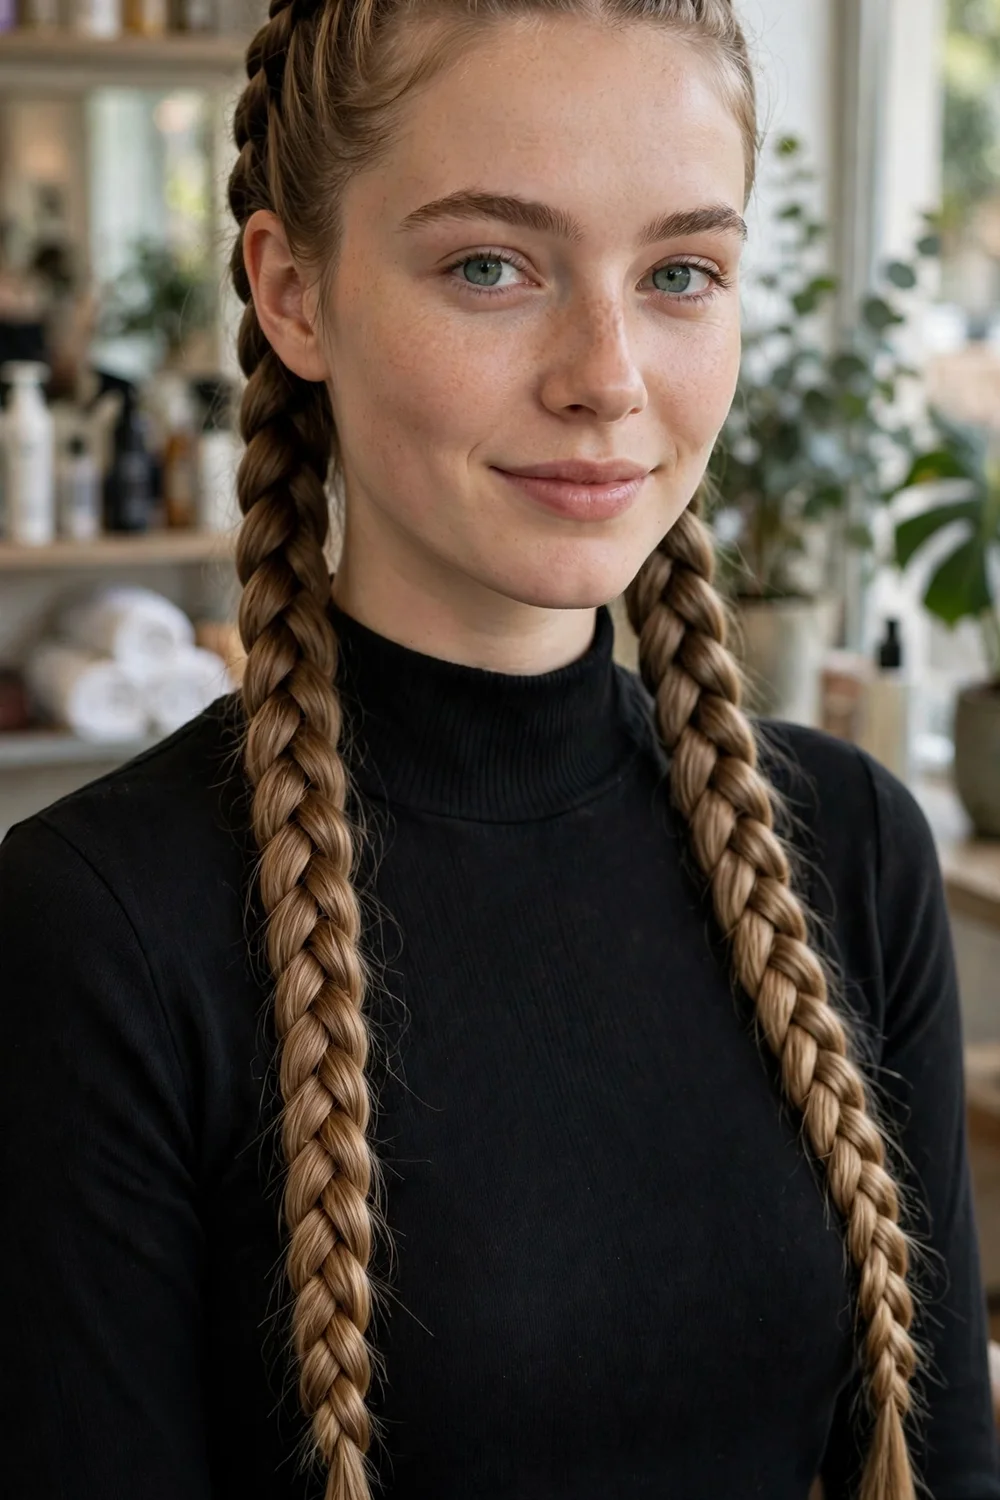
Part your hair down the center. On one side, take a section at the front, split it into three, and braid by crossing the outer strands under the middle, adding a little hair to each outer strand as you move down. Repeat on the other side and secure both ends with elastics. The under crossing is what makes the braid sit raised on top of the hair.
Two braids spread the weight of long hair across both sides, so the style stays comfortable for a full day. It suits active days, travel, and days when you want hair fully off your face and neck. The braids also set waves, so undoing them the next day gives you a second style with no extra work.
Try this: Clip the side you are not braiding out of the way. Loose hair from the other side is the main cause of uneven Dutch braids.
Difficulty: Medium | Cost: $ | Time: 10 minutes
17. Single French Braid Down the Back

Start with a section at the crown, split it into three, and begin a regular braid. As you cross each outer strand over the middle, add a small section of loose hair to it first. Continue down the back of your head, then braid the remaining length in a regular three strand pattern and secure the end.
The French pattern holds hair close to the head, so front layers and shorter pieces stay contained better than in a nape braid. It suits school, work, and outdoor days, and it keeps long hair from tangling under collars and straps. Practice on dry hair, where the added sections are easier to see and hold.
Try this: Keep the added sections small and even on both sides. Large, uneven additions make the braid lean to one side.
Difficulty: Medium | Cost: $ | Time: 8 minutes
18. Low Double Buns with a Center Part
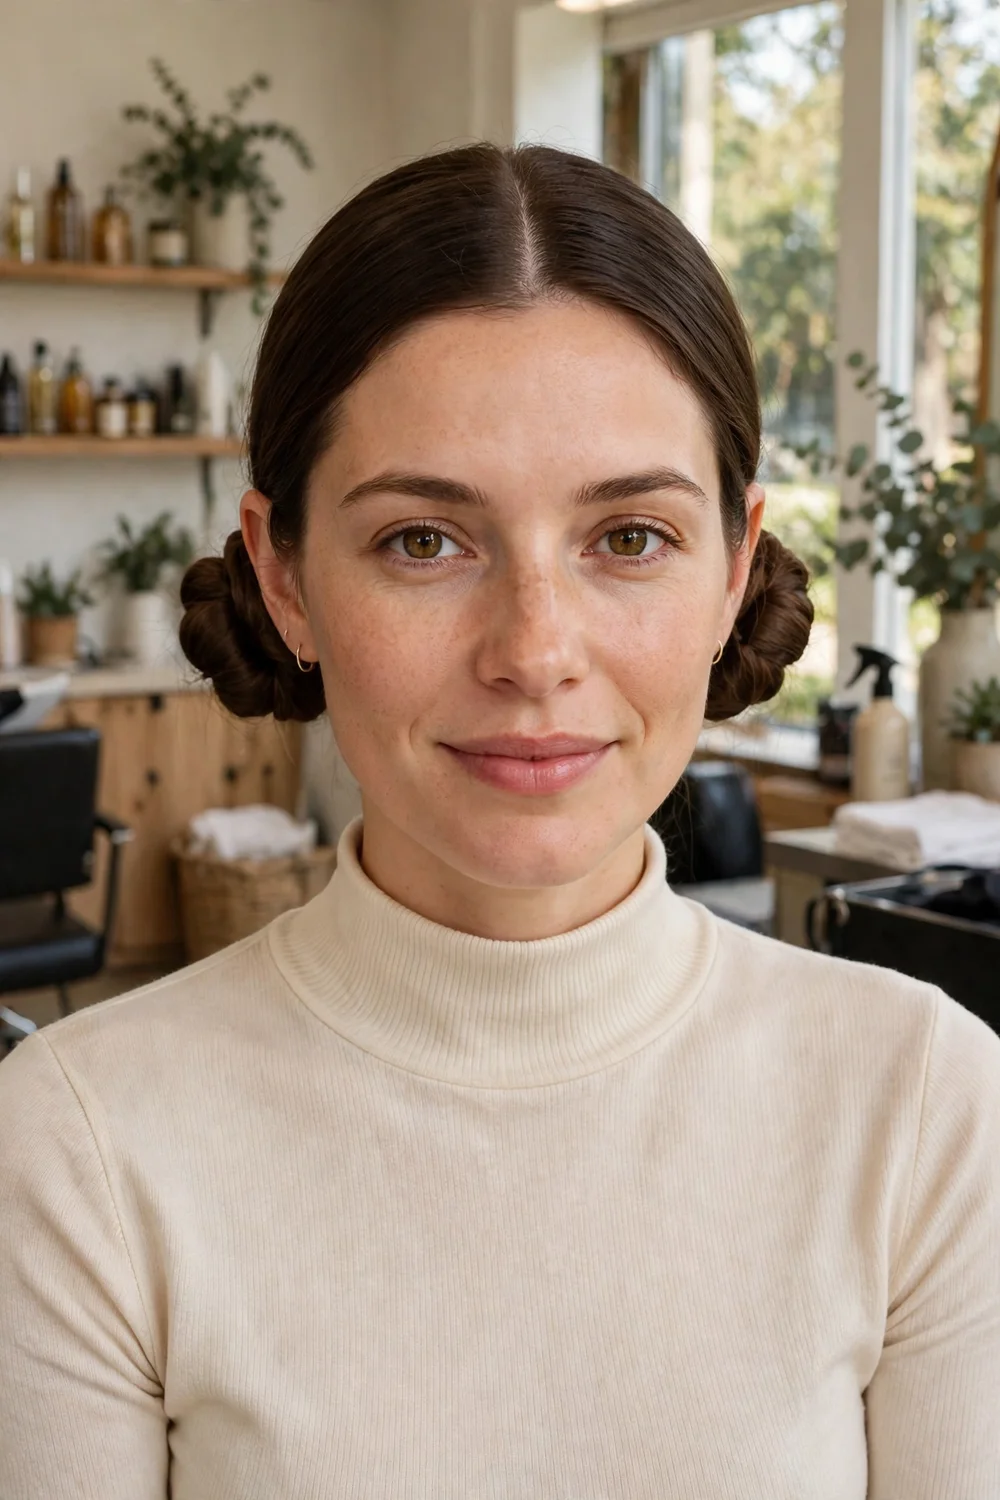
Part your hair down the center and divide it into two sections. Twist the first section into a low bun just behind your ear and pin or tie it in place, then repeat on the other side. Leave the front smooth, or pull out two small strands to soften the part line.
Splitting long hair into two buns spreads the weight, so this feels lighter than one large bun. The style keeps hair off the neck and suits warm days and casual events. It works on straight, wavy, and curly hair, and curly hair needs fewer pins because the texture grips itself.
Try this: Make both ponytails first and check them in a mirror for matching height before you twist either bun.
Difficulty: Easy | Cost: $ | Time: 6 minutes
19. Quick Half-Up Mini Knot for Long Hair

Take the top section of hair from above your ears to the crown, twist it, and wrap it into a small knot or mini bun. Pin it or secure it with a small elastic, and leave the rest of your long hair loose down your back. The small knot adds height at the crown while the loose length keeps the overall look relaxed.
This is a fast fix for front hair that will not settle, because only the top section needs attention. It suits wavy and straight hair, and it pairs well with curtain style front pieces. For seasonal versions of half up long styles, see the fall hairstyle ideas for long hair roundup.
Try this: Twist the section away from your face on both sides before you wrap it. Even twist direction keeps the mini knot balanced.
Difficulty: Easy | Cost: $ | Time: 3 minutes
20. Overnight Braid Waves with No Heat
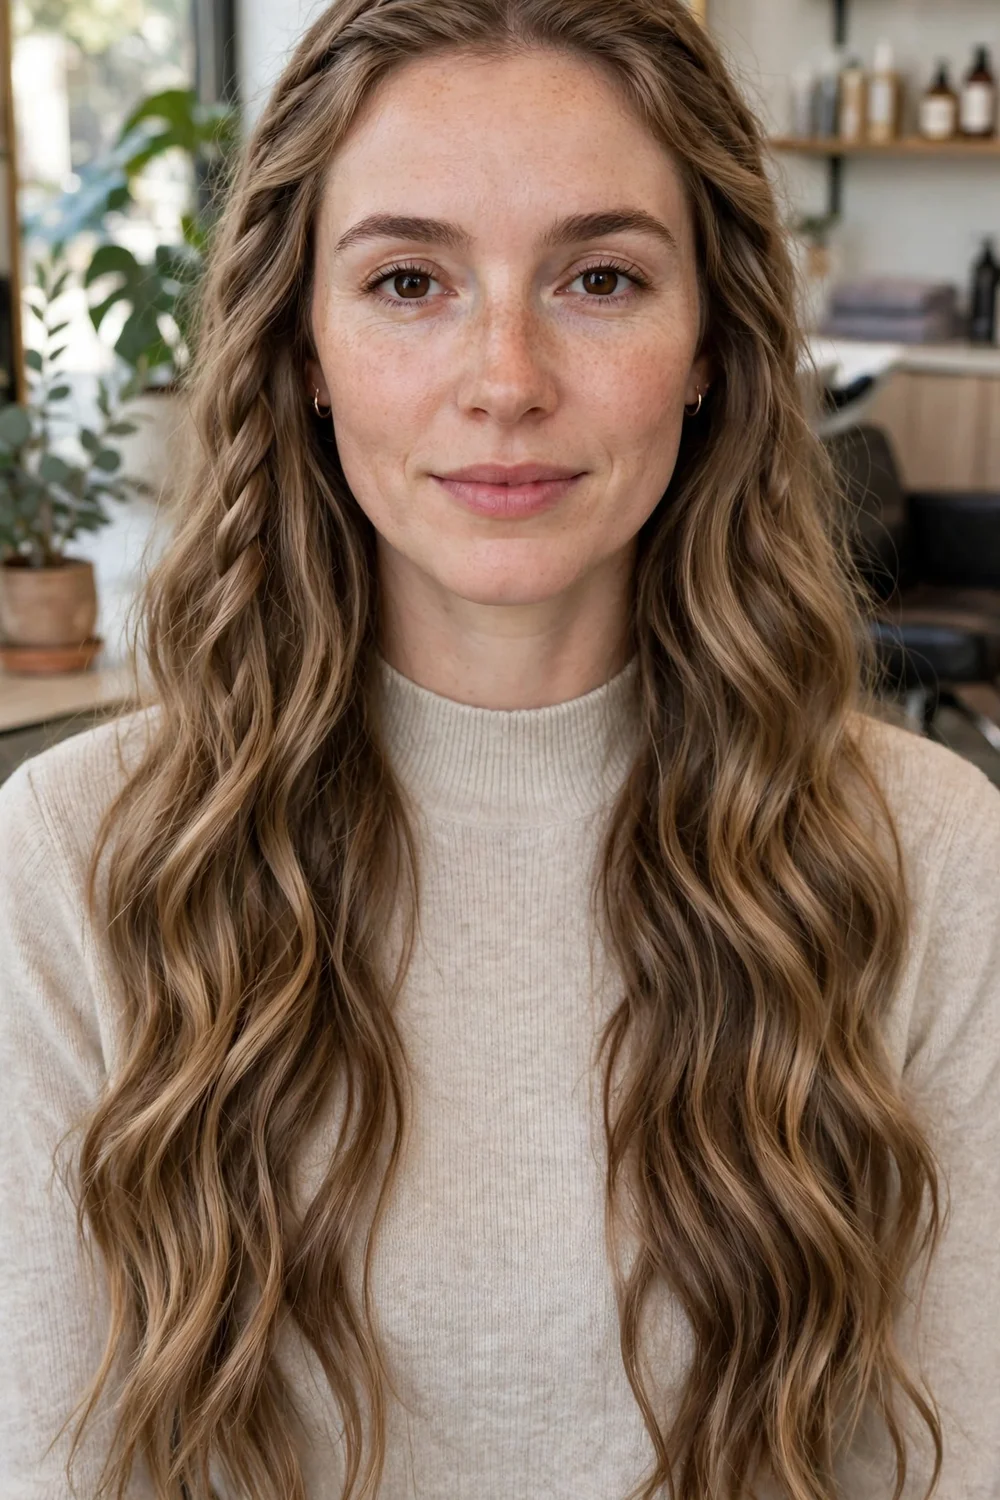
In the evening, divide slightly damp hair into one braid for loose waves or two braids for smaller, more defined waves. Sleep with the braids in, then undo them in the morning and separate the waves with your fingers only. Do not brush, because brushing turns the waves into frizz and removes the pattern you waited for.
This is the simplest wave method on this list, with no heat, no tools beyond elastics, and no morning styling time. It suits straight and wavy hair that does not hold a curling iron curl for long. Use soft elastics at the ends so you do not leave a hard crease in the last inches.
Try this: Braid when your hair is about eighty percent dry. Hair that is too wet sets weak waves, and hair that is fully dry sets almost none.
Difficulty: Easy | Cost: $ | Time: 5 minutes in the evening
21. Straight Center-Part Style with Serum Finish
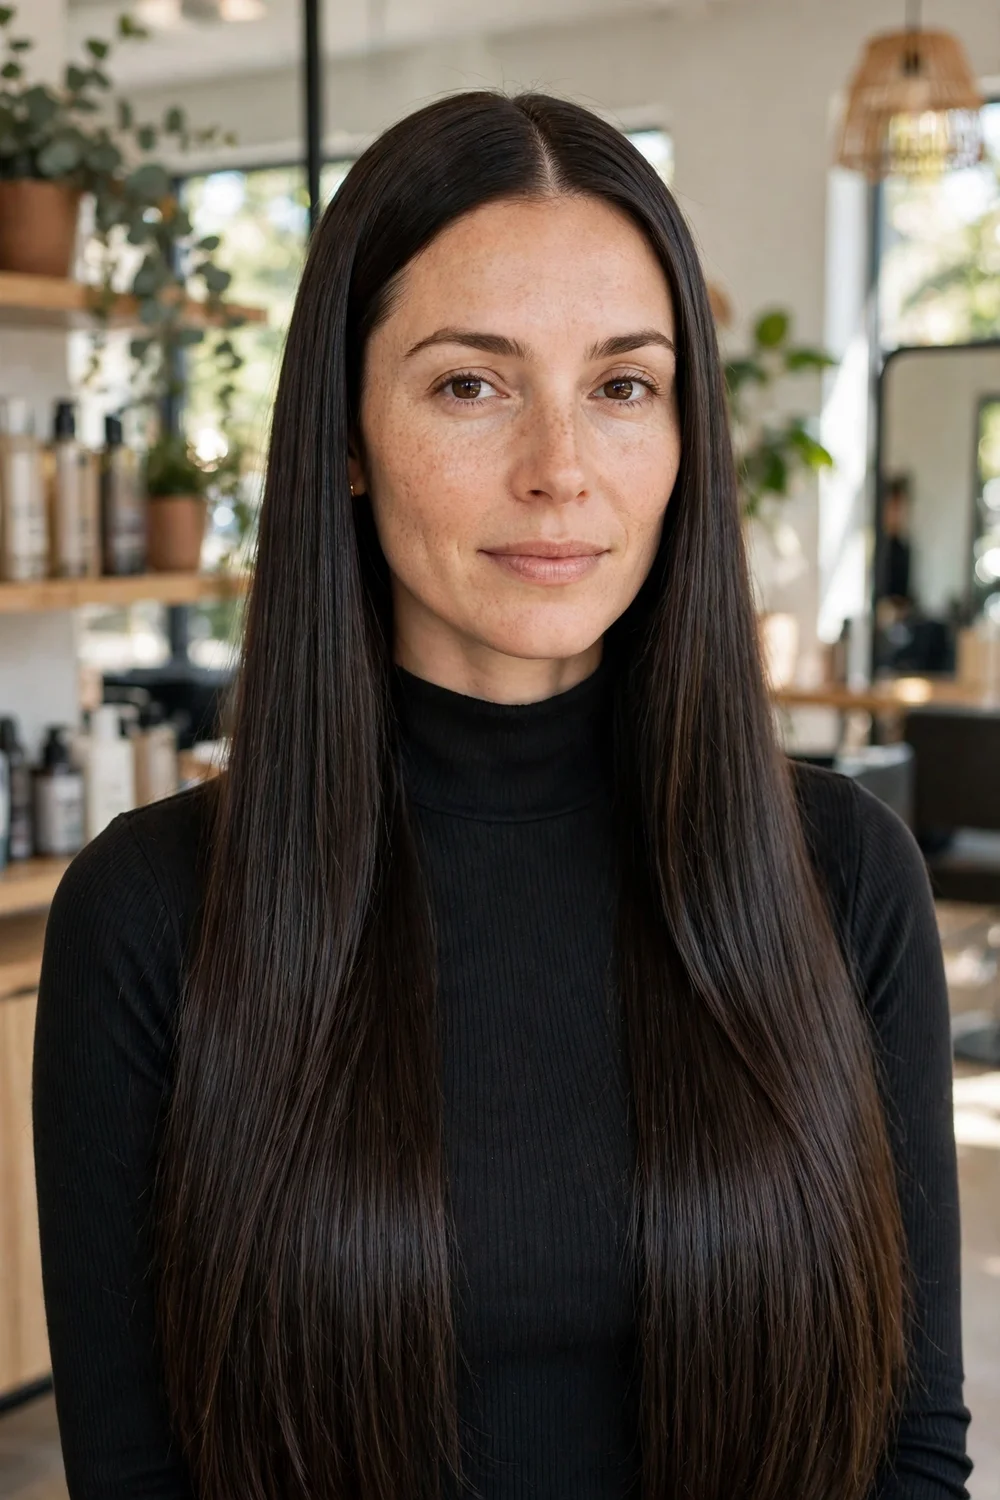
Make a clean center part with the end of a comb, then smooth a small amount of serum from the mid lengths to the ends. If you use heat, run a flat iron over small sections once, starting near the roots and moving down in one slow pass. If you skip heat, brush the lengths smooth and let the part carry the neat finish.
The center part gives long, loose hair a clear shape on days when you wear it fully down. It suits straight hair and blow dried wavy hair, and it shows length and condition more than any up style here. Blonde readers can compare down styles in the hairstyles for long blonde hair collection.
Try this: Apply serum after styling, not before a flat iron, unless the product is labeled as a heat protectant. The two products do different jobs.
Difficulty: Easy | Cost: $ | Time: 6 minutes
22. Deep Side Part with Air-Dried Waves
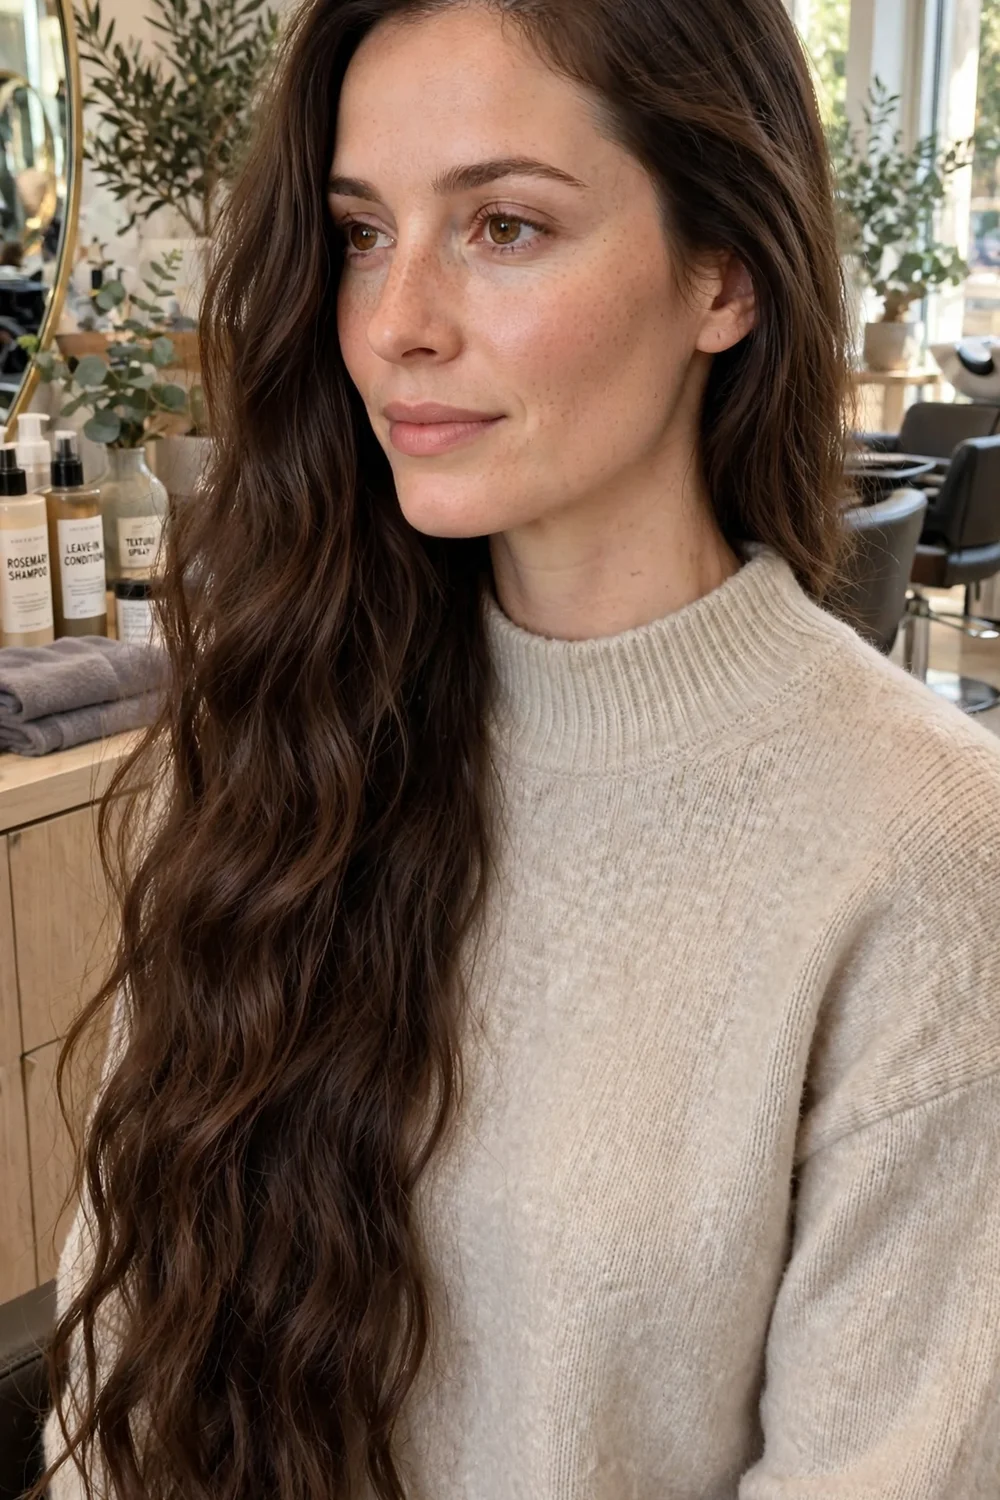
While your hair is still damp, part it deeply on one side, about above the outer corner of your eyebrow, and tuck the smaller side behind your ear. Scrunch the lengths gently with your hands and let everything air dry without touching it. Once dry, flip the larger side over the part for extra lift at the root.
Changing the part is the fastest change on this list, because it needs no elastic, pin, or clip. A deep side part adds volume at the front and suits wavy and curly hair worn down. It also works as a reset on days when your usual center part looks flat.
Try this: Set the part while the hair is damp, not dry. A part set on dry hair drifts back to its usual place within an hour.
Difficulty: Easy | Cost: $ | Time: 2 minutes
23. Scarf-Tied Low Ponytail for Bad Hair Days

Gather your hair into a low ponytail and secure it with an elastic first, then tie a soft, narrow scarf around the base in a simple knot or bow. Let the scarf ends fall alongside the ponytail. The elastic does the holding work, so the scarf never needs to be tied tightly enough to slip or pull.
The scarf covers a plain elastic, adds color near your face, and hides second day roots at the base of the ponytail. Choose a smooth fabric such as satin, which slides less against hair than rough cotton. This style suits straight, wavy, and curly ponytails at any height, though low placement is the most forgiving.
Try this: Always use an elastic under the scarf. A scarf tied alone on smooth long hair will work loose, usually within the first hour.
Difficulty: Easy | Cost: $ | Time: 3 minutes
24. Padded Headband Push-Back for Long Hair
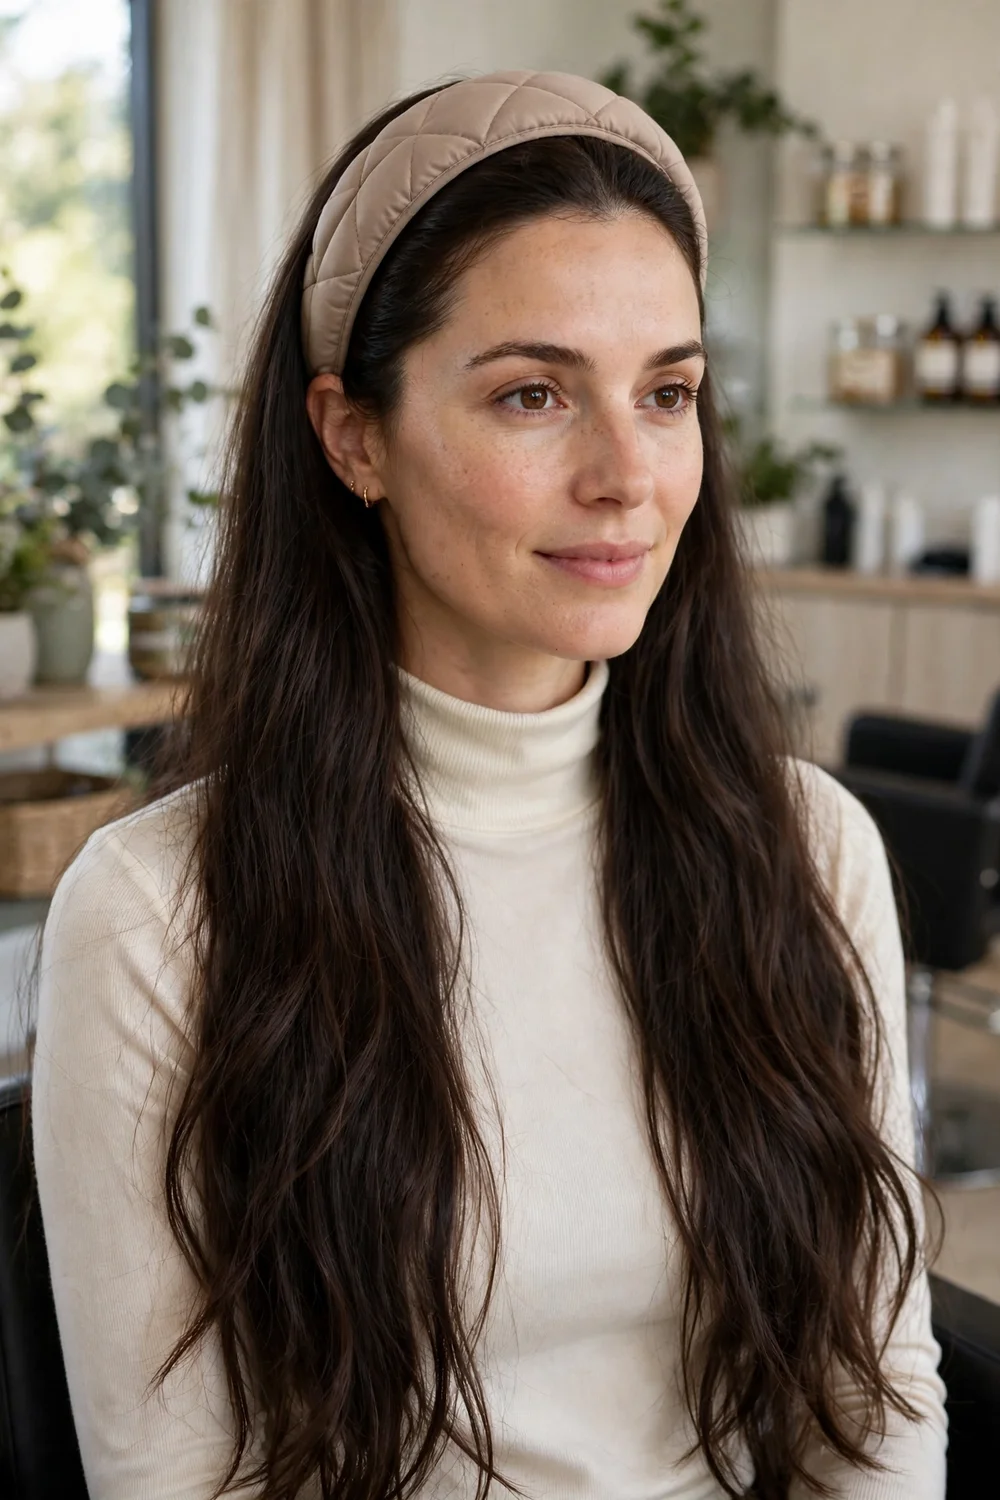
Brush your hair back from your forehead, place a wide or padded headband about an inch behind your hairline, and push it back slightly to settle it. Leave all of your length loose down your back, and pull a small amount of hair forward over the sides of the band if you want a softer line at the ears.
A headband holds front hair and baby hairs in place with no pins and no tension at the scalp. It suits school, work from home, and days when loose hair keeps falling into your face. Satin and velvet bands grip better than smooth plastic on straight hair, and wider bands spread pressure so they stay comfortable longer.
Try this: If headbands give you a headache, place the band further back and choose a padded style. Padding spreads the pressure over a wider area.
Difficulty: Easy | Cost: $ | Time: 1 minute
25. Curly Pineapple Updo for Long Curls

Flip your head forward, gather your curls loosely at the very top of your head, and secure them once with a soft, wide elastic or a scrunchie, keeping the loop loose. Sit up and let the curls fall forward and to the sides like the leaves of a pineapple. Do not brush or separate the curls before gathering, because the clumps hold the shape.
Originally used to protect curls during sleep, the pineapple also works as a daytime up style for long curly hair that feels too warm on the neck. The loose base keeps curl volume and avoids the dent a tight ponytail leaves in curls. Use a fabric covered elastic, because plain rubber catches on curls when you remove it.
Try this: Gather the hair with your hands open and fingers spread. A brush or tight fingers will pull the front curls flat and break up the pattern.
Difficulty: Easy | Cost: $ | Time: 2 minutes
26. Two-Strand Twist Crown Half-Up

Take a section along one side of your part, split it into two strands, and twist them around each other as you move back, adding a little hair from below as you go. Repeat on the other side, then join both twists at the back with a small elastic or pins and leave the remaining length loose.
The twists sit like a soft crown and keep front hair contained without a full braid. This suits wavy and curly hair, where the twist pattern stays visible and grips well. On straight hair, work with smaller sections and pin the join flat so the crown holds its line.
Try this: Twist both sides in the same direction and with similar tension. Mismatched tension is what makes one side sit higher than the other.
Difficulty: Easy | Cost: $ | Time: 5 minutes
| Style group | Ideas on this list | Time needed | Tools needed | Hold |
|---|---|---|---|---|
| Clip and headband fixes | Claw clip twist, half-up claw clip, headband push-back | 1 to 2 minutes | One clip or one headband | Medium |
| Ponytails | Low ponytail, high ponytail, bubble, knotted, rope twist, braided, pull-through, scarf-tied | 3 to 7 minutes | Elastics, optional scarf | High |
| Buns | Messy top bun, sleek low bun, low double buns, pineapple updo | 2 to 6 minutes | Elastics, bobby pins | Medium to high |
| Half up styles | Twisted half-up, half-up mini knot, twist crown half-up | 3 to 5 minutes | Pins or small elastics | Medium |
| Braids | Three-strand back braid, side braid, fishtail, French braid, double Dutch braids | 4 to 10 minutes | Brush, small elastics | High |
| Worn down | Overnight braid waves, straight center part, deep side part | 2 to 6 minutes, plus overnight for waves | Comb, serum, elastics for the overnight braid | Low to medium |
Frequently Asked Questions
What is the easiest hairstyle for long hair?
The claw clip twist and the headband push-back are the easiest hairstyles for long hair on this list. Each takes about one minute, needs a single tool, and requires no braiding or pinning skill. Gather and twist the hair, secure it with a large claw clip, or push a padded headband back from your hairline and leave the length loose.
How can I style long hair in five minutes or less?
Choose a ponytail, a messy top bun, a half up claw clip style, or a simple three strand braid. All four take five minutes or less once you have practiced them twice. Keep a brush, soft elastics, bobby pins, and a claw clip together in one place so you do not spend the five minutes looking for tools.
Which simple hairstyle for long hair lasts the longest?
Braided styles last the longest. A French braid, double Dutch braids, and a braided ponytail hold for a full day because the hair is woven and anchored at several points. Ponytails with two elastics at the base and low buns pinned at four points are the next longest lasting options.
How do I style long hair without heat?
Use clip, braid, bun, and ponytail styles, which need no heat at all. For waves without heat, braid slightly damp hair in the evening and undo the braids in the morning, then separate the waves with your fingers only. A deep side part set on damp hair also adds lift and shape with no heat.
Why does my bun or ponytail slip out of long hair?
Long hair is heavy, and a single elastic or clip often cannot hold that weight for a full day. Use two elastics at the base of a ponytail, choose a large claw clip with long teeth for twists, and cross bobby pins in an X shape for buns. Starting with dry hair also helps, because damp hair loosens as it dries.
What basic tools do I need for simple long hairstyles?
You need a brush, soft fabric covered elastics in two sizes, bobby pins, one large claw clip, and one small claw clip. A narrow scarf and a padded headband are optional and cover the two accessory styles on this list. No other tools are required for any style here.
Final Thoughts
Pick two or three styles from this list that fit your usual mornings and practice each one twice on a quiet evening, when there is no time pressure. The claw clip twist, one ponytail, and one braid cover most days between them: hair fully up, hair contained, and hair held for a long active day. Once those three feel automatic, add a half up style and the overnight braid, and you will have a full week of simple hairstyles for long hair that each take minutes and use the same small set of tools.

