

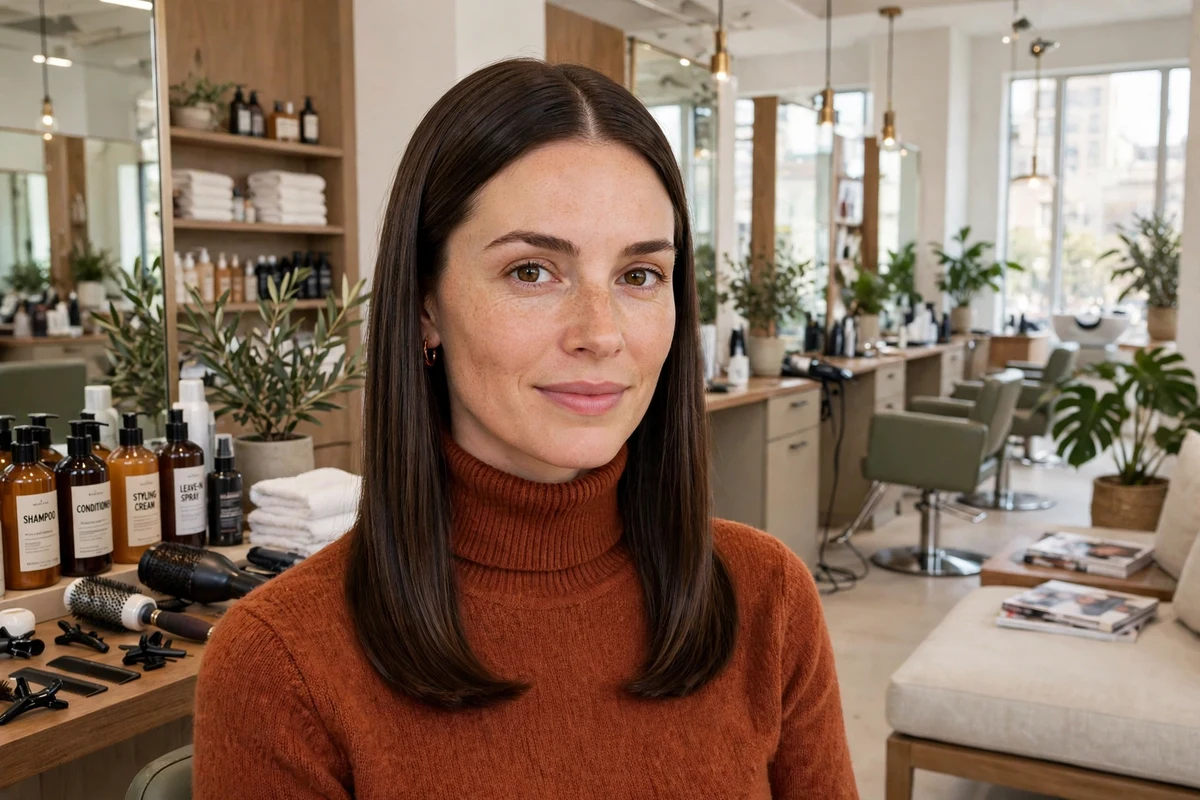
Shoulder length hair is the length I point people to when they want a real change without a big commitment. It is long enough for a ponytail, a bun, and most braids, and short enough to dry fast and hold a shape through the day. If you are growing out a bob or cutting back from long hair, this is the length where both directions feel manageable.
Below are 26 shoulder length hairstyles, pulled from what top-ranking guides actually show and filled out with two practical updos those guides missed. Every idea notes who it suits, how much daily work it asks for, and what the salon side usually involves, so you can narrow the list to two or three options before you book.
Key Takeaways
- Shoulder length means the ends sit between the top of the shoulders and the collarbone, and curly hair should be judged at its dry length.
- Lobs and blunt cuts give fine hair a fuller edge, while layered, shag, and wolf shapes remove weight from thick hair.
- Bangs change the front of this length more than any other add-on: curtain and wispy fringes are the lowest upkeep options.
- Waves, a blowout, and a deep side part are styling changes, so you can try them on your current cut before you book a new one.
- Most shoulder length cuts need a trim every 6 to 8 weeks, and fringe trims every 3 to 6 weeks if you add bangs.
1. Classic Lob
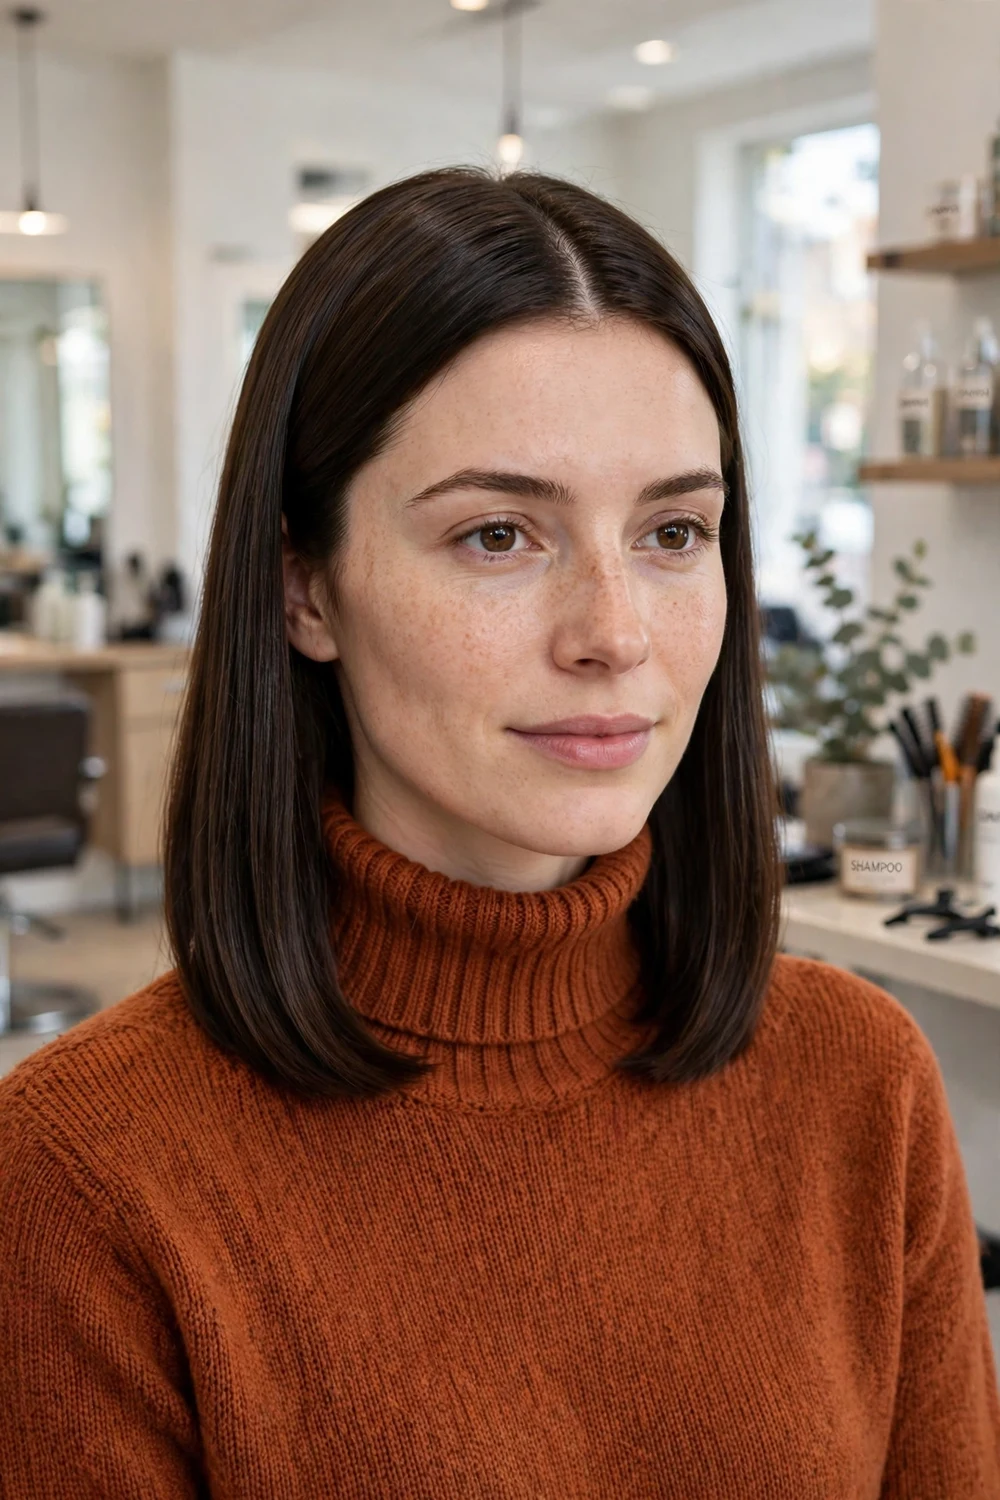
The classic lob ends right at the collarbone, with clean ends and very light layering through the last inch. That length keeps enough weight for the hair to sit flat at the sides, while the collarbone line gives you a ponytail on busy days.
Ask your stylist to keep the back and front at the same length, with a center or soft side part. Straight hair shows the shape best, and wavy hair gets a gentle bend at the ends without extra work.
Try this: Blow-dry with a paddle brush and tuck one side behind your ear to check the length on both sides before you leave the salon.
Difficulty: Easy · Cost: $$
2. Blunt Shoulder Cut
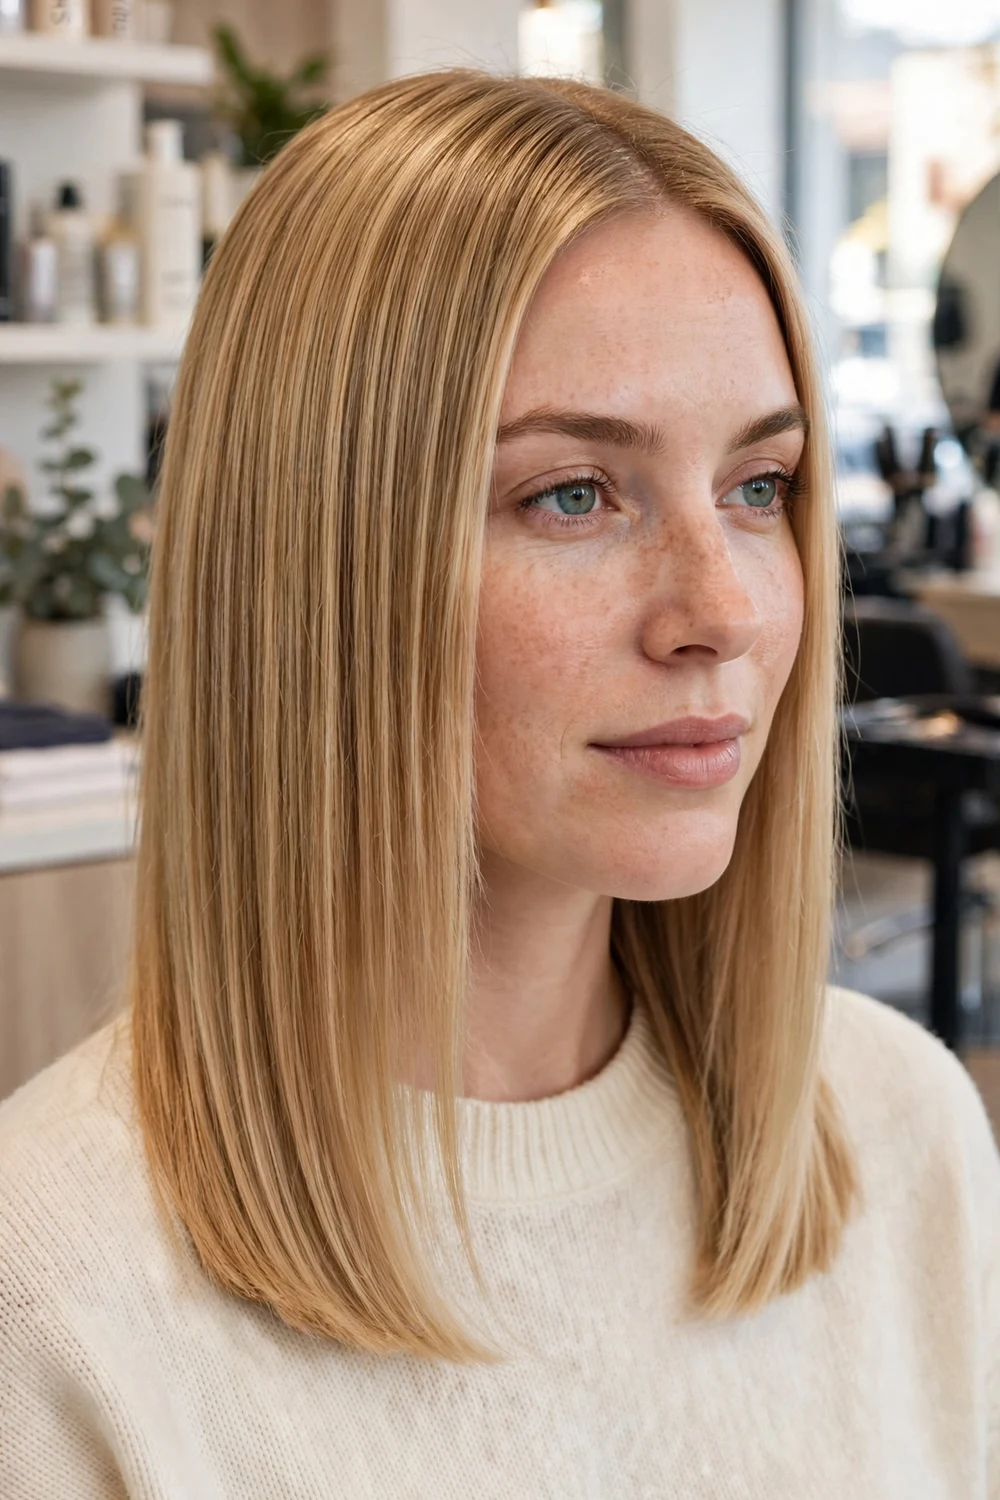
A blunt shoulder cut is cut straight across with no layers, so every strand ends on the same line. That solid edge makes fine hair look thicker at the bottom, and it pairs well with the shapes in our medium blunt hairstyle ideas guide.
Wear it smooth with a flat iron on medium heat and a heat protectant spray first. If your hair is thick, ask for a small amount of weight removed from inside the cut so the ends still look solid and the shape stays easy to dry.
Try this: Run a pea-size amount of smoothing cream through the ends only, so the roots stay lifted.
Difficulty: Easy · Cost: $$
3. Layered Lob
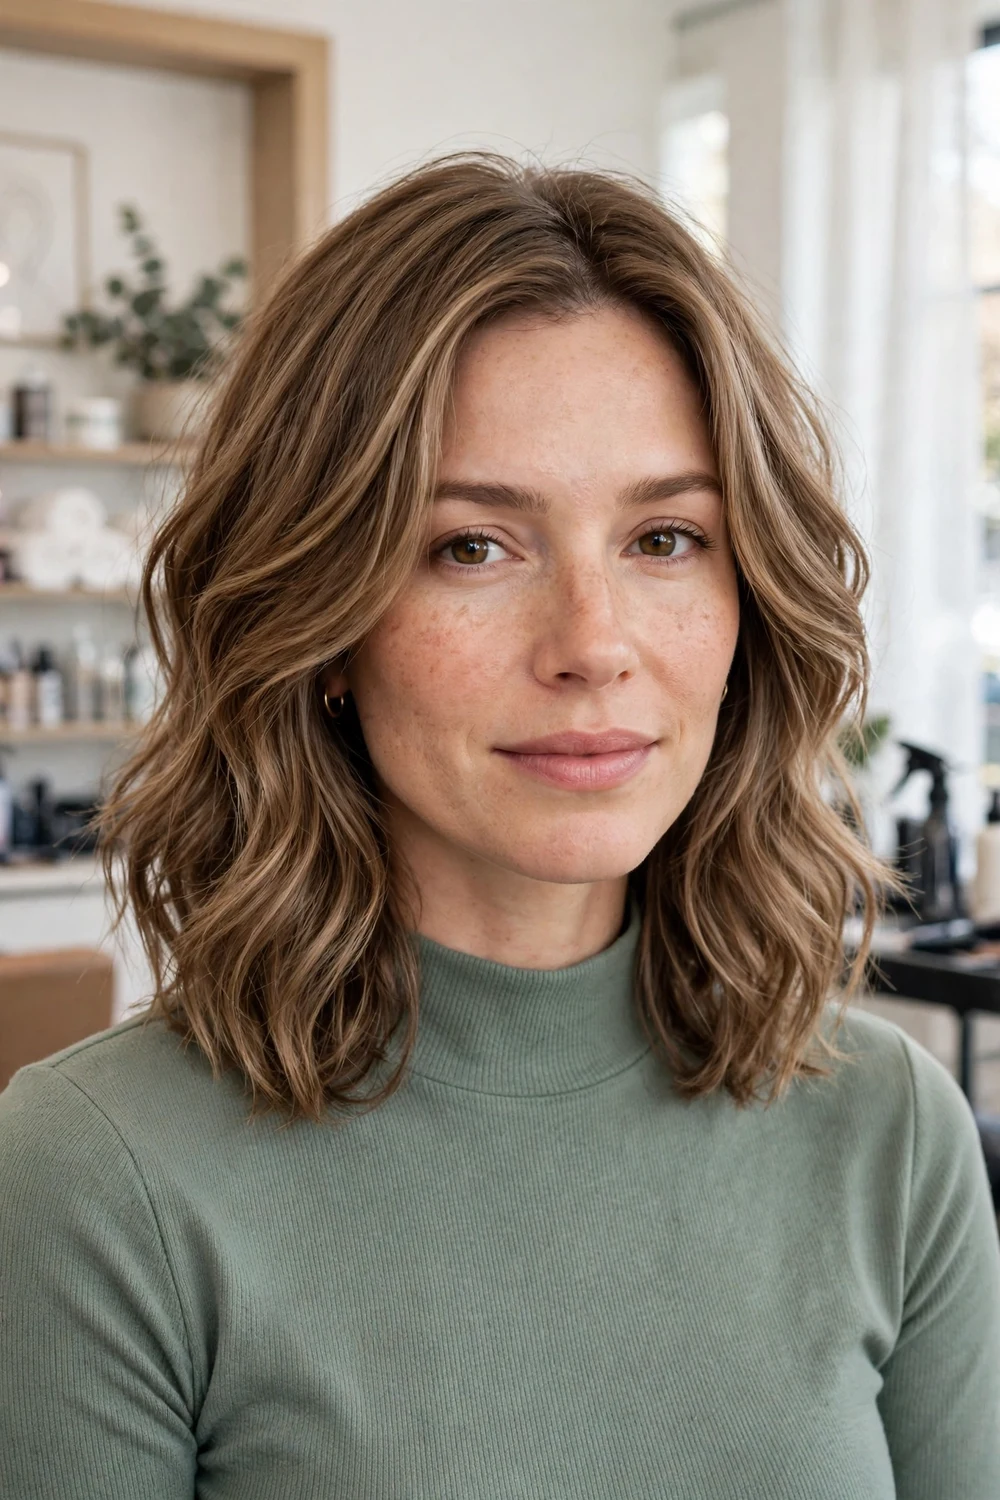
The layered lob keeps the collarbone length of a classic lob and adds long layers that start below the chin. The layers let waves fall in separate pieces, so the cut looks lighter around the face and less blocky at the back.
Keep the shortest layer at chin level or lower. Shorter layers on fine hair can make the ends look thin, while longer layers keep the fullness where you want it.
Try this: Scrunch a light mousse into damp hair and air-dry, then break up the waves with your fingers once the hair is fully dry.
Difficulty: Easy · Cost: $$
4. Textured Layers

Textured layers use point cutting and soft internal layers to remove bulk from inside the cut. The outline stays shoulder length, while the inside feels lighter and moves more when you turn your head.
This is a helpful route for thick hair that forms a triangle shape at medium length. Ask for texture through the mid-lengths and ends, and keep the top layer smooth so the finish stays neat for work.
Try this: Dry the hair most of the way with a diffuser on wavy hair, or with a round brush on straight hair, to show the separation in the layers.
Difficulty: Medium · Cost: $$
5. Face-Framing Layers

Face-framing layers start at the cheekbones or chin and step down into the length. They draw attention to the eyes and cheekbones, and they soften a strong jawline without changing the length at the back.
Bring a photo that shows where you want the first layer to land. A first layer at the cheekbone gives a wider look at the cheeks, while a first layer at the chin gives a longer, slimmer look around the face.
Try this: Blow-dry the front pieces away from your face with a round brush for two minutes to set the sweep.
Difficulty: Easy · Cost: $$
6. Shoulder-Length Shag
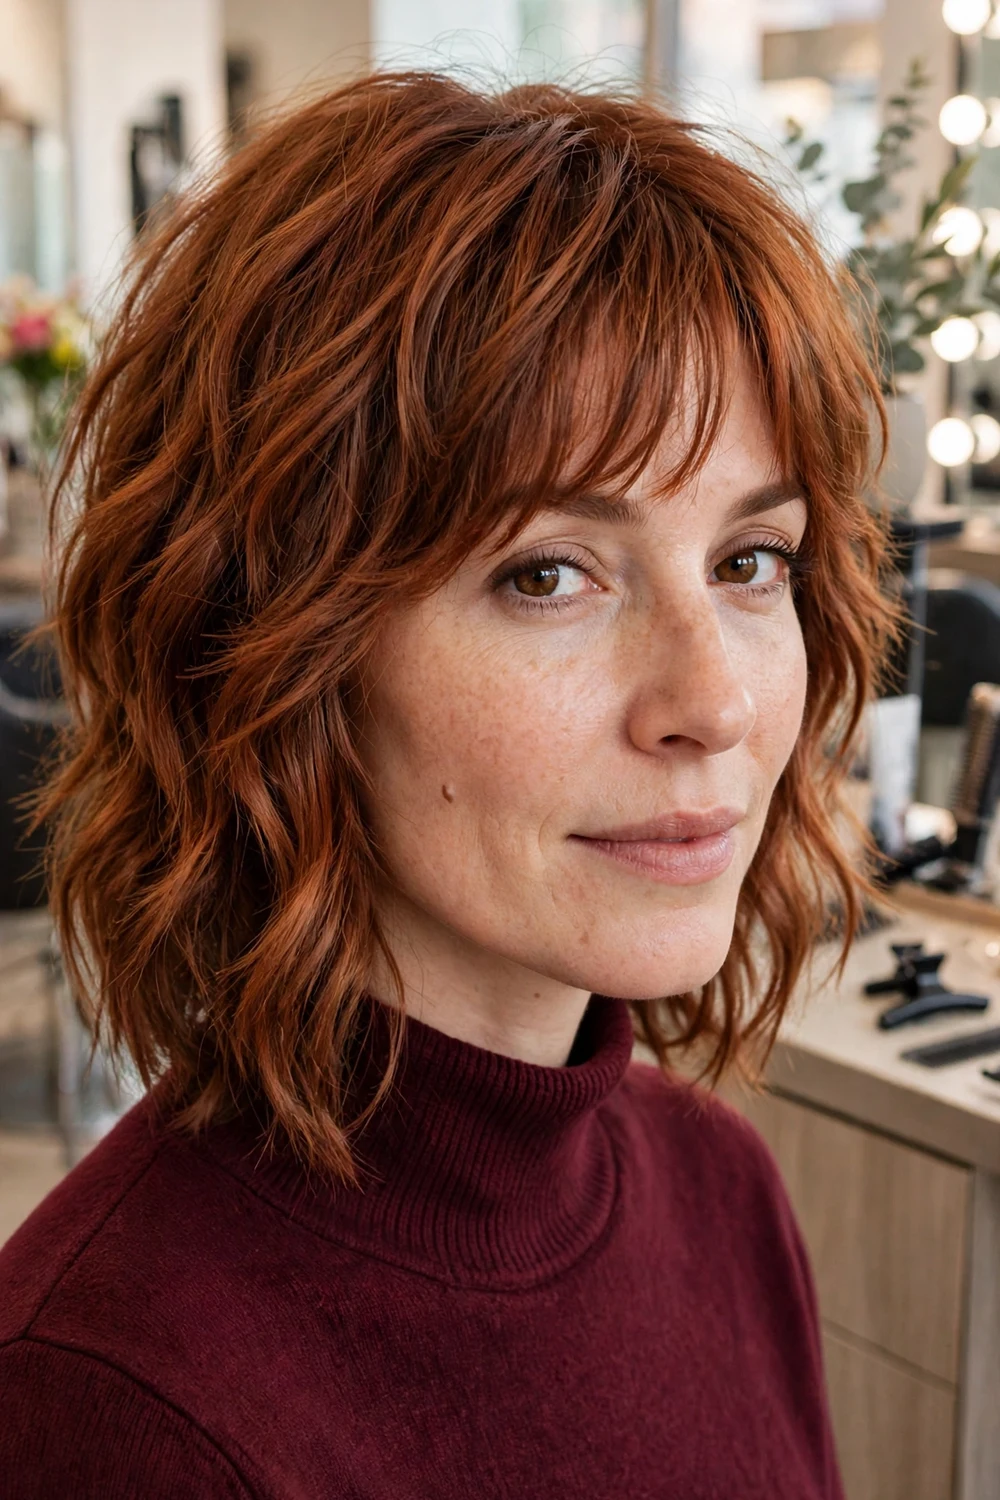
The shoulder-length shag uses choppy layers through the crown and a soft fringe or curtain front. The shorter crown layers add height, and the piecey ends keep the shape from looking too neat.
Wavy hair suits this cut well because the natural bend fills out the layers. Straight hair can wear it too, with a texturizing spray and a quick scrunch after drying. You can compare softer versions in our shaggy lob hairstyles for fine hair roundup.
Try this: Work a small amount of texture paste between your palms and pinch the ends, rather than brushing the layers smooth.
Difficulty: Medium · Cost: $$
7. Wolf Cut
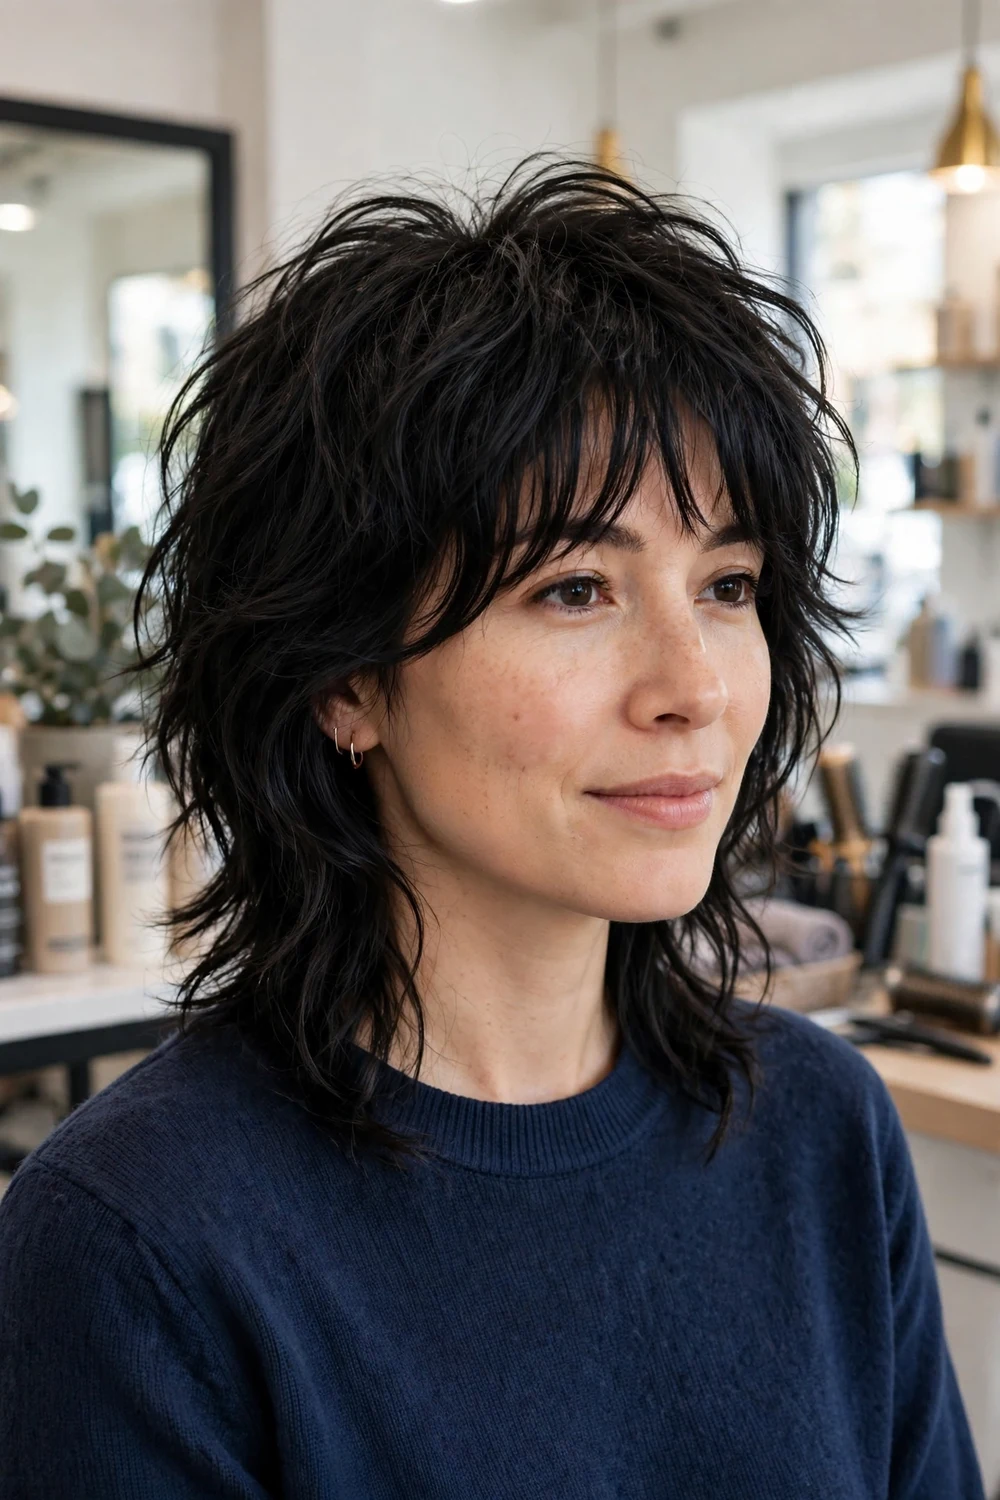
The wolf cut blends shag layers at the crown with longer, thinner lengths at the back. At shoulder length the contrast is softer than on long hair, so you get height on top and a tapered outline without a hard mullet line.
Ask for blended layers with no harsh step between the top and the back. Curly and wavy hair show the shape with the least daily work, while straight hair needs a bend added with a curling iron.
Try this: Diffuse the crown layers for lift, then leave the longer back lengths to dry flatter for contrast.
Difficulty: Medium · Cost: $$$
8. Butterfly Cut

The butterfly cut pairs short face-framing layers with longer layers through the back. At shoulder length, the short layers sit around the chin and flip outward, while the back keeps its full length and weight.
This cut is styled, rather than washed and left alone. A round brush blowout or large rollers show the wing-like flip at the front, so plan a few extra minutes on wash days.
Try this: Set the front layers with two large Velcro rollers while you do your makeup, then release and shake them out.
Difficulty: Medium · Cost: $$
9. Soft Modern Mullet
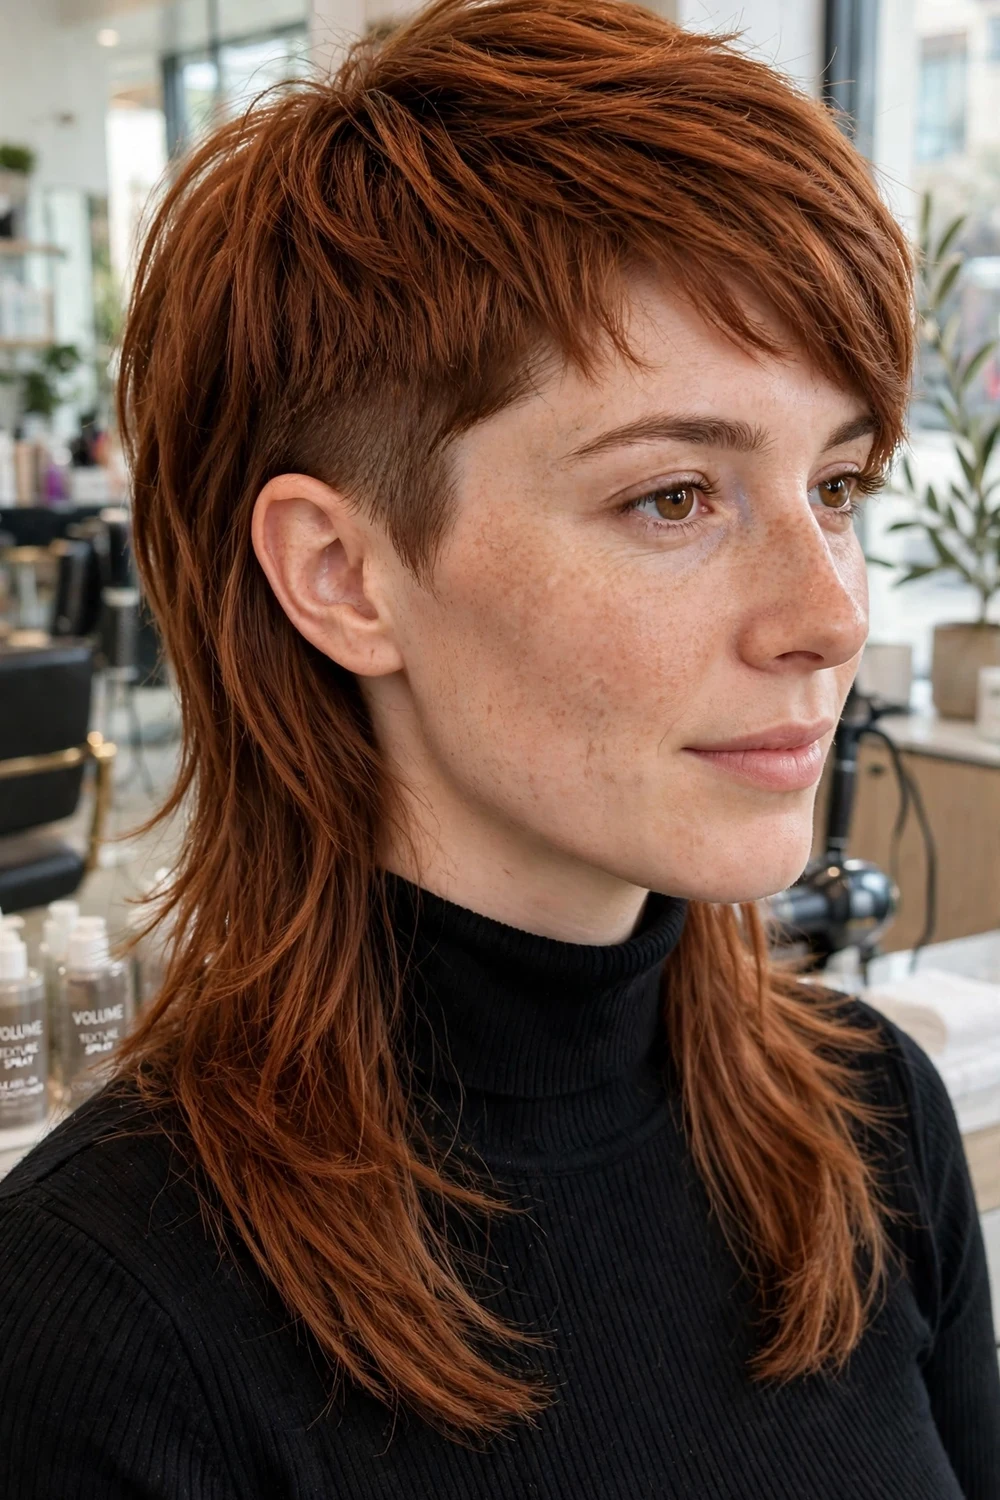
A soft modern mullet keeps the front and sides shorter, with length left at the back to brush the shoulders. The blend is gradual, so the result reads as a layered cut with extra length at the back.
Keep the side sections at cheek or jaw level and ask for a smooth blend into the back. This shape grows out fast at the front, so shorter trim intervals keep it looking planned.
Try this: Style the front sections forward with a small round brush and let the back lengths fall straight.
Difficulty: Hard · Cost: $$
10. Curtain Bangs with Layers

Curtain bangs part in the middle and sweep to each side, blending into layers at the cheekbones. On shoulder length hair they add a clear focal point at the front while the rest of the cut stays simple. Our long hairstyles with curtain bangs guide shows the same fringe on longer lengths.
Ask for the shortest point of the fringe at the bridge of the nose or the cheekbone, depending on how much forehead coverage you want. Longer curtain bangs are easier to pin back on days you want them out of the way.
Try this: Blow-dry the fringe forward first, then sweep each side back with a round brush to get the open curtain shape.
Difficulty: Medium · Cost: $$
11. Wispy Bangs
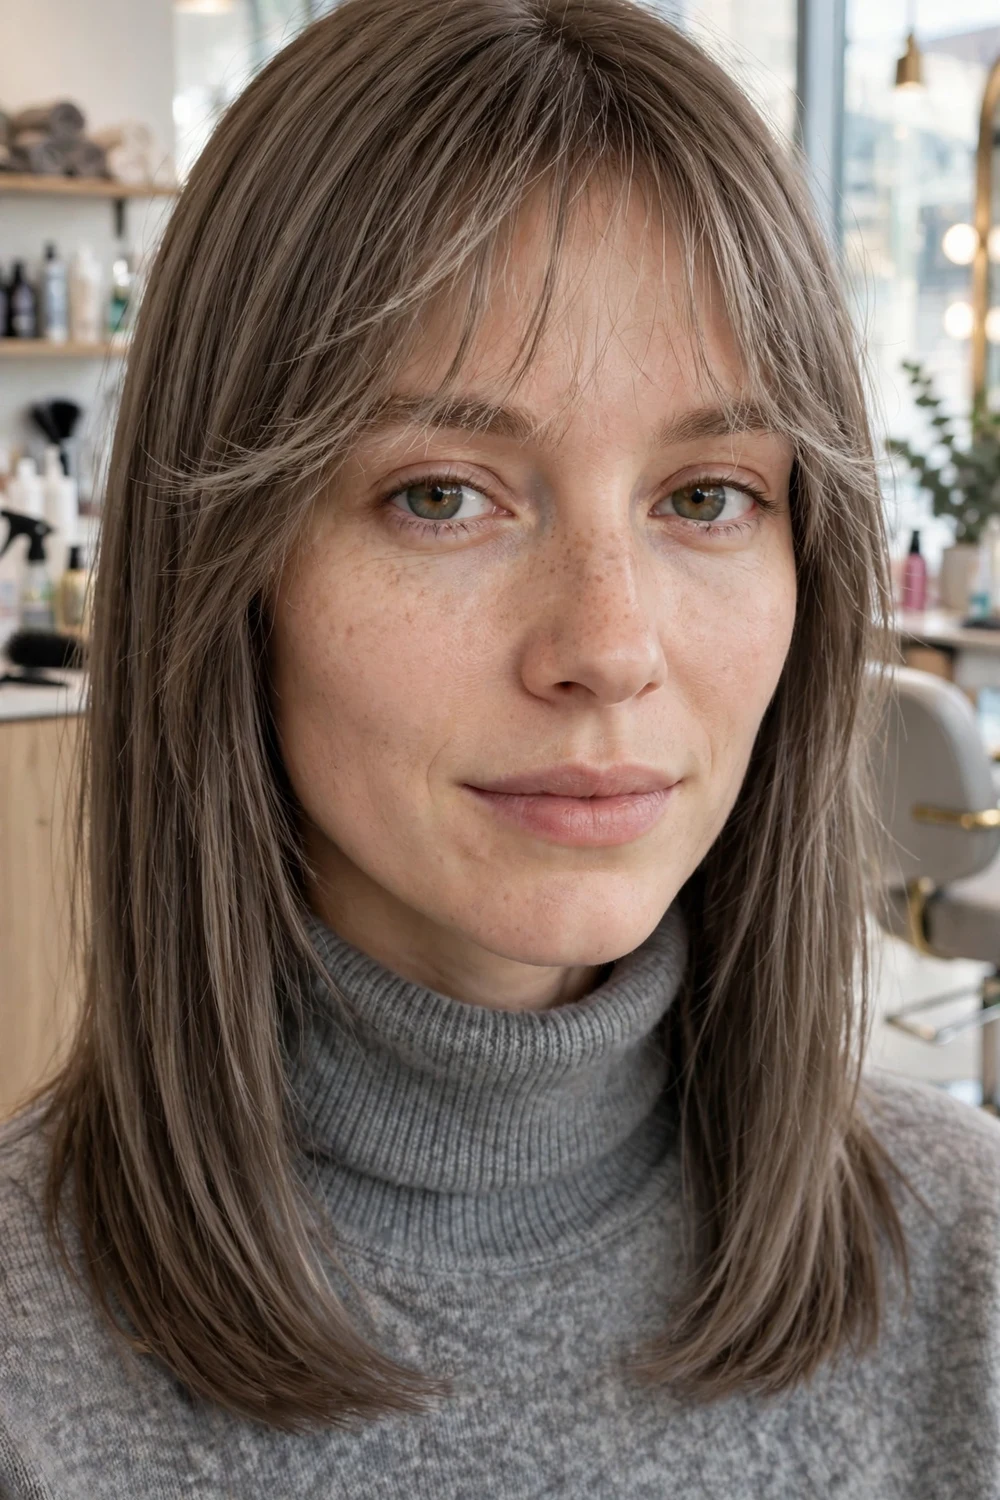
Wispy bangs are cut thin and feathered, so you can see a little forehead through the fringe. They add softness to a shoulder length cut without the weight or the upkeep of a full blunt fringe.
Fine hair suits this fringe well because a heavy fringe can look sparse at the ends. Ask your stylist to cut the bangs dry or to check them dry, since wet bangs shrink as they dry and can end up shorter than planned.
Try this: Mist the bangs with water in the morning and blow-dry them side to side with a small brush to reset the direction.
Difficulty: Easy · Cost: $$
12. Blunt Bangs with a Sleek Cut

Blunt bangs are cut straight across just below the brows and paired with a smooth shoulder length cut. The straight fringe and the straight ends echo each other, which gives the whole style a clean, deliberate line.
This pairing works best on straight or slightly wavy hair. Curly hair can wear it with a fringe cut dry, curl by curl, but the daily styling time goes up, so talk that through with your stylist first.
Try this: Flat iron the fringe on low heat in one slow pass, then let it cool before you touch it so the line stays straight.
Difficulty: Medium · Cost: $$
13. Deep Side Part

A deep side part is a styling change you can make on almost any shoulder length cut. Moving the part an inch or two off center lifts the roots on the heavier side and adds a diagonal line that suits round faces well.
Try the part on both sides at home. Most people have a side where the hair lifts more easily, and that side usually holds volume longer through the day. This part also works well on the cuts in our medium hairstyles with waves collection.
Try this: Flip your part to the opposite side while the hair is damp, then dry the roots in that direction for extra lift.
Difficulty: Easy · Cost: $
14. Angled Long Bob
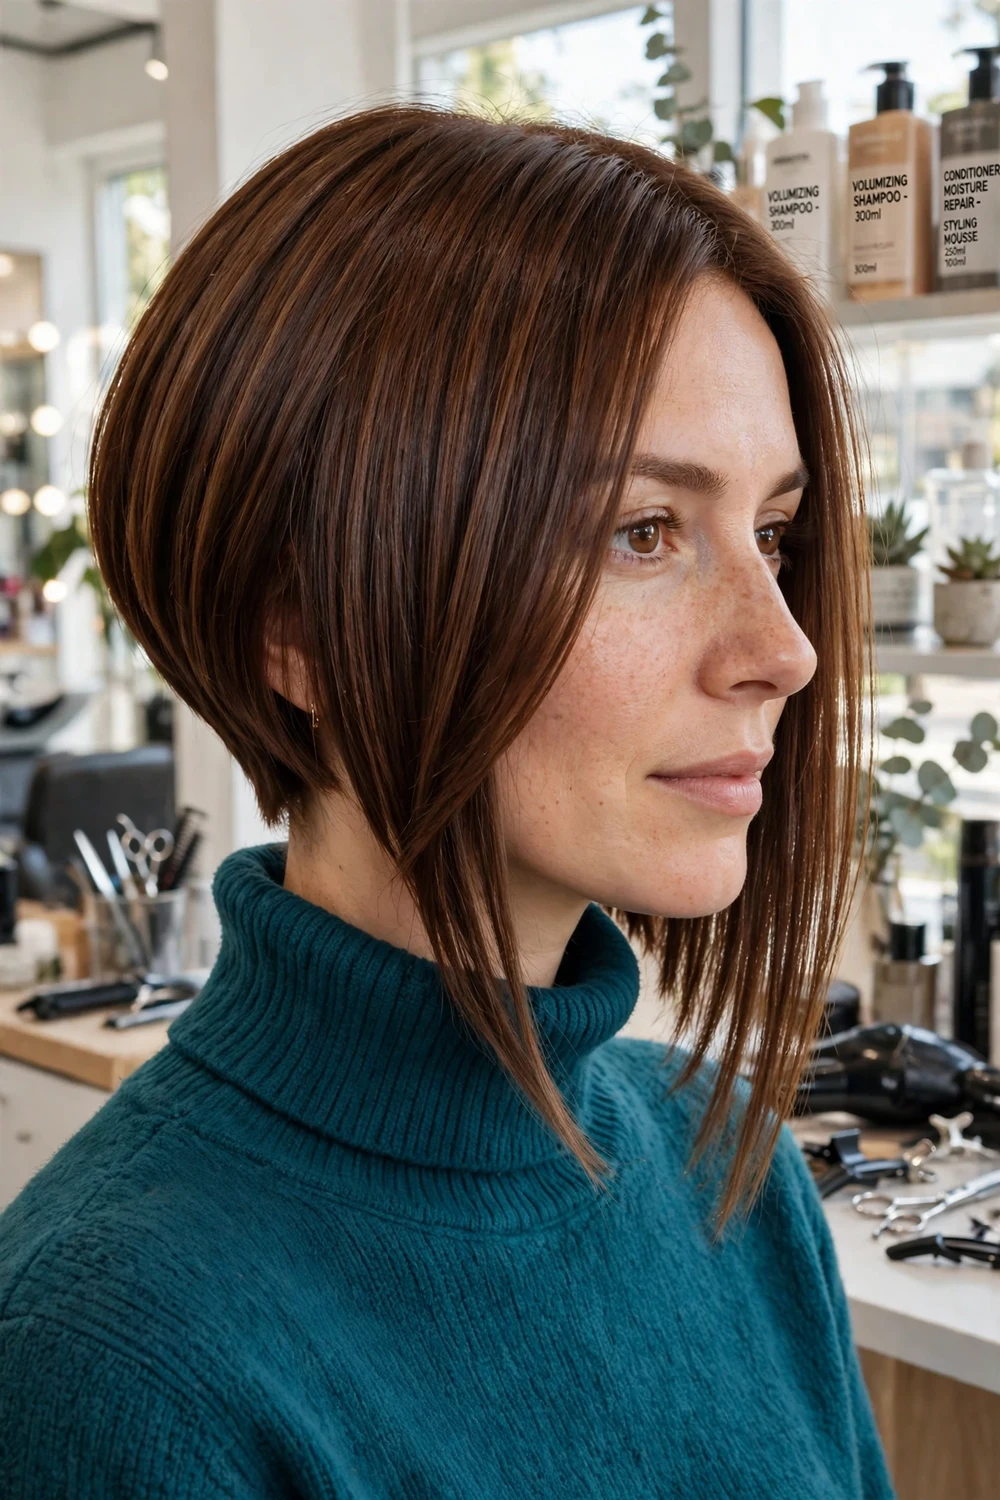
An angled long bob is shorter at the back and longer at the front, with the front pieces reaching the collarbone. The angle draws a diagonal line along the jaw and gives the neck a longer look.
Keep the angle gentle on fine hair. A steep angle removes a lot of hair at the back, which can make thin hair look sparse at the nape. A soft angle keeps the effect and keeps the fullness.
Try this: Blow-dry the back sections under with a round brush and the front sections down and forward to show the angle.
Difficulty: Medium · Cost: $$
15. Asymmetrical Bob

An asymmetrical bob leaves one side longer than the other, usually by one to two inches at shoulder length. The uneven line is the whole point of the cut, so it reads clearly on straight hair and on soft waves.
Decide which side you want longer before the cut, and think about which side you usually tuck or pin. A longer side that you always tuck behind your ear will hide the shape you paid for.
Try this: Wear a deep part on the shorter side so the length difference shows at a glance.
Difficulty: Medium · Cost: $$
16. Beach Waves

Beach waves are loose, uneven waves with straighter ends, worn on a shoulder length cut. The wave pattern starts around eye level, which keeps the roots smooth and the movement through the mid-lengths.
You can make them with a curling wand, a flat iron, or overnight braids on damp hair. Leave the last inch of each section uncurled so the ends stay piecey, and let the waves cool fully before you separate them.
Try this: Scrunch a salt spray into dry waves on day two instead of re-curling, to refresh the texture without more heat.
Difficulty: Easy · Cost: $
17. Bouncy Blowout Waves

Bouncy blowout waves are large, smooth waves made with a round brush or a dryer brush. On shoulder length hair the wave has room to form a full curve, so the finish looks full at the sides and soft at the ends.
Work in sections about as wide as your brush. Dry each section, roll it up while it is warm, and pin it or hold it for a few seconds so the curve sets as it cools.
Try this: Sleep with the hair in a loose top knot to keep some of the bend for the next morning.
Difficulty: Medium · Cost: $
18. Rounded Curly Cut
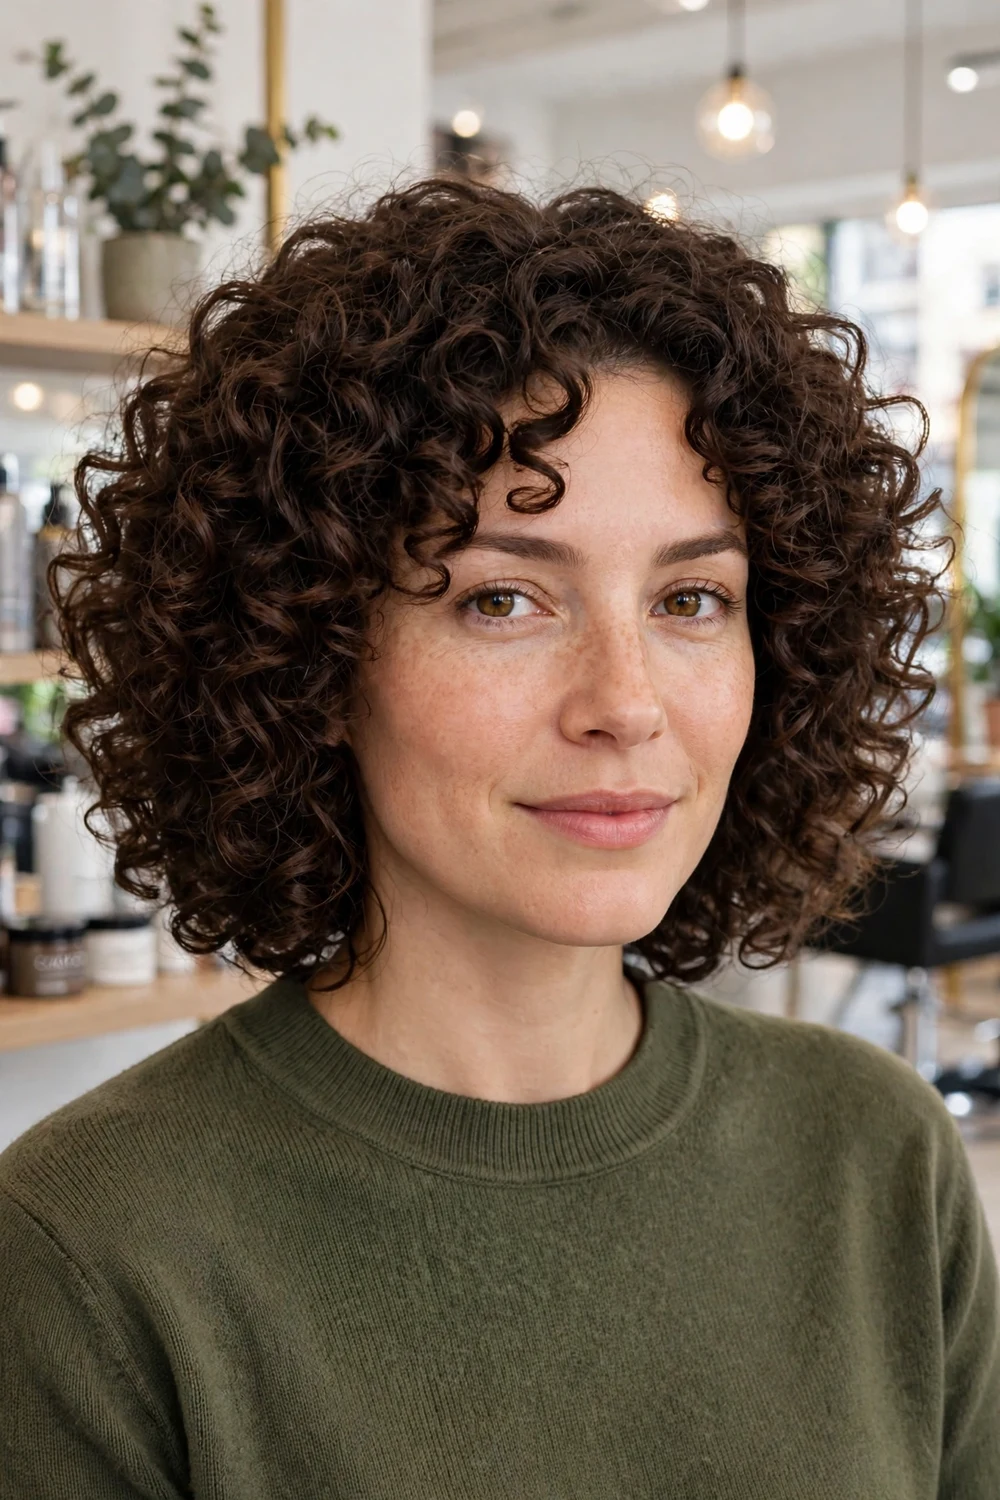
A rounded curly cut shapes the layers so the volume sits around the crown and cheeks, with less bulk at the bottom. That rounded outline solves the triangle shape that one-length curly hair often makes at shoulder length.
Ask for the cut to be done on dry hair, or checked dry, so the stylist can see where each curl lands. Wet curly hair hangs longer, and a wet cut can come up much shorter once the curls spring back.
Try this: Apply leave-in conditioner and curl cream to soaking wet hair, then diffuse or air-dry without touching the curls until they are dry.
Difficulty: Medium · Cost: $$
19. Curly Shag
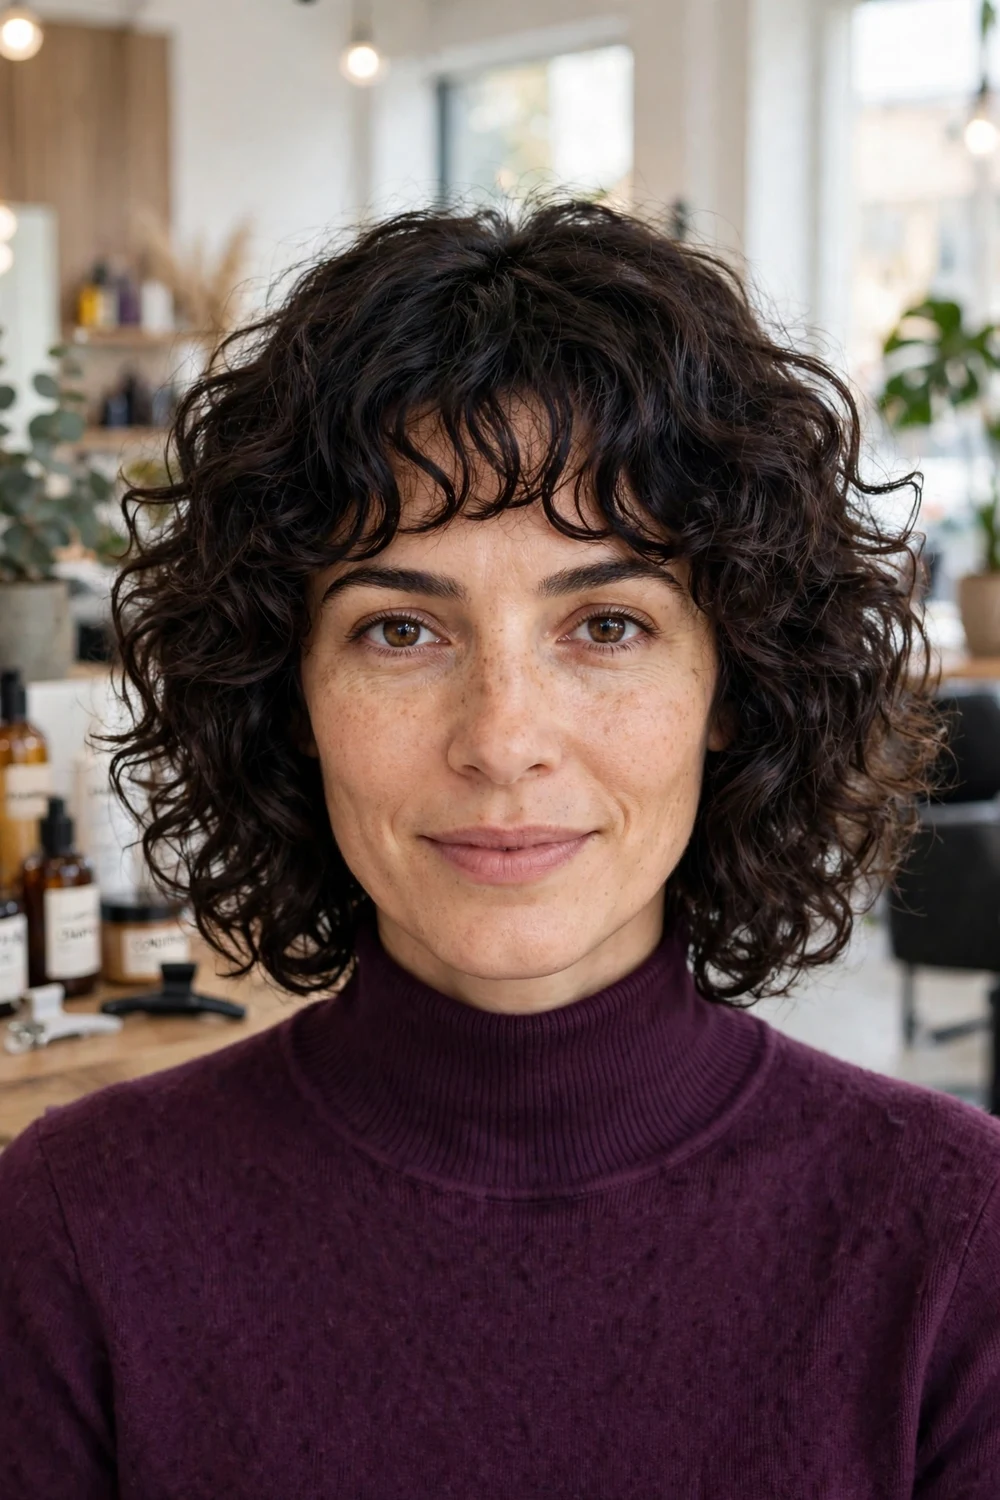
The curly shag uses short internal layers and a curly fringe to lift the top of the cut and reduce weight at the ends. At shoulder length it gives curls room to bounce while the outline stays light.
Ask your stylist to cut the layers curl by curl and to keep the fringe longer than you think you need. Curly fringe shrinks as it dries, and a longer starting point leaves room to adjust at the next visit.
Try this: Refresh day two curls with a water and leave-in mist, scrunching only the sections that have flattened.
Difficulty: Medium · Cost: $$
20. Voluminous Curls

Voluminous curls use smaller, defined curls through the whole head to build width and height at shoulder length. The length is long enough for the curls to stack, and short enough that they keep their spring.
For natural curls, definition comes from product on wet hair and hands-off drying. For a curled finish on straight hair, use a smaller barrel, curl in alternating directions, and brush through once at the end for a softer result.
Try this: Lift the roots with a pick or your fingertips once the curls are fully dry, rather than adding more product.
Difficulty: Medium · Cost: $
21. Sleek Pin-Straight Shoulder Cut

A pin-straight shoulder cut is worn completely smooth, with a center or side part and ends that sit in one clean line. The smooth finish shows the exact length, so regular trims keep the ends looking tidy. See a close match in our sleek straight medium hairstyles for women guide.
Use heat protectant every time you flat iron, and keep the iron moving in one slow pass per section. Two fast passes add more heat and more frizz than one steady pass.
Try this: Finish with a tiny amount of shine serum on the ends only, and keep it away from the roots.
Difficulty: Easy · Cost: $
22. Half-Up Half-Down Style
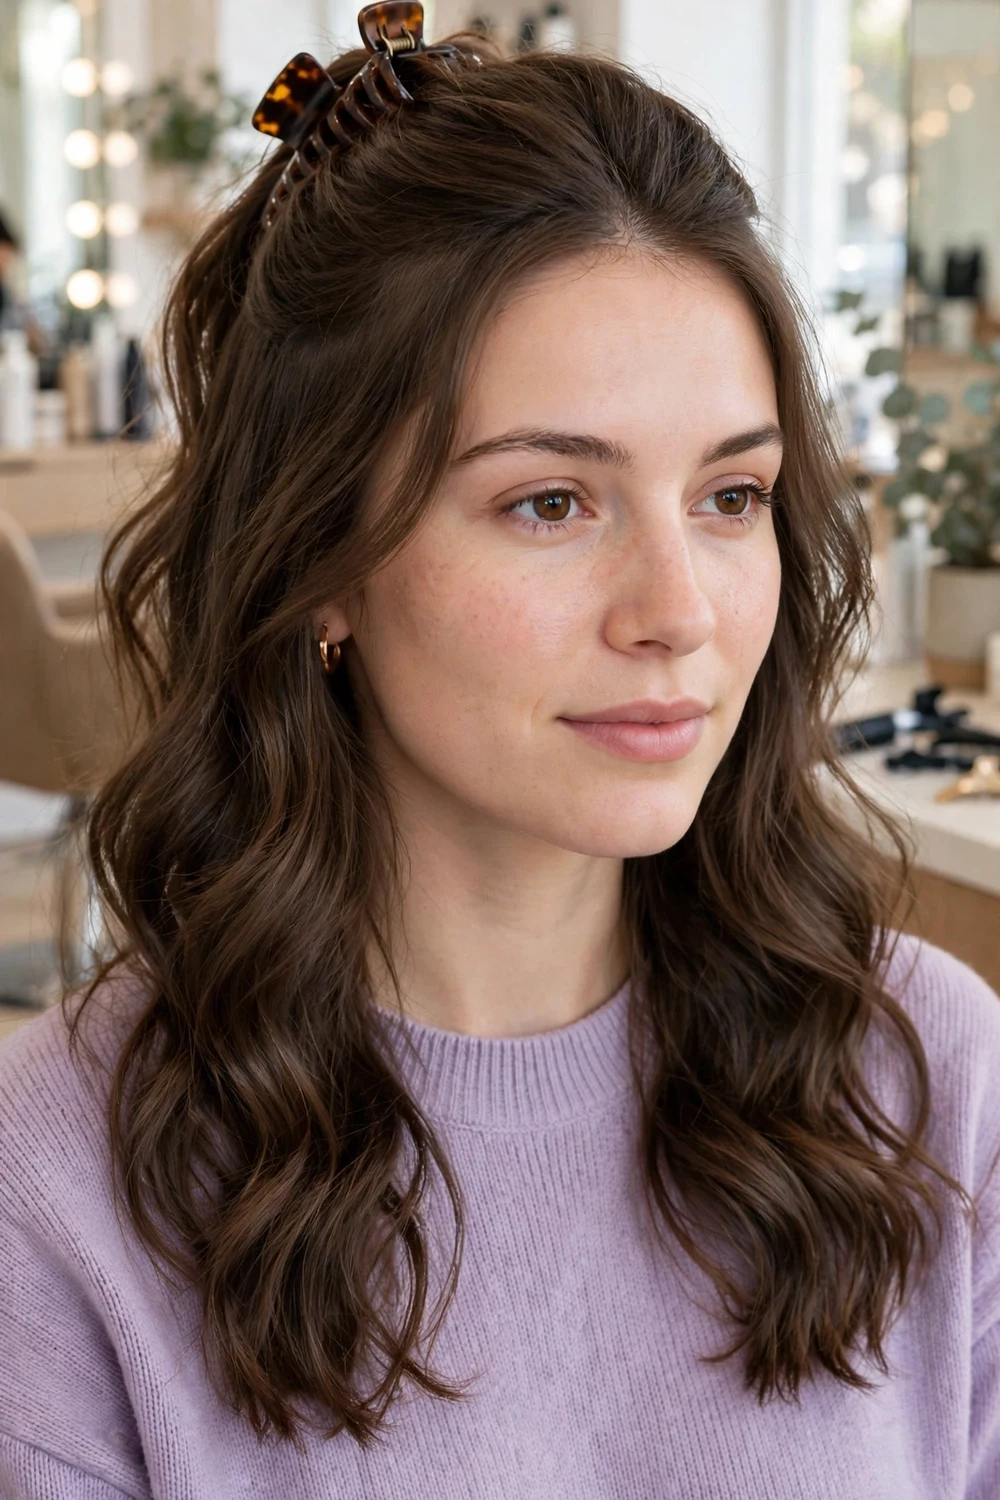
The half-up half-down style lifts the top section of shoulder length hair into a small knot, clip, or ponytail, while the rest falls loose. It clears the hair from the face and still shows the length at the back.
Take the top section from above the ears and keep it loose at the roots so the style does not pull. Curl or wave the loose lengths for events, or leave them straight for a clean daytime version.
Try this: Twist the top section once before you clip it, to add height without backcombing.
Difficulty: Easy · Cost: $
23. Messy Bun with Face Pieces
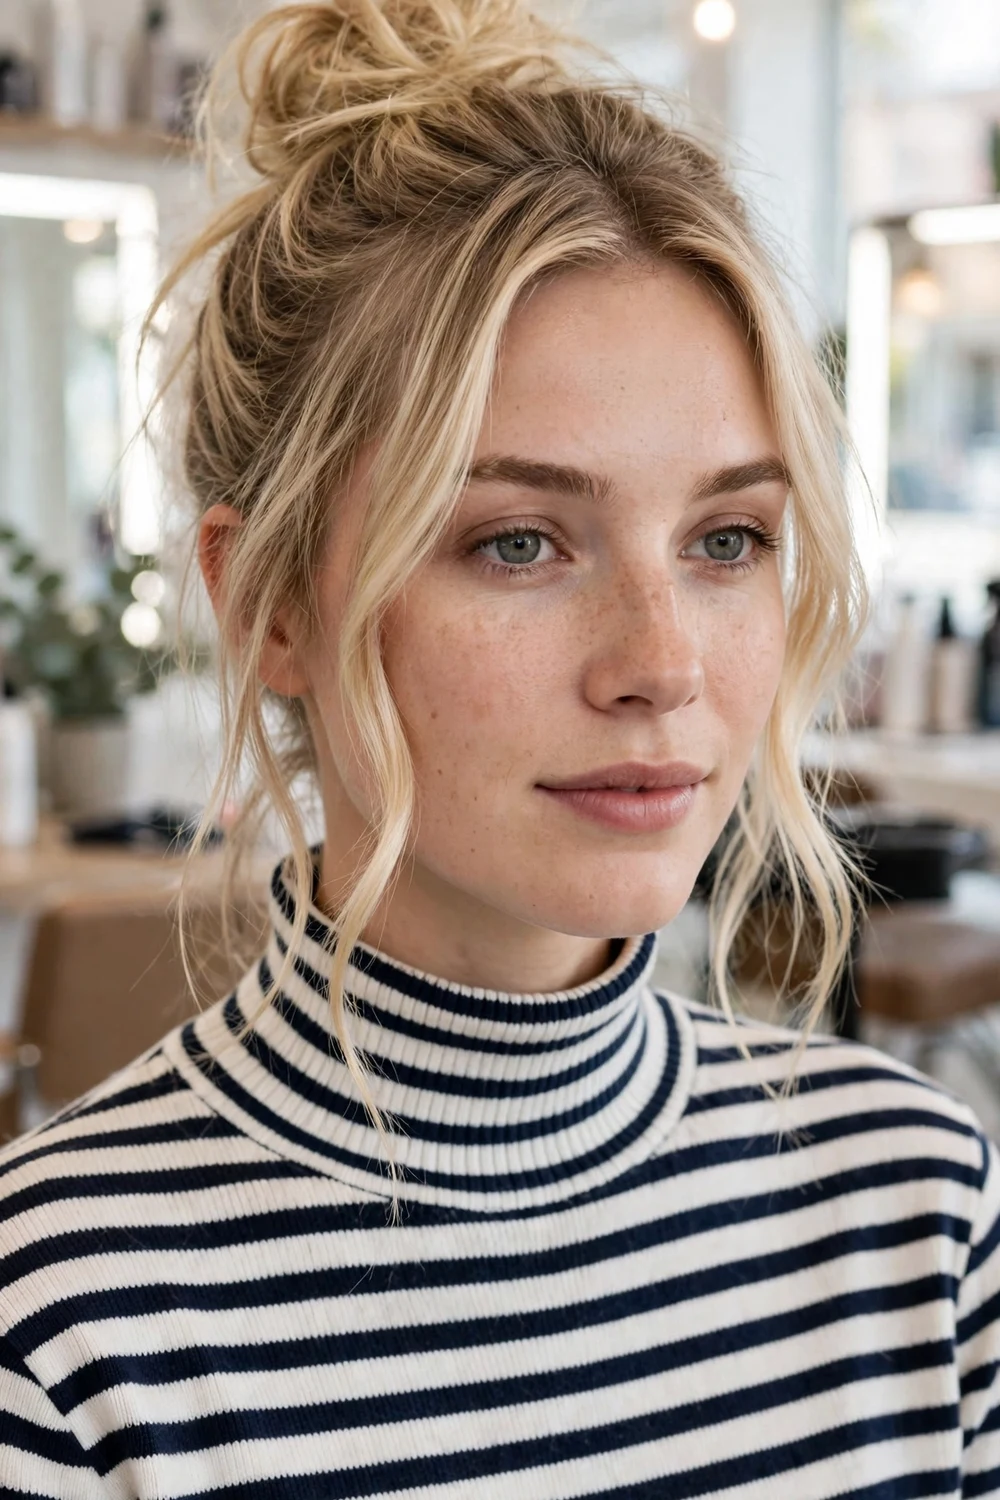
A messy bun works at shoulder length when you gather the hair at the crown or nape and leave two face pieces out. The loose pieces keep the style soft, and the bun holds better on hair that has some texture or a day of wear.
If shorter layers slip out at the back, cross two bobby pins under the bun to hold them. A claw clip can replace the elastic on shorter lengths and often holds with less pulling.
Try this: Mist the face pieces with water and bend them with a curling iron for ten seconds each to frame the face.
Difficulty: Easy · Cost: $
24. Braided Crown

A braided crown braids a section from each side of the head and pins the braids across the top. At shoulder length, two smaller braids meet more easily than one long braid, and the loose lengths underneath keep the style relaxed.
Braid on hair with some grip, such as second-day hair or hair with a light texture spray. Pull gently on the edges of each braid to widen it before you pin it, so the crown looks fuller.
Try this: Pin the ends of the braids under the opposite braid to hide the elastics.
Difficulty: Medium · Cost: $
25. Claw Clip Twist

The claw clip twist gathers shoulder length hair at the back, twists it upward, and clips it so the ends fold over the top of the clip. This updo was missing from the competitor lists, and it is one of the most practical styles at this length because it needs no pins and no elastic.
Choose a medium clip for shoulder length hair. A very large clip can slide on finer hair, while a small clip will not hold thick hair. Twist close to the head and clip through the twist and a layer of hair beneath it for a firm hold.
Try this: Leave the front pieces out before you twist, then clip, for a softer finish around the face.
Difficulty: Easy · Cost: $
26. Low Ponytail with a Wrapped Base

A low ponytail sits at the nape and works at shoulder length even when a high ponytail is still too short. Wrapping a thin section of hair around the elastic hides the band and makes a simple ponytail look finished. Competitor lists covered buns and half-up styles, and left this one out.
Smooth the sides with a brush and a small amount of gel or cream before you secure the elastic. Take the wrapping section from under the ponytail, wrap it two or three times, and pin it underneath where the pin will not show.
Try this: Curl the ponytail lengths in two large sections for a softer finish that still takes under five minutes.
Difficulty: Easy · Cost: $
Shoulder Length Hairstyles at a Glance
Use this table to compare the most booked options by hair type and daily effort before you read the full list again.
| Idea | Best For | Daily Time | Upkeep |
|---|---|---|---|
| Classic Lob | Most face shapes and straight to wavy hair | 5 minutes | Trim every 8 weeks |
| Blunt Shoulder Cut | Fine or thin hair that needs a fuller edge | 5 minutes | Trim every 6 to 8 weeks |
| Layered Lob | Wavy hair and anyone who wants movement | 10 minutes | Trim every 8 weeks |
| Textured Layers | Thick hair that feels heavy at one length | 10 minutes | Trim every 8 weeks |
| Face-Framing Layers | Long and square faces that need softness at the front | 5 minutes | Trim every 8 weeks |
| Shoulder-Length Shag | Wavy hair and a relaxed, lived-in finish | 10 minutes | Trim every 8 to 10 weeks |
| Wolf Cut | Thick or wavy hair and a bolder shape | 15 minutes | Trim every 8 weeks |
| Butterfly Cut | Long layers and a bouncy blowout look | 15 minutes | Trim every 8 weeks |
| Soft Modern Mullet | Straight or wavy hair and an edged shape | 10 minutes | Trim every 6 weeks |
| Curtain Bangs with Layers | Oval and heart faces, and a soft front frame | 10 minutes | Bang trim every 4 to 6 weeks |
| Wispy Bangs | Fine hair and a light, low-commitment fringe | 5 minutes | Bang trim every 4 weeks |
| Blunt Bangs with a Sleek Cut | Straight hair and a sharp, graphic front | 10 minutes | Bang trim every 3 to 4 weeks |
Frequently Asked Questions
What length counts as shoulder length hair?
Shoulder length hair ends between the top of the shoulders and the collarbone. Straight hair shows that length exactly, while wavy and curly hair can look shorter when dry, so curly cuts should be checked at their dry length.
Which shoulder length hairstyle suits fine hair best?
Blunt cuts and classic lobs suit fine hair best because the solid ends make the hair look thicker. Light face-framing layers can add movement, but heavy layering through the ends can make fine hair look thinner.
How often does shoulder length hair need a trim?
Most shoulder length cuts need a trim every 6 to 8 weeks to keep the shape and ends tidy. Fringes need shorter intervals, usually every 3 to 6 weeks, and rounded curly cuts can often go 10 to 12 weeks.
Can shoulder length hair go up in a ponytail or bun?
Yes. Shoulder length hair is long enough for a low ponytail, a messy bun, and a claw clip twist. A high ponytail can be harder if you have short layers, so low and mid placements are the reliable options at this length.
Which shoulder length cut needs the least daily styling?
A classic lob, a blunt shoulder cut, and a softly layered cut need the least daily styling because they air-dry into shape. Cuts with blunt bangs, a butterfly shape, or a blowout finish ask for more daily work.
Final Thoughts
Start with your hair type and your morning routine, and the right shoulder length cut usually picks itself. Fine hair does well with blunt edges and lobs, thick hair does well with layers that remove weight, and curly hair does well with shapes cut and checked dry. Pick two or three photos from this list that show your own texture, and bring them to your appointment so you and your stylist are looking at the same target.
If you are still deciding, try the styling-only options first: a deep side part, beach waves, or a claw clip twist can tell you a lot about how you like this length before you commit to a new cut.

