

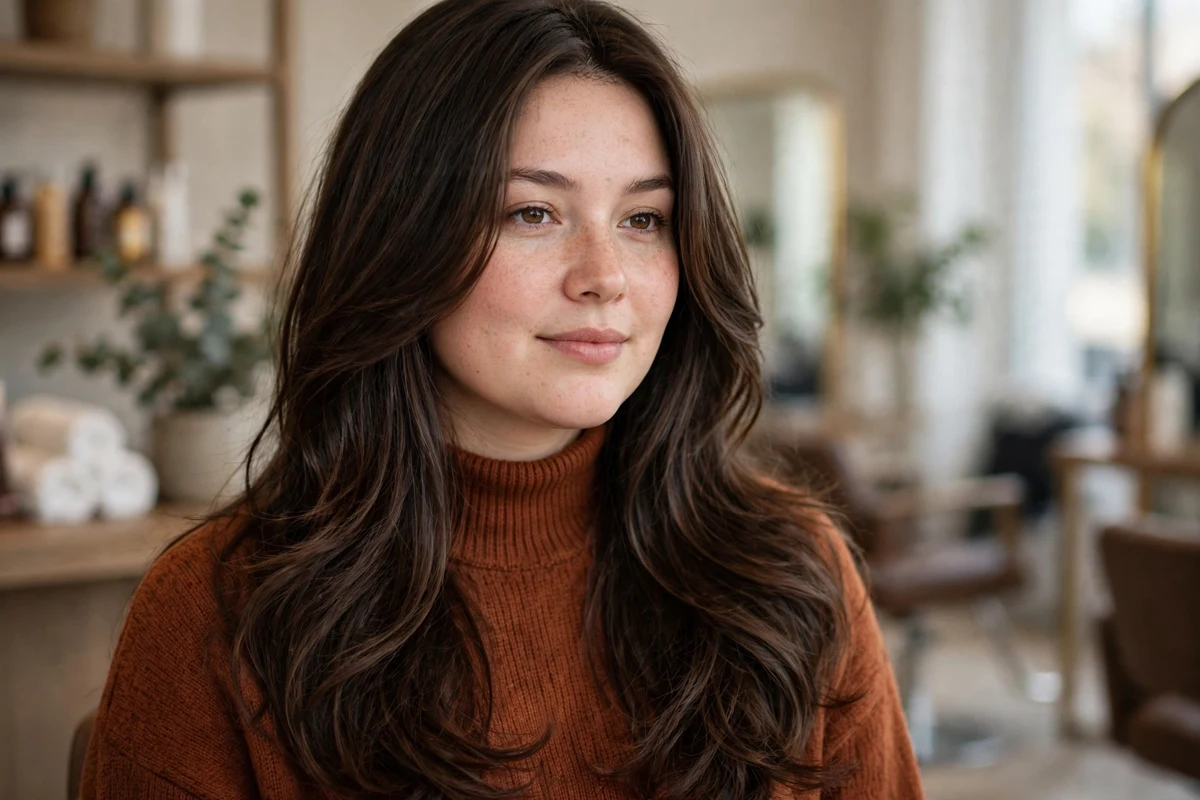
I have always liked my hair long, and I have a round face, so I spent years hearing that the two did not go together. That advice skipped the detail that actually decides it: where the hair sits. Long hair that stops at the cheeks or puffs out beside them does add width. Long hair that runs past the chin, stays slim at the sides, and carries its volume at the crown or down at the ends does the opposite.
Below are 27 long hairstyles for round faces, merged from the top ranking guides on this keyword and checked against each other so no idea repeats. Each one notes where the length falls and where the volume sits, because those two things decide whether a long style flatters a round face. For the all lengths version of this approach, see the hairstyles to slim a round face guide.
Key Takeaways
- Let the length fall past the chin. Hair that ends at the cheeks underlines the widest point of the face.
- Put volume at the crown or below the jaw, and keep the sides slim and close to the head.
- Start layers, waves, and curls below the chin so movement sits low instead of at cheek level.
- Side parts, side-swept fringes, and curtain bangs draw diagonal lines that break up roundness.
- High ponytails, top knots, and braided crowns add height above the face while the lengths stay down.
1. Long Face-Framing Layers Starting Below the Chin
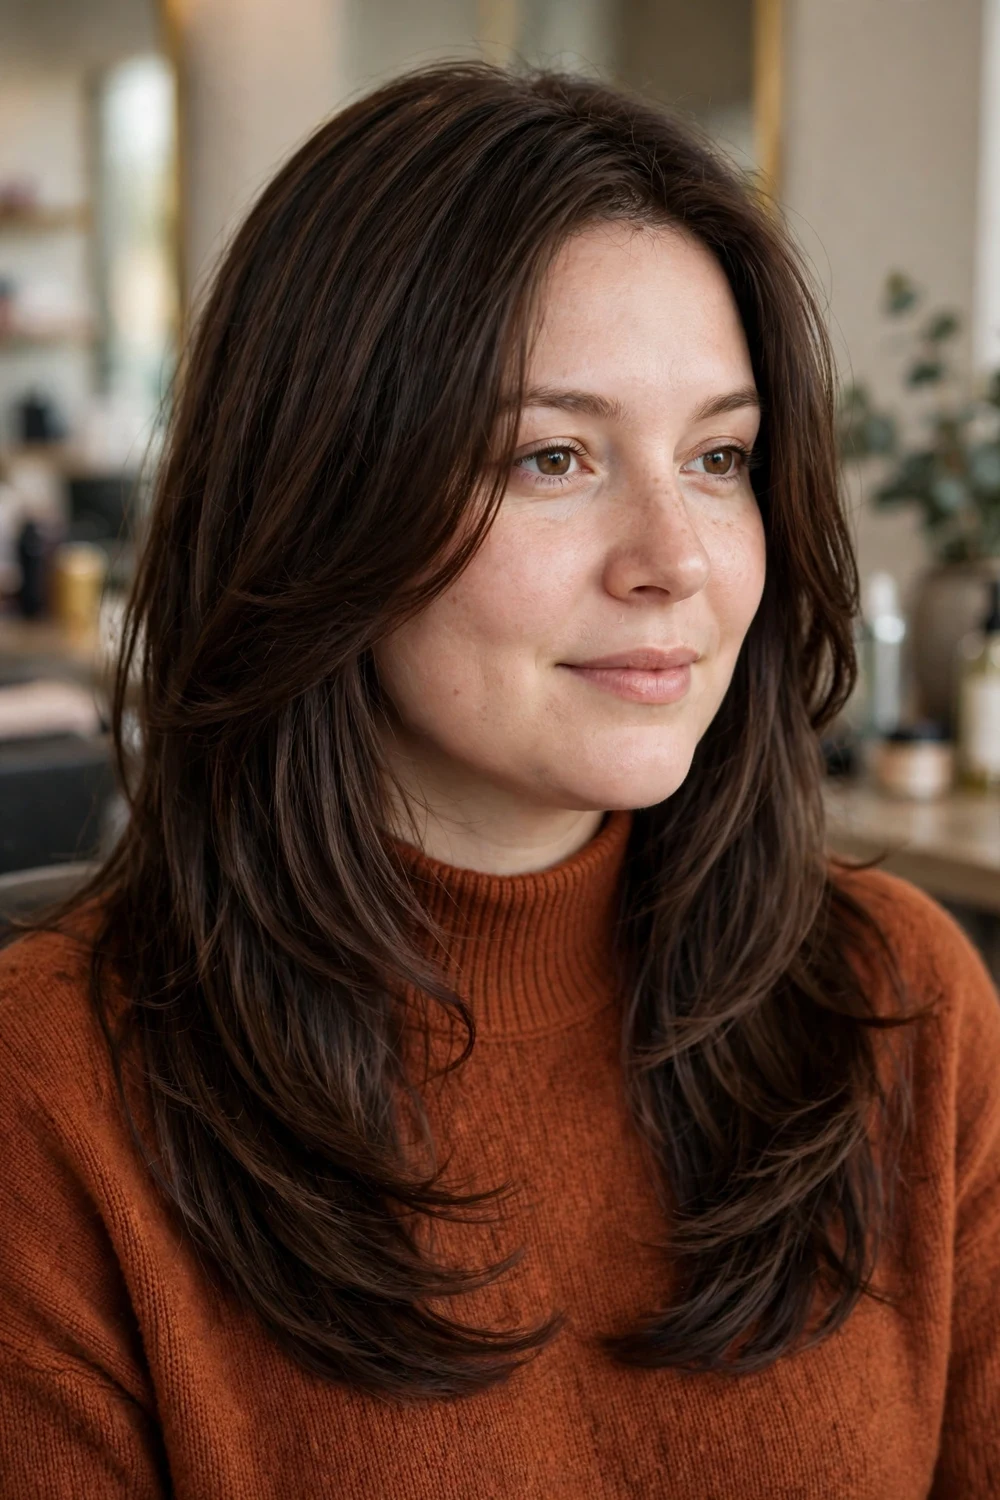
Ask for the shortest front layer to start below the chin, past the widest point of the cheeks. Front pieces that begin there run down alongside the face and pull the eye with them, so the face reads longer than it is.
Keep the layers long and blended through the back as well. Short, choppy layers near the cheeks flip outward and add width exactly where a round face is already fullest, which undoes the point of the cut.
Try this: Take a photo of your current front layers and mark where the shortest piece lands. If it lands on your cheekbone, growing that one piece to chin length is the single change that makes the biggest difference.
Difficulty: Easy · Cost: $$
2. Sleek Straight Hair with a Deep Side Part
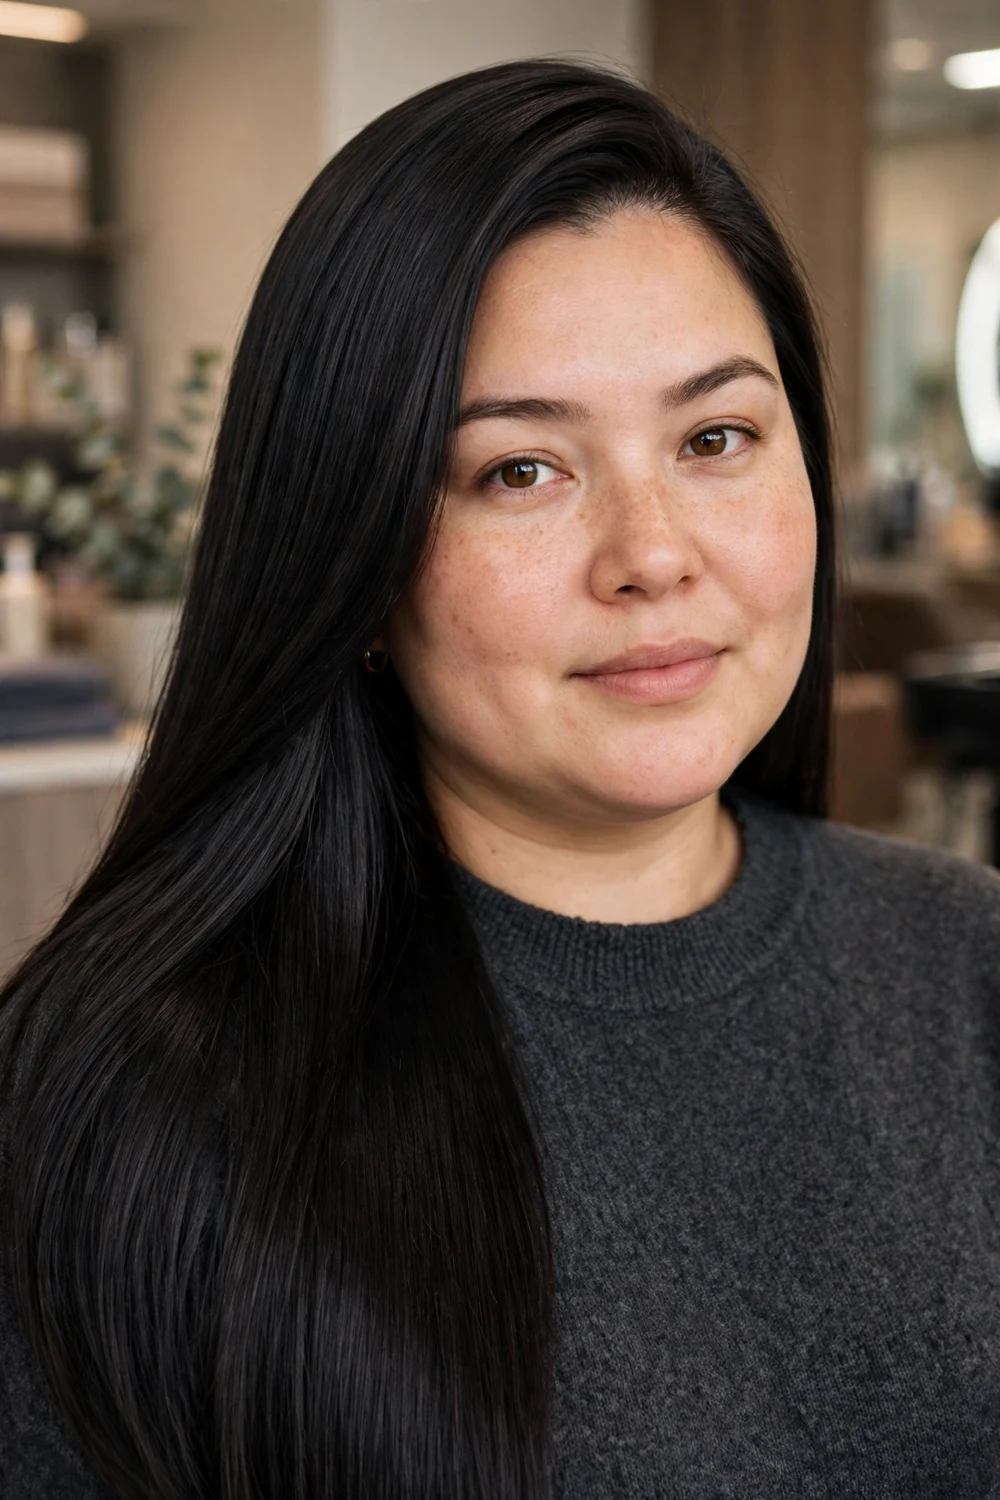
A part placed well off center draws a diagonal line across the top of the head, and diagonal lines break up roundness. The heavier side sweeps down across one cheek while the flat, straight lengths keep both sides slim.
This style suits fine to medium hair that lies flat on its own. On thick or wavy hair it takes more heat work each morning to keep the sides close to the head.
Try this: Flat iron in small sections and put shine spray on the mid-lengths only. Product at the roots makes the crown go flat, and the crown height is what the deep part is working to create.
Difficulty: Easy · Cost: $
3. Long Shag with Soft Curtain Bangs

The shag stacks texture through the crown and upper lengths, then thins out toward the ends. That puts movement up high and keeps the sides lean, which is the placement a round face needs.
Curtain bangs open in the middle and sweep down past the cheekbones, so they frame the face rather than cover it. If you want more versions of this fringe, the guide to long hairstyles with curtain bangs shows how the same bangs work across different cuts.
Try this: Blow-dry the curtain bangs forward first, then sweep each side back with a round brush. Drying them straight out to the sides makes them sit wide at cheek level.
Difficulty: Medium · Cost: $$
4. Waist-Length Waves with Subtle Layers
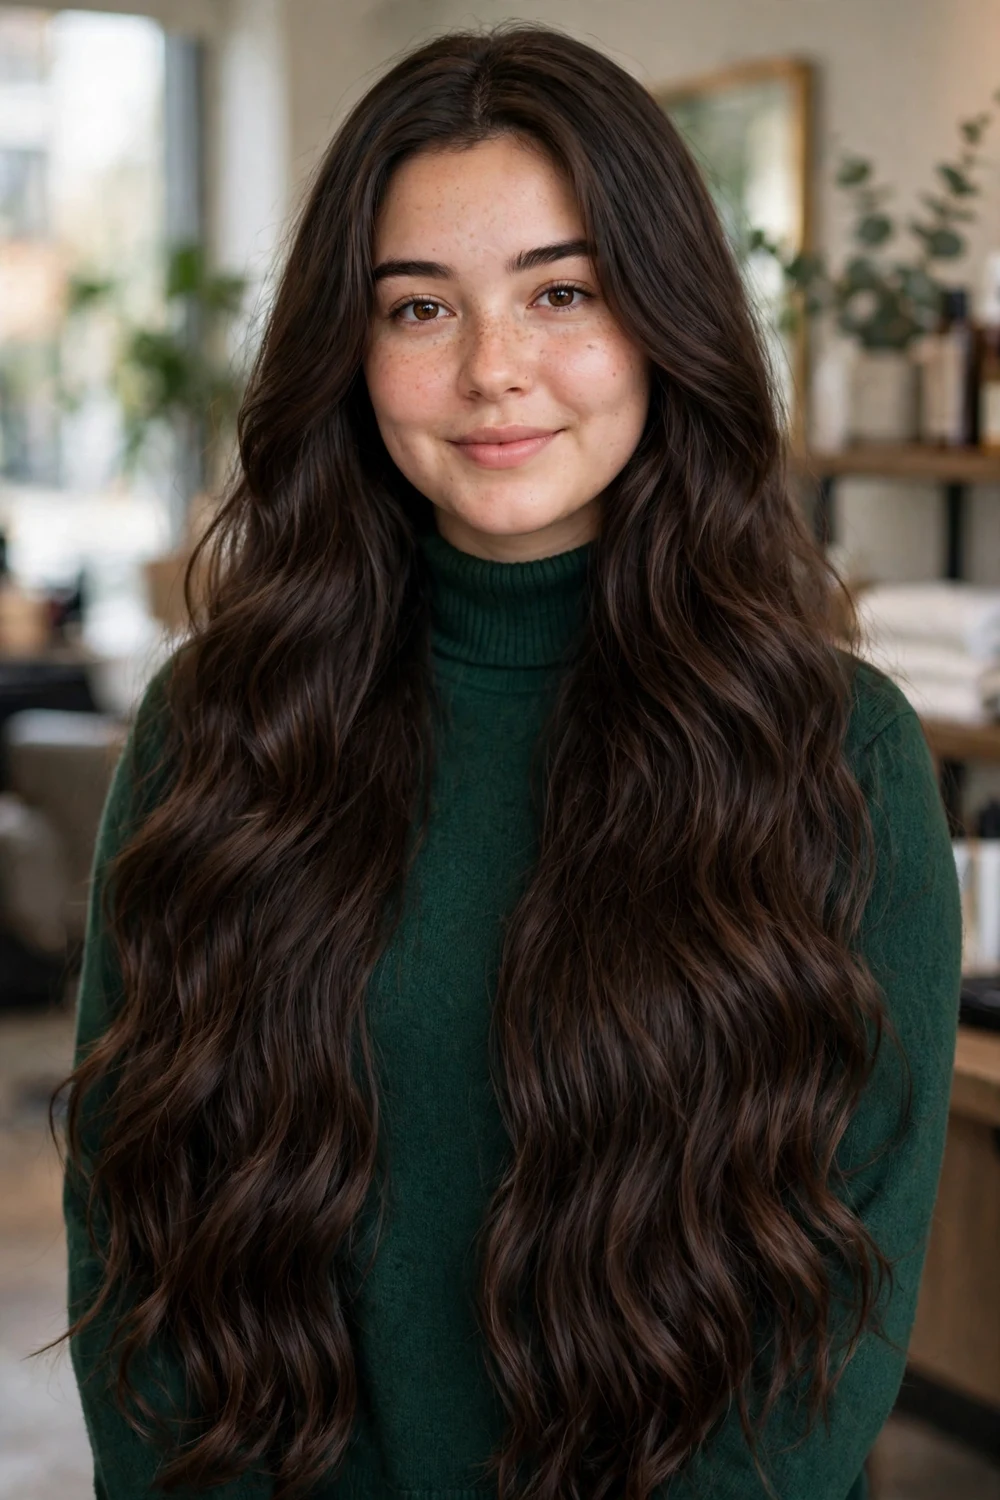
Very long hair gives the strongest vertical line on this list. Waist-length lengths pull the whole outline downward, and subtle layers stop the ends from forming one heavy, wide block.
The trade-off is upkeep. Hair this long tangles at the back, needs more conditioner through the ends, and takes noticeably longer to dry than mid-back hair.
Try this: Start the waves below the chin. Waves that begin at cheek level bounce outward and widen the face, while waves that start lower travel down the body instead of out to the sides.
Difficulty: Medium · Cost: $$
5. Long Straight Hair with Wispy Bangs

Wispy bangs are cut thin, so parts of the forehead stay visible through them. That broken, see-through edge softens the forehead without drawing one hard horizontal line across the face.
Ask for the bangs to be longer at the sides than in the middle, so the edges blend into the front layers instead of ending in a blunt shelf above the brows.
Try this: Book short fringe trims between full cuts. Wispy bangs lose their shape faster than the rest of a long cut, and a heavy, grown-out fringe reads wide on a round face.
Difficulty: Easy · Cost: $$
6. Textured Long Cut with a Side-Swept Fringe
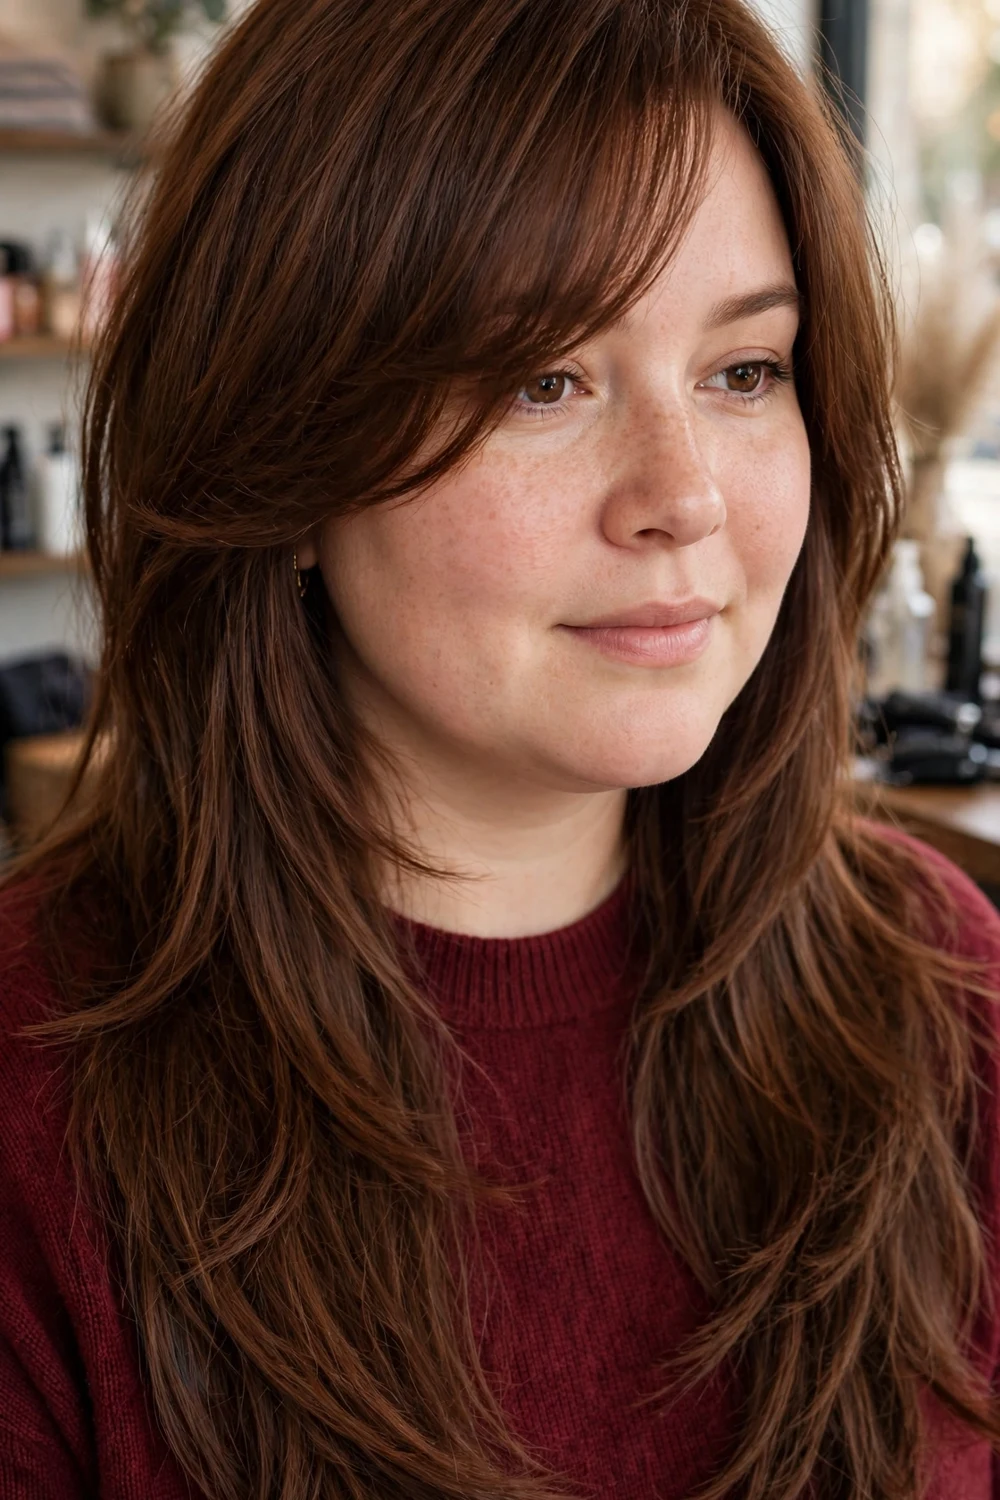
Point-cut, textured ends keep long hair light and piecey instead of blunt and wide at the bottom. The side-swept fringe crosses the forehead at an angle, and that slant cuts across the round outline of the face.
This cut works well on medium to thick hair that holds a sweep. Very fine hair may need a light mousse at the fringe to stop it falling straight down the forehead by midday.
Try this: Dry the fringe with a round brush, pulling it across and down rather than straight forward. A fringe that falls forward and stops above the brows makes the face look shorter.
Difficulty: Medium · Cost: $$
7. Balayage Layers with Loose Curls
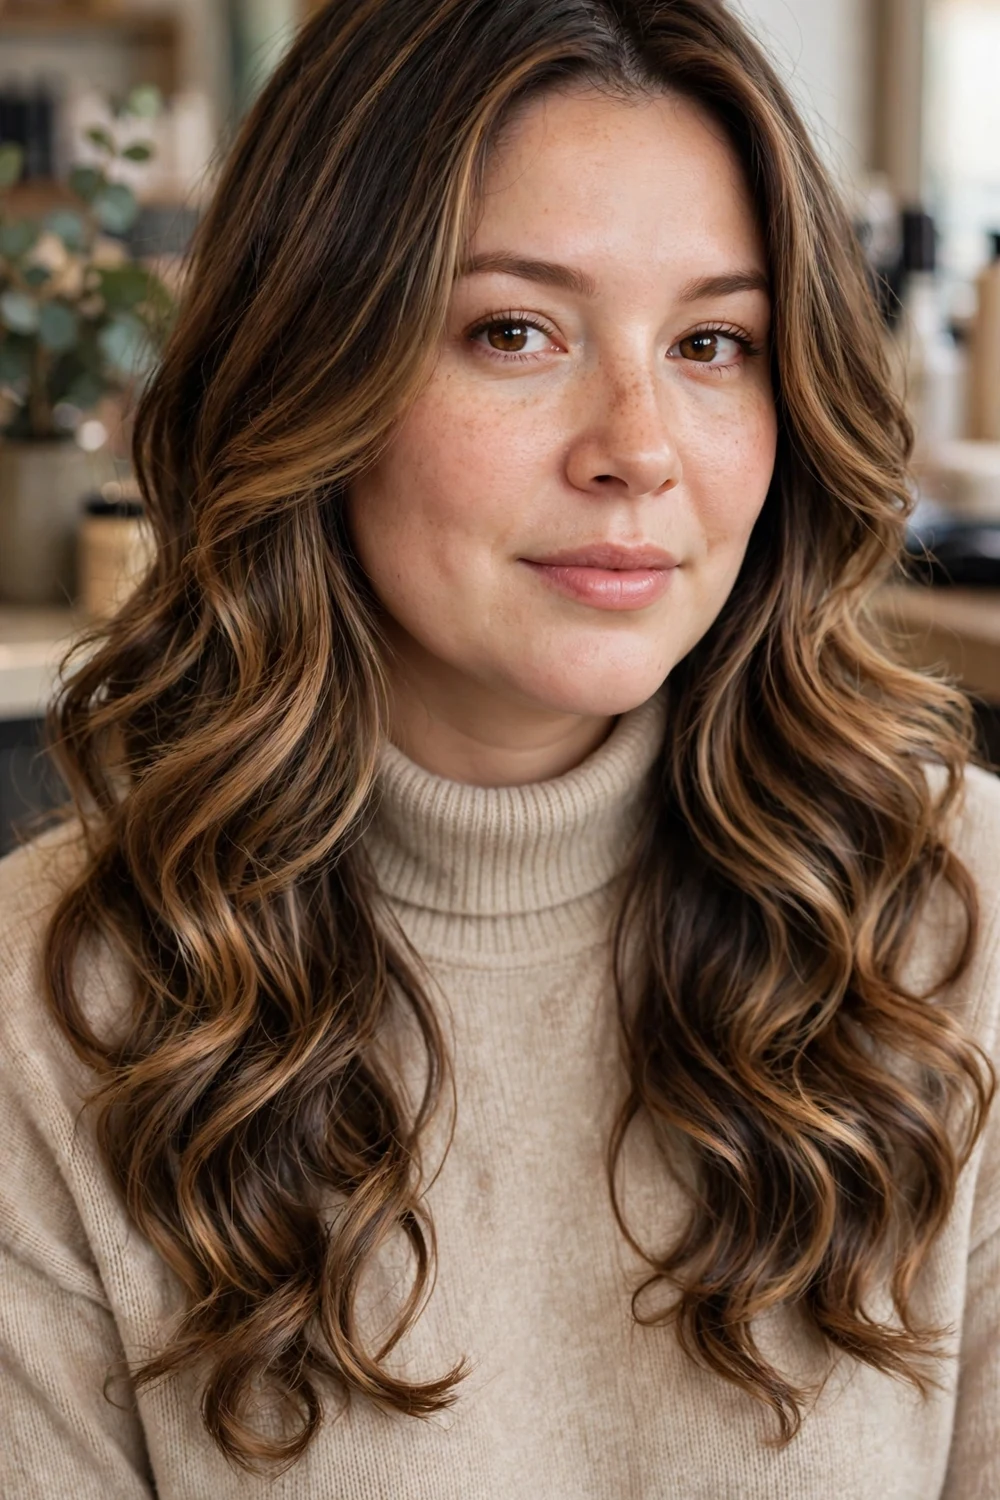
Balayage places lighter pieces along the lengths and around the face, and those vertical streaks of light lead the eye downward. Keep the lightest pieces below the cheekbones for the strongest lengthening effect.
Loose curls brushed out after cooling keep the texture soft and low. The color and the curl placement work together here, one drawing the eye down and the other keeping width away from the cheeks.
Try this: Ask your colorist to keep the root area your natural shade. A darker root above lighter lengths adds to the downward pull, and it grows out without a hard line.
Difficulty: Medium · Cost: $$$
8. Long Layers with Crown Volume
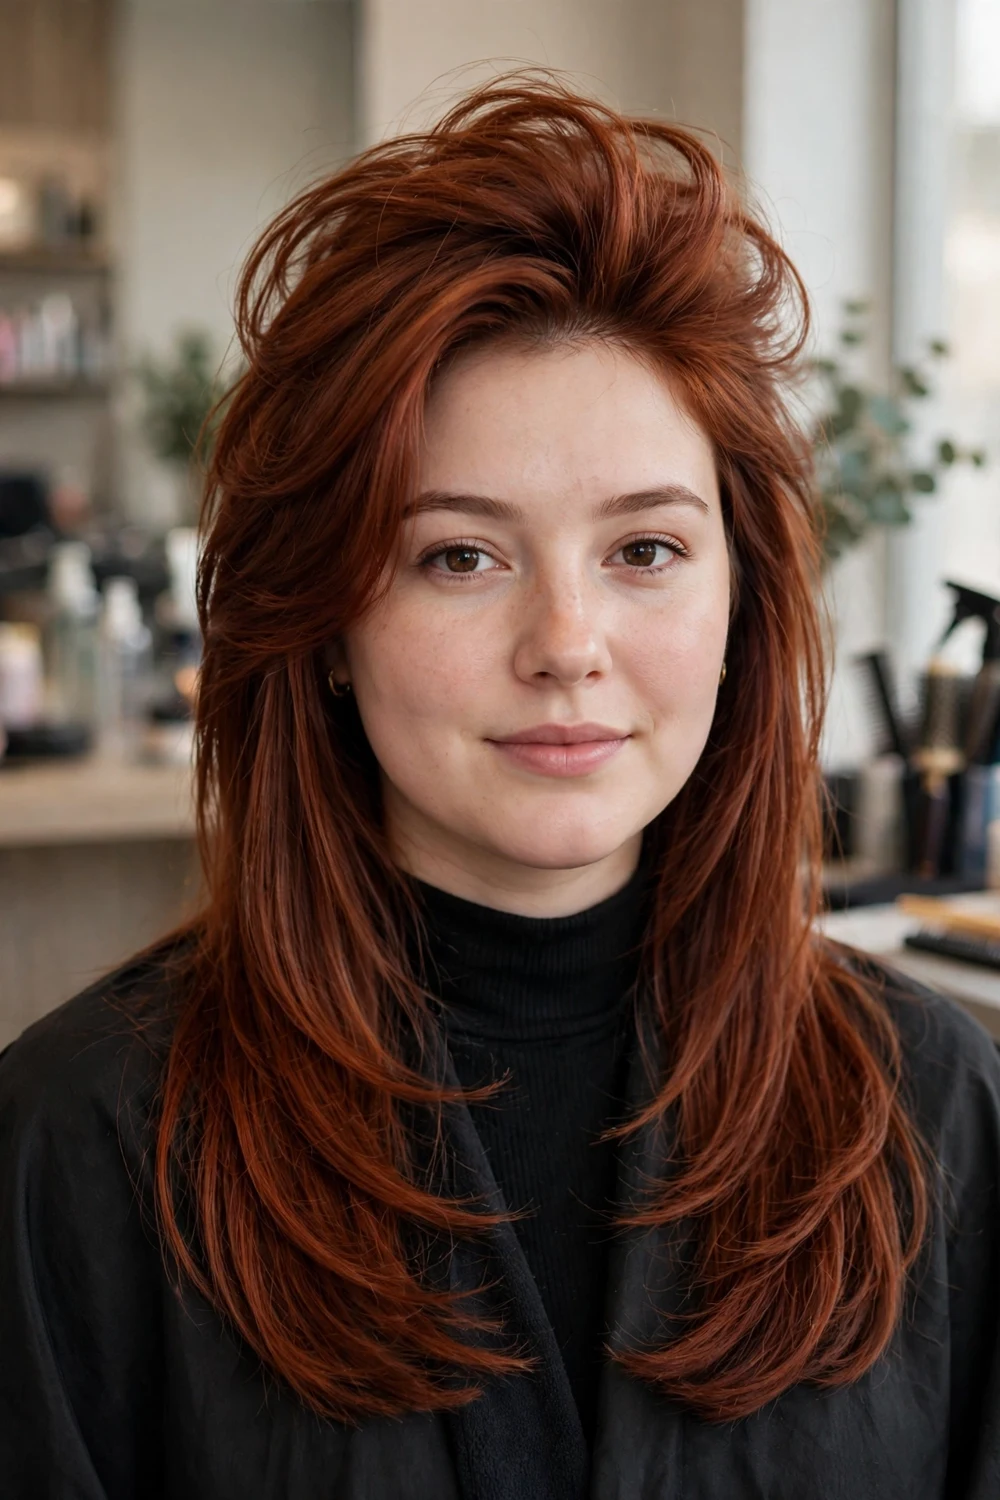
This is the long layered cut many people already have, styled with the lift moved to the top. Blow-dry the crown section upward and back while the sides dry flat against the head.
The contrast does the work: height above, slim sides beside the cheeks. If the sides get as much volume as the crown, the whole head reads wider and the face looks rounder than before.
Try this: Dry the sides with the dryer pointing down, following the hair shaft. It takes an extra minute and it is the step that keeps this style from turning into a wide blowout.
Difficulty: Easy · Cost: $
9. Side-Swept Waves
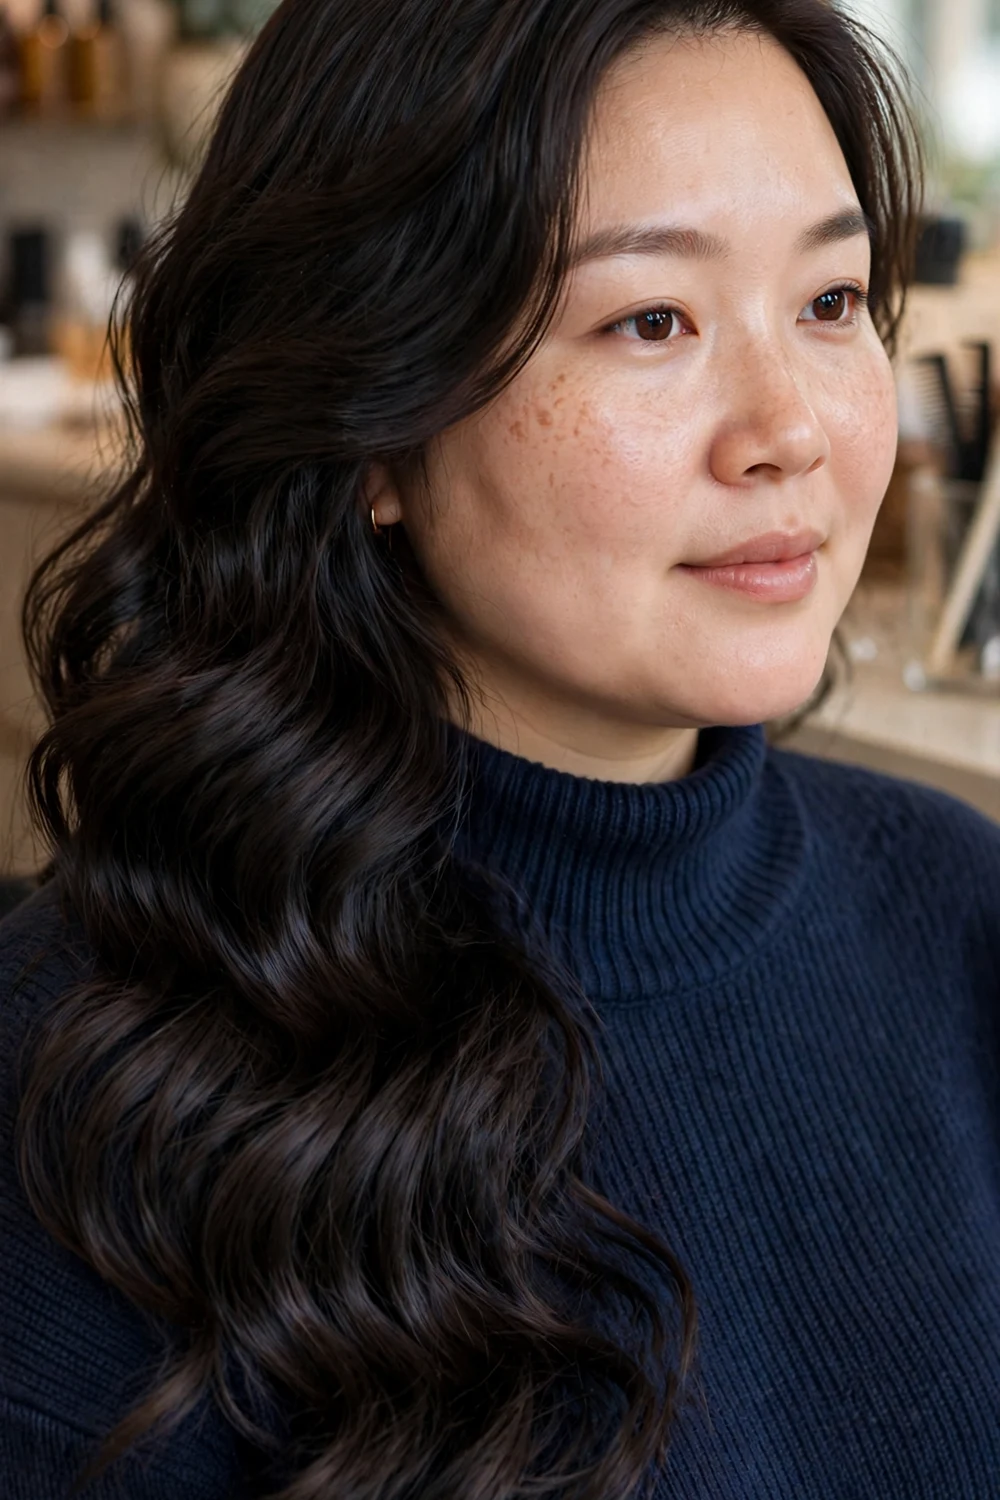
Gathering all the waves over one shoulder clears one side of the face completely and stacks the hair on the other. The uneven outline reads longer and leaner than hair split evenly down both sides.
Because all the weight sits on one side, this style suits hair with some natural hold. Very silky hair slides back to the center within an hour unless it is pinned.
Try this: Set the waves first, then sweep them over and hide two grips low behind the opposite ear, under the hair. The pins hold the sweep in place all day.
Difficulty: Medium · Cost: $
10. Feathered Layers with a Blowout Finish

Feathered layers are cut to flick away from the face at the ends, so the hair frames the cheeks without hugging them. A blowout smooths the top and crown while the feathered ends do the framing.
Feathering removes weight at the ends, which helps thick hair fall closer to the body. On fine hair, ask for light feathering only, since too much leaves the ends looking thin.
Try this: Blow-dry the front sections back and away from the face with a large round brush. Drying them forward lays them flat on the cheeks and adds width.
Difficulty: Medium · Cost: $$
11. Sleek Straight Hair with a Center Part

A center part works on straight long hair because the two flat panels fall like curtains on either side of the face. The panels cover the outer edges of the cheeks, so the visible part of the face looks narrower.
This style needs the hair to sit close to the head at the sides. Puff or frizz at cheek level undoes the effect, which is why it suits straight and relaxed textures best.
Try this: Smooth the sides with a brush and dryer rather than adding any root lift there. Save root lift for the crown, where it adds length instead of width.
Difficulty: Easy · Cost: $
12. Beachy Waves with Sunlit Highlights

Loose, undone waves through the mid-lengths and ends give movement without a set curl pattern. Lighter pieces woven through the lengths catch the light as the hair moves and draw attention down the body of the hair.
The top third of the hair stays smooth in this style. That flat top section is what separates it from a full wavy style, which puts texture beside the cheeks.
Try this: Braid damp hair overnight for waves without heat. Unbraid gently and separate with your fingers, not a brush.
Difficulty: Medium · Cost: $$
13. Long Hair with Angled, Front-Longer Ends

Here the hemline is cut on a slant, shorter at the back and longer at the front. The two long front points reach down past the collarbone and frame the face with the longest front pieces of any cut on this list.
The angle has to stay gentle. A steep angle takes too much length off the back and the cut starts to read as a shorter style with two long strands attached.
Try this: Ask to see the slant checked with the hair dry and worn how you normally part it. An angle cut on wet hair with a center part can sit unevenly once you move the part.
Difficulty: Medium · Cost: $$
14. Soft Curls Starting Below the Cheeks

Curl placement is the whole trick here. The hair stays smooth from the part down to the cheekbones, then opens into soft curls that swing below the jaw, so the fullness sits low.
For curl pattern options at this length, see the long curly haircuts with layers for women guide. Layering matters for natural curl, since one-length curly hair tends to widen at the bottom.
Try this: Curl in vertical sections, away from the face, and leave the top section uncurled. Vertical sections fall down the body; horizontal sections stack out to the sides.
Difficulty: Medium · Cost: $$
| Style type | Where the volume sits | Best for | Upkeep |
|---|---|---|---|
| Long layers and V-cut | Below the jaw, at the ends | Straight to wavy hair | Low |
| Sleek straight, side or center part | None at the sides, flat panels | Fine to medium hair | Medium |
| Shag and butterfly layers | Crown and upper lengths | Medium to thick hair | Medium |
| Waves and curls below the cheeks | Mid-lengths and ends | Wavy and curly hair | Medium |
| High ponytail, top knot, braided crown | On top of the head | Any texture with enough length | Low |
| Balayage and ombre color | Light placed on the lower lengths | Any cut on this list | High |
15. Long Hair with a Loose Side Braid

A side braid pulls all the length to one side and fixes it there, which gives the same lean, uneven outline as side-swept waves but holds all day. Keep the braid loose so it looks soft rather than tight.
Start the braid low, below the ear. A braid that starts high and tight pulls the sides completely flat against the head, which can look harsh next to a round face.
Try this: Leave two thin strands free at the front to soften the hairline, and pull a few loops of the braid out gently after you finish it to widen the braid itself rather than the hair beside your face.
Difficulty: Easy · Cost: $
16. Ombre Long Hair Fading Toward the Ends
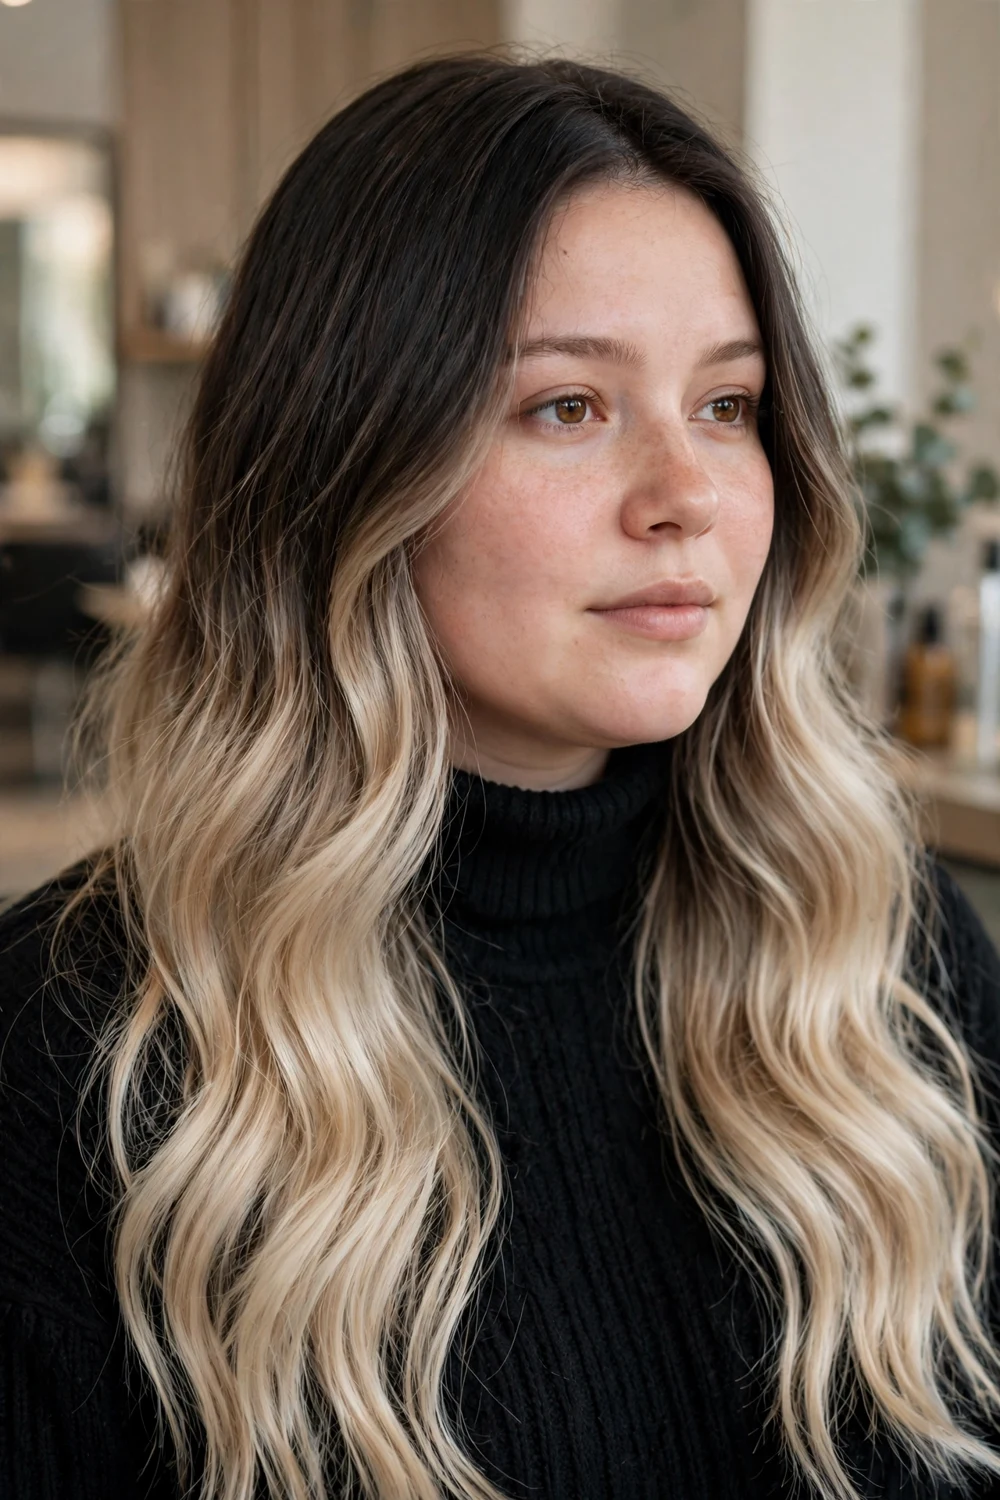
Ombre moves the lightest color to the ends of the hair, far below the face. Eyes follow the light, so attention lands on the lengths and the lower body rather than on the width of the cheeks.
Because the color sits on the oldest part of the hair, the ends need the most care. Lightened ends that are dry and split make very long hair look thin at the bottom.
Try this: Ask for the color change to start around the jaw or lower. Ombre that starts high, near the cheekbones, puts a light horizontal band at the widest point of the face.
Difficulty: Hard · Cost: $$$
17. High Ponytail with Crown Volume

A high ponytail lifts the whole outline up and back. The hair leaves the sides of the face entirely, the crown gains height, and the long tail keeps the vertical line going down the back.
More ways to wear this length up are in the trendy ponytail hairstyles for long hair roundup. Placement is what separates the flattering version from the flat one: the base needs to sit above the crown, not at the back of the head.
Try this: Backcomb a small section at the crown before you gather the hair, and let the front sit smooth rather than pulled tight. A scraped-back front shortens the look of the face.
Difficulty: Easy · Cost: $
18. Half-Up Style with Height at the Crown

The top section is lifted and pinned above the crown while the rest of the hair stays down. You get crown height and a clear forehead, plus the long lengths still frame the jaw from below.
Keep the pinned section small and high. A half-up style pinned low at the back of the head adds width behind the ears and loses the lifting effect entirely.
Try this: Twist the top section once before pinning it. The twist holds the height better than a flat section held with grips, and it stops the pinned hair sliding down during the day.
Difficulty: Easy · Cost: $
19. Braided Crown with the Lengths Left Down

A braid worked along the hairline or across the crown sits on top of the head, where it adds height and detail above the face. The unbraided lengths hang straight down and keep the sides slim.
This is the most time-consuming style on the list to do on yourself, and it is easier with a second mirror so you can see where the braid is drifting at the back.
Try this: Braid along one side and over the top for a diagonal line. A braid that circles the head in a flat horizontal band adds a wide line at the level of the forehead.
Difficulty: Hard · Cost: $$
20. Long Hair with Deep Waves
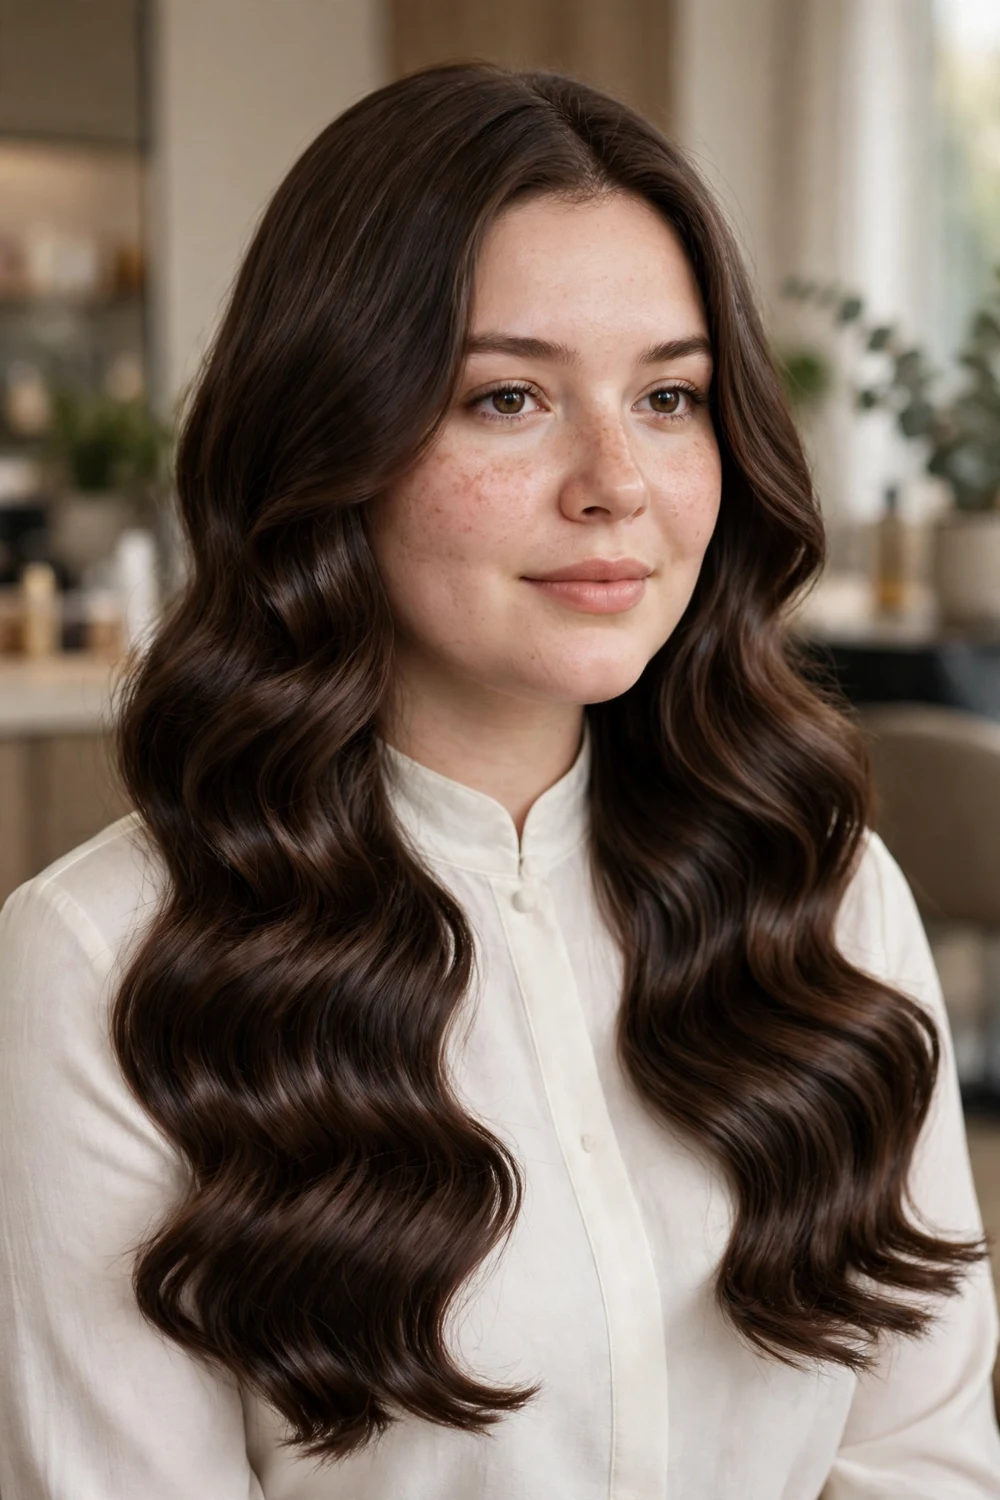
Deep waves are wide, smooth S shapes rather than curls. They reflect light in bands down the hair, and the repeated downward pattern suits a round face because the movement runs vertically.
Deep waves hold best on hair with some natural wave or texture. On very straight, fine hair they tend to drop out within a few hours without a setting product.
Try this: Use a wide waver or large rollers and brush through once the hair has cooled. Keep the first wave low, starting around the jaw, so no wave bulges out at cheek height.
Difficulty: Medium · Cost: $$
21. Voluminous Curls with a Side Part
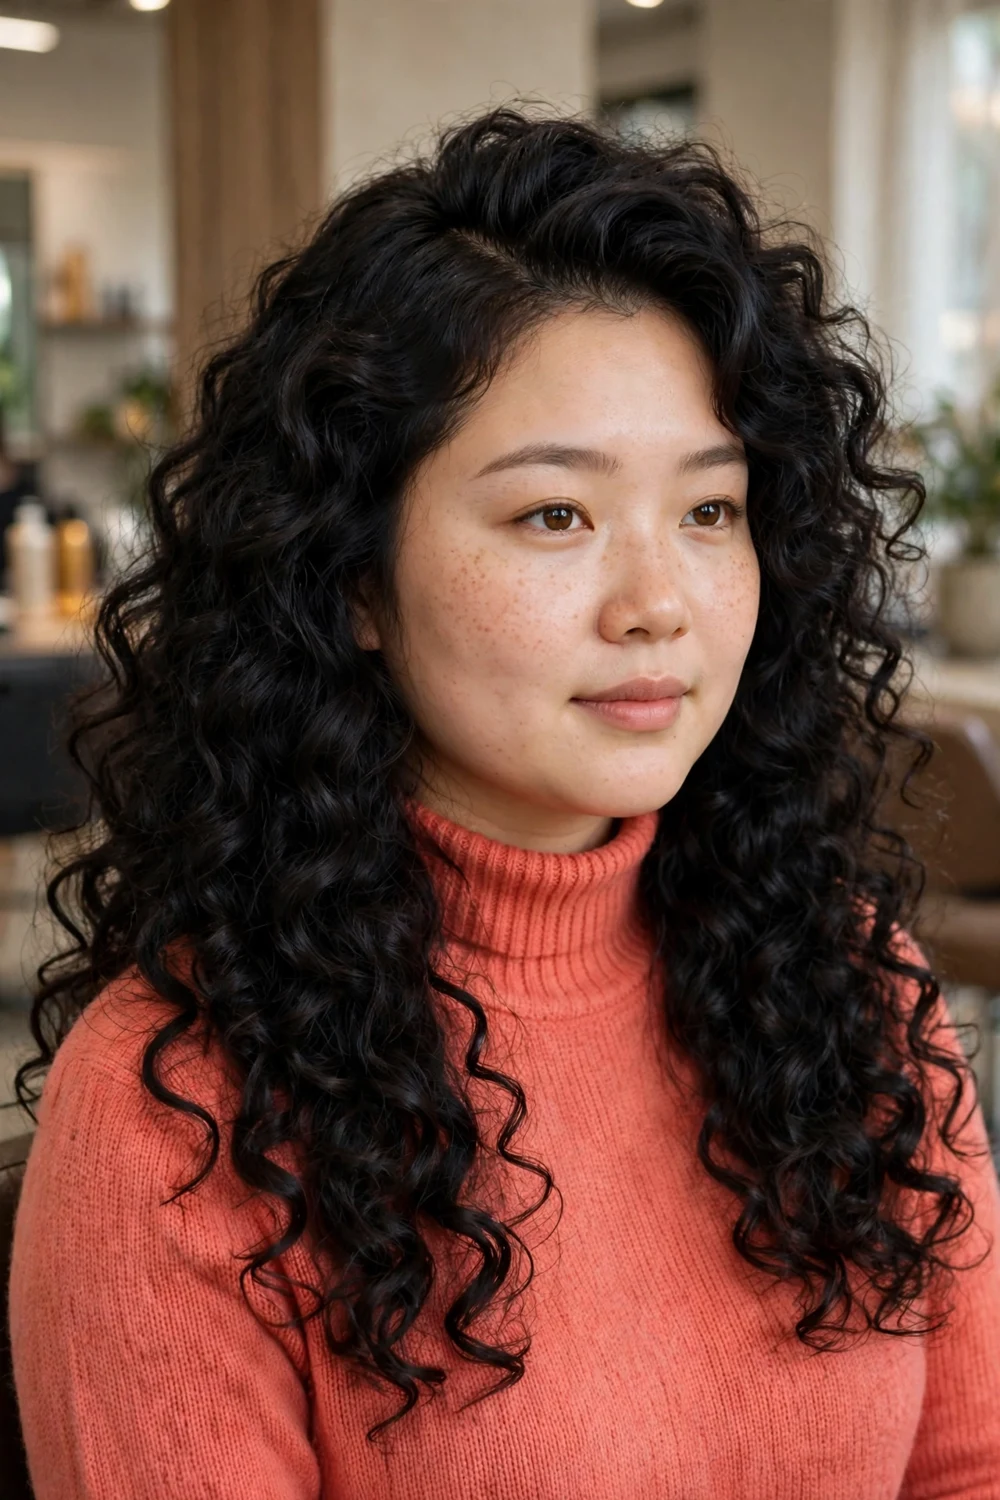
Big curls can work on a round face when the part and the placement are right. A side part stacks more hair and more height on one side at the crown, while the curls themselves sit mostly below the shoulders.
This is the one idea here where the front view matters most. From the side, full curls look balanced on almost anyone; from the front, the width shows at cheek level first.
Try this: Set or diffuse the curls, then shake them out at the roots on top only. Do not fluff the sides out at cheek level, since that is where extra width shows most.
Difficulty: Medium · Cost: $$
22. Messy Bun with Loose Face-Framing Tendrils
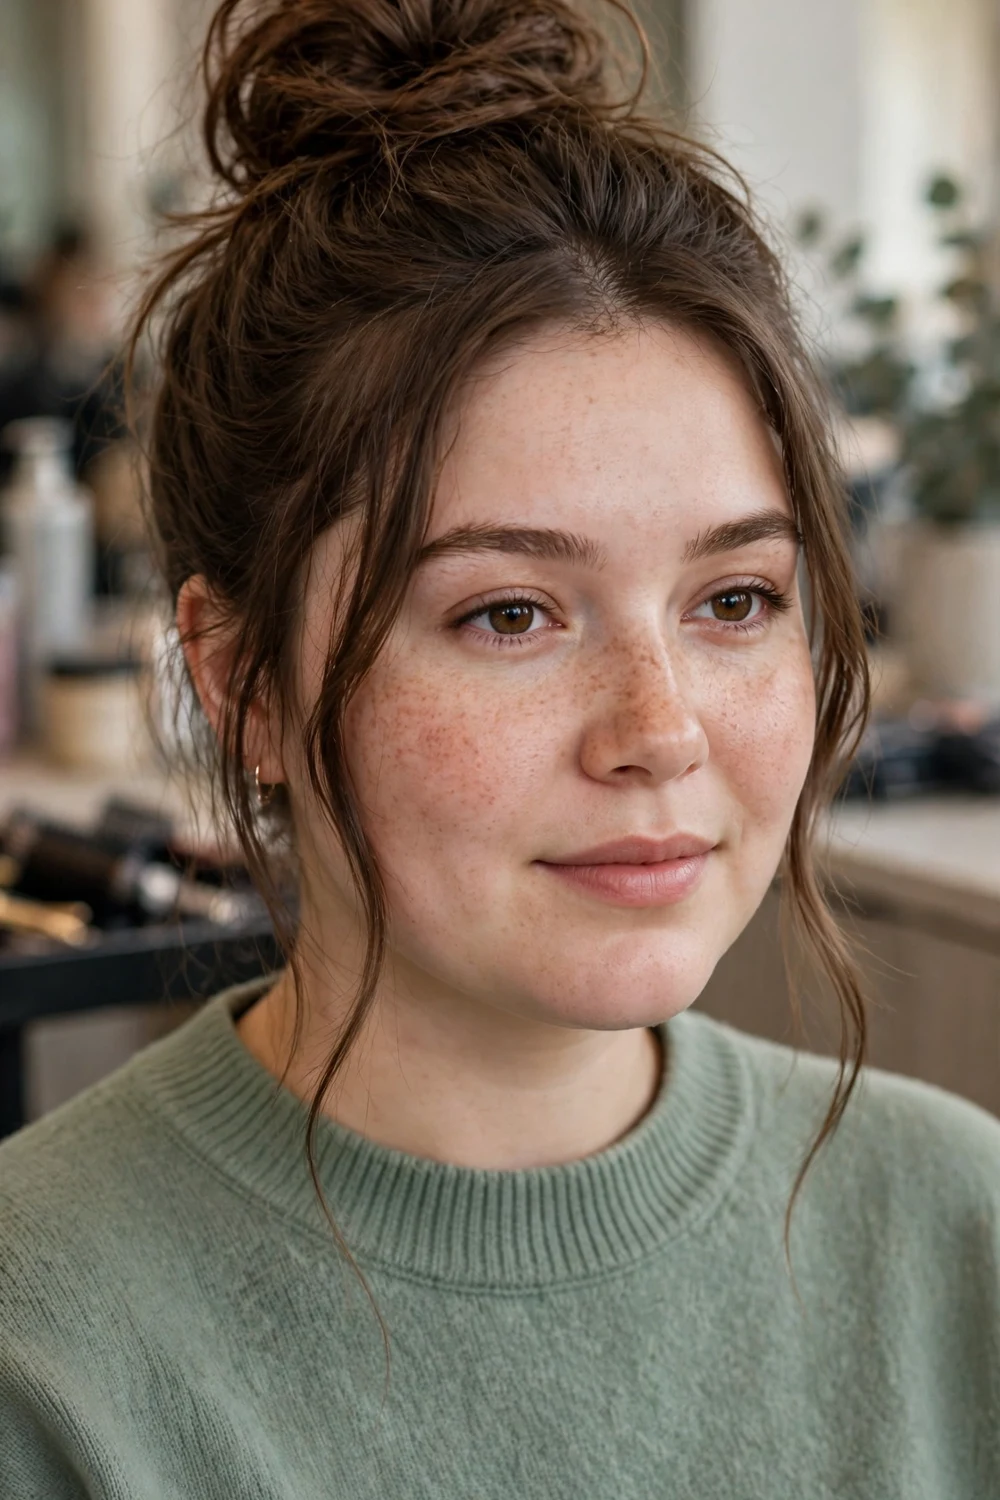
A bun piled high on the crown adds the most height of any style here, and it clears the hair off the cheeks and jaw completely. Two loose tendrils left down at the front stop the style looking severe.
Because nothing hangs beside the face, this style puts your features fully on show. It suits days when you want the hair completely out of the way, at work or in warm weather.
Try this: Pull the tendrils out after the bun is fixed and let them end below the chin. Short tendrils that stop at the cheekbones point straight at the widest part of the face.
Difficulty: Easy · Cost: $
23. Long Butterfly Cut Layers

The butterfly cut splits the hair into two tiers: shorter layers that frame the face from the chin down, and much longer layers through the back. The short tier gives bounce and shape up front without giving up length.
Styled with the short tier blown out and away from the face, the cut adds movement at the front while the long back tier keeps the overall outline long and narrow.
Try this: Ask for the short tier to start at the chin, not the cheekbones. A butterfly cut that starts at the cheeks frames the widest point of the face and works against you.
Difficulty: Medium · Cost: $$
24. V-Cut Layers at the Back

In a V-cut, the back is shaped into a point at the center and the front pieces are the longest. From the front, those long pieces run down both sides of the face and give a clear downward line.
The V also removes weight from the back corners, so the hair falls closer to the body instead of spreading out sideways behind the shoulders.
Try this: Ask for a soft V rather than a sharp point if your ends are fine. A sharp V on fine hair leaves the very ends looking sparse, and the point is the part people see from behind.
Difficulty: Medium · Cost: $$
25. Long Hair with a Waterfall Braid

A waterfall braid runs across the upper back of the head and lets strands fall through it in steps. The detail sits behind and above the face, while the falling strands add vertical lines through the lengths.
Keep the braid placed high at the back, around crown level. Worn low, it pulls the eye to the back of the head and the front of the hair is left plain and flat.
Try this: Braid on slightly textured, day-old hair rather than freshly washed hair. Clean, silky strands slip out of a waterfall braid quickly because each dropped strand has to hold its own place.
Difficulty: Hard · Cost: $$
26. Half-Up Top Knot with the Length Left Down

Only the very top section goes into a small knot, placed right on the crown. The knot adds height at the highest point of the head, and every other strand stays down to frame the face and jaw.
Compared with the half-up pinned style earlier in this list, the knot reads more casual and takes under a minute once you know the section size that suits you.
Try this: Take the section from above the temples only. Taking hair from the sides into the knot leaves the sides bare and can make the cheeks look more exposed and wider.
Difficulty: Easy · Cost: $
27. Slicked-Back Long Hair with Slim Sides
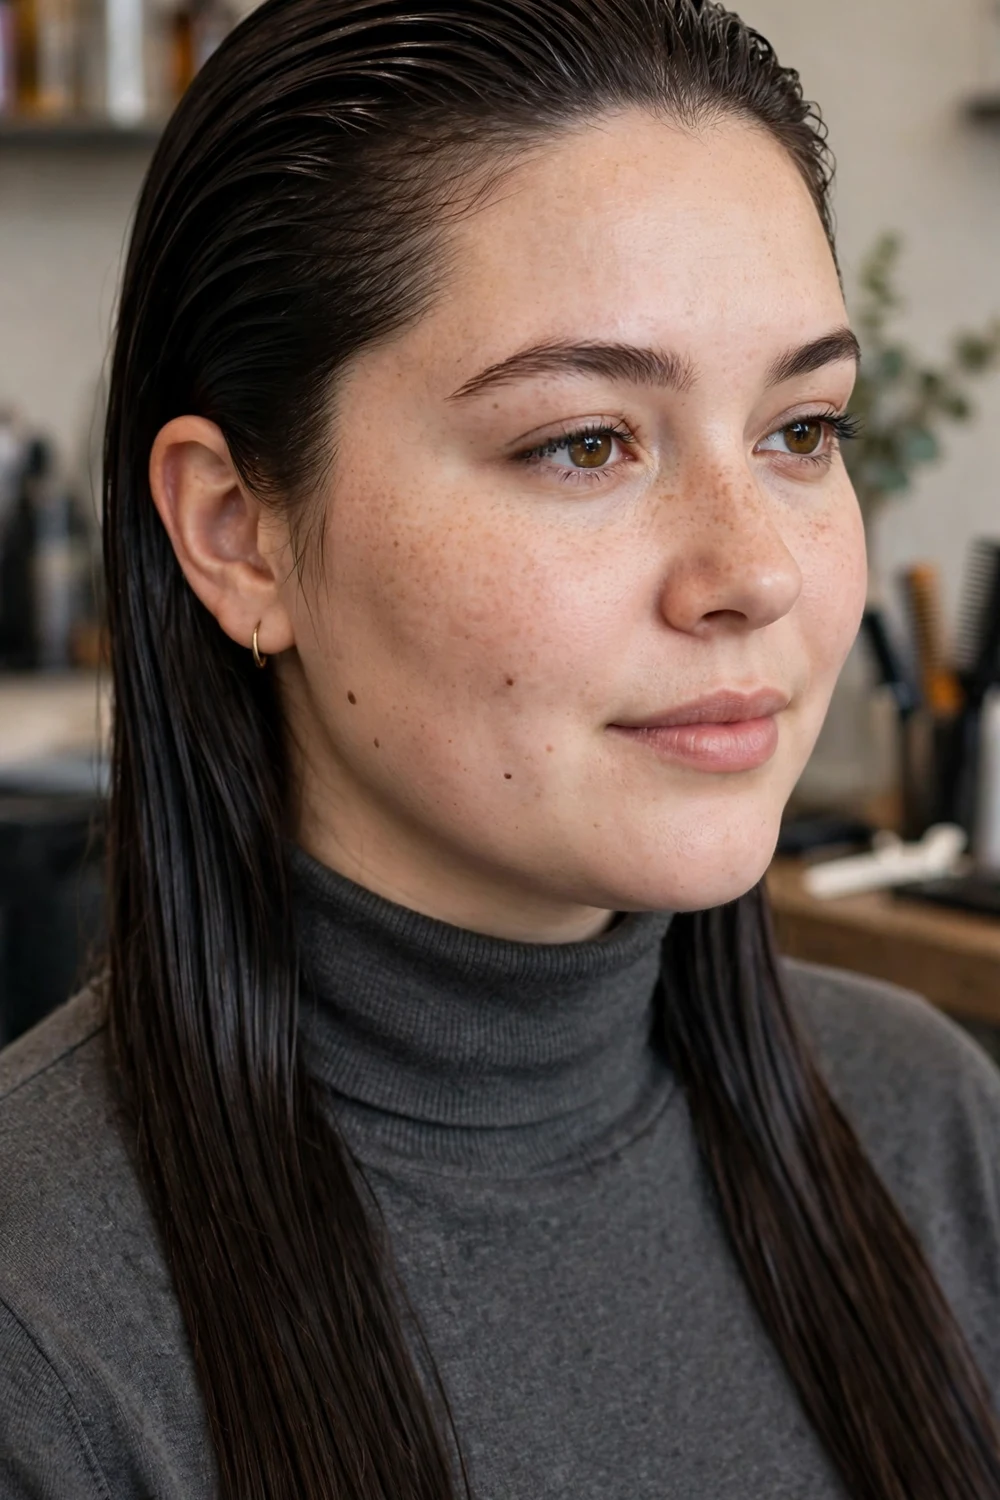
Brushing all the hair back off the forehead removes every horizontal line at the front. The face is fully open, the crown line runs up and back, and the lengths hang flat and close behind the shoulders.
This style shows the hairline and forehead completely, so it suits people who like their hair fully off their face. It also works as a base under a hat or headband in winter.
Try this: Work a small amount of gel or smoothing cream through damp hair and brush it back in sections. Keep the sides tucked flat behind the ears so nothing sticks out at cheek level.
Difficulty: Easy · Cost: $
Frequently Asked Questions
Can a round face wear long hair?
Yes. Long hair suits a round face when the length falls past the chin and the volume sits at the crown or below the jaw. Styles that stop at the cheeks or puff out at cheek level are the ones that make a round face look wider.
What is the best long length for a round face?
Hair that ends between the collarbone and mid-back works for most people. It is long enough to draw a clear vertical line, and it is easier to layer and style than waist-length hair.
Should round faces avoid a center part with long hair?
No. A center part works when the hair is straight or in low waves and the sides sit close to the head. It is less helpful with big curls or heavy volume at the sides, where a side part usually works better.
Which bangs suit long hair on a round face?
Curtain bangs, a long side-swept fringe, and thin wispy bangs all suit a round face because they cross the forehead at an angle or in an open shape. A short, heavy, straight-across fringe is the hardest to wear because it draws a horizontal line across the face.
Where should layers start on long hair for a round face?
Ask for the shortest layer to start at or below the chin. Layers that start at the cheekbones add movement and width at the widest point of the face, while chin-down layers pull the eye downward.
How do I stop long hair from making my face look wider?
Keep the sides smooth and close to the head, put any lift at the crown, and start waves and curls below the jaw. Check the mirror from the front: if the widest point of your hair sits at your cheeks, move the texture lower.
Final Thoughts
Long hair and a round face work together when you control two things: the length has to clear the chin, and the volume has to sit at the crown or below the jaw instead of beside the cheeks. Every idea in this list follows that rule, from the layered cuts to the high ponytail and the top knot.
If you are booking a cut, start with idea 1 or idea 23 and bring the layer starting point with you in plain words: shortest layer at or below the chin. If you are styling hair you already have, the fastest changes cost nothing: move your part to the side, dry the sides flat, and start your waves lower. For seasonal cuts in shorter lengths, the fall hair cuts for round faces roundup covers the autumn options.

